Making Your Home Welcome Everyone Who Walks Through the Door
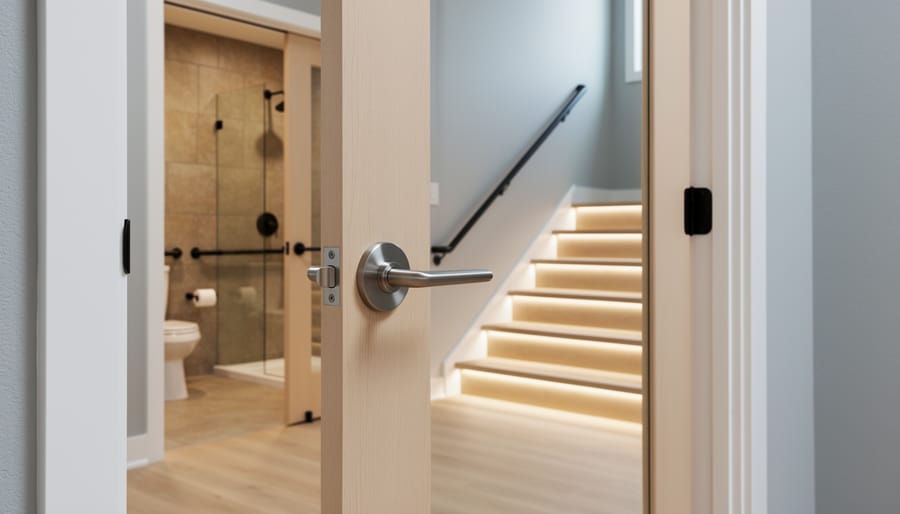
Install grab bars in bathrooms at 33-36 inches high, positioning them beside toilets and inside shower stalls where weight transfer happens most. Choose modern designs in brushed nickel or matte black that complement your existing fixtures rather than institutional chrome—accessibility features should enhance your home’s aesthetic, not compromise it.
Widen doorways to a minimum 32-inch clear opening by replacing standard hinges with offset hinges, a simple DIY modification that costs under $50 per door and accommodates wheelchairs, walkers, and anyone moving furniture. For permanent solutions, consider removing non-structural door frames and installing pocket doors that disappear into walls.
Create visual contrast on stairs by adding LED strip lighting along each tread edge and painting handrails in colors that stand out from walls—this benefits everyone from aging parents to guests unfamiliar with your home’s layout. Extend handrails 12 inches beyond the top and bottom steps for safer transitions.
Replace round doorknobs with lever-style handles that operate with a simple downward press, eliminating the twisting motion that challenges people with arthritis, carrying groceries, or holding children. This universal design principle makes daily tasks easier for all household members while future-proofing your space.
Accessibility isn’t about clinical modifications—it’s about thoughtful design that welcomes everyone into your home comfortably and safely. The solutions that support someone using a wheelchair today might prevent your own fall tomorrow, making these improvements valuable investments regardless of current mobility needs.
Why Accessibility Matters in Your Home (Even If You Think It Doesn’t)
Here’s a reality check: accessible design isn’t just for people with permanent disabilities. It’s for everyone, including you and your family members at various stages of life.
Think about it. Have you ever broken a leg and struggled with stairs? Carried heavy groceries while trying to open doors? Watched an aging parent navigate your home with increasing difficulty? These everyday scenarios highlight why accessibility matters to all of us, regardless of current ability.
The universal design approach creates spaces that work for the widest range of people possible. When you install lever-style door handles instead of knobs, you’re not just helping someone with arthritis—you’re making life easier when your hands are full. That curbless shower you’re considering? It prevents tripping hazards for toddlers, accommodates temporary injuries, and means you won’t need costly renovations as you age.
Here’s the financial upside: accessible features increase your home’s marketability. As Baby Boomers age and multigenerational living becomes more common, buyers actively seek homes with features like wider doorways, single-level living spaces, and well-lit hallways. You’re future-proofing your investment.
Plus, accessible homes are simply more welcoming. When visitors with mobility challenges, visual impairments, or other needs can comfortably navigate your space, you’re being a better host. Nobody should feel excluded from gathering places because of poor design choices.
The misconception that accessibility means institutional-looking modifications is outdated. Today’s accessible design seamlessly blends function with style. Those grab bars? They come in brushed nickel and oil-rubbed bronze. Wheelchair-accessible counters? They look like intentional design choices, not medical equipment.
Bottom line: accessibility is good design, period.
Understanding Wayfinding: How People Actually Navigate Your Space
Think of wayfinding as the invisible map your brain creates when moving through your home. It’s that intuitive sense of knowing where you are and where you need to go next—something most of us take for granted until it becomes challenging. For people with cognitive disabilities, vision impairments, or conditions like dementia, effective wayfinding can mean the difference between independence and constant assistance.
The good news? Creating clear navigation paths helps everyone in your household, from kids to elderly parents to overnight guests who stumble to the bathroom at 2 AM.
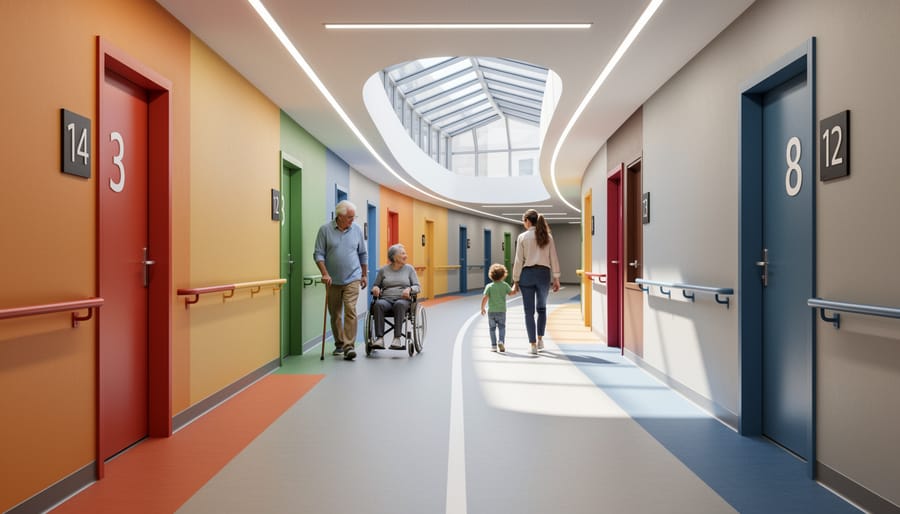
Start with visual landmarks and consistent cues. Your brain naturally anchors itself to recognizable features, so consider using distinct colors for different zones in your home. A warm terracotta accent wall might signal the kitchen area, while cool blues indicate the bedroom wing. This color-coding doesn’t need to be dramatic—subtle shifts work beautifully while maintaining your design aesthetic.
Lighting plays a crucial role in wayfinding. Install motion-sensor night lights along hallways and near staircases to automatically illuminate paths without requiring anyone to fumble for switches. Layer your lighting so each room has multiple light sources at different heights, eliminating confusing shadows and creating clear visual depth.
Contrast is your secret weapon. High-contrast edges help define where one space ends and another begins. Think dark door frames against light walls, or contrasting tape on the edges of steps. These simple modifications reduce accidents and help people with low vision navigate confidently.
Incorporating tactile surface elements adds another navigation layer—textured flooring near transitions or raised numbers on doors provide physical cues that complement visual ones.
Keep pathways clutter-free and maintain consistent furniture placement. Predictability reduces cognitive load and builds spatial confidence. Consider adding clear glass markers or decals at eye level to prevent walk-through accidents, and ensure door handles stand out visually from surrounding walls.
Essential Accessibility Elements That Don’t Sacrifice Style
Entrance and Doorway Solutions
The entryway sets the tone for accessibility throughout your entire home, and making it welcoming for everyone starts right at the door. Whether you’re planning modifications for yourself, a family member, or simply want to age in place gracefully, these entrance solutions combine practicality with style.
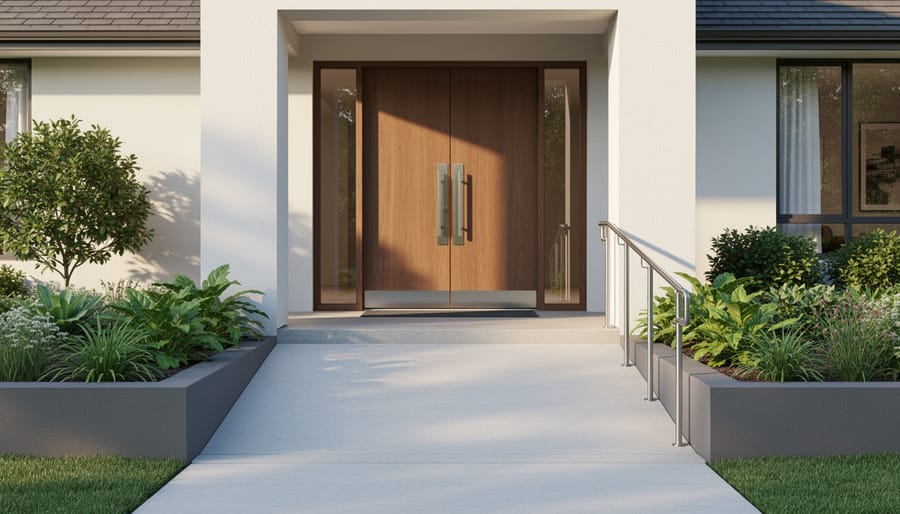
Start with ramps as an alternative to steps. Permanent ramps should have a gentle slope—typically one inch of rise for every twelve inches of length. Modular ramp systems offer flexibility for DIYers, while aluminum options provide durability with minimal maintenance. For smaller height differences, consider threshold ramps that create smooth transitions without major construction.
Door width makes a significant difference. Standard 32-inch doorways can feel cramped for wheelchair users, but widening to 36 inches accommodates most mobility devices comfortably. If you’re renovating, this is the perfect time to upgrade. Offset hinges provide a budget-friendly alternative, adding a couple extra inches of clearance without replacing the entire door frame.
Swap traditional doorknobs for lever-style handles that require minimal hand strength and can be operated with an elbow or forearm when your hands are full. This simple change benefits everyone, from arthritis sufferers to parents juggling groceries and kids.
Looking ahead, smart home technology offers automated door openers activated by motion sensors, smartphone apps, or voice commands. These systems eliminate physical barriers entirely while adding a modern touch that enhances your home’s overall functionality and appeal.
Lighting and Visual Contrast for Wayfinding
Proper lighting and visual contrast transform a home from challenging to navigable for people with low vision. Think of your lighting as a guiding system that naturally leads people through spaces while highlighting potential hazards.
Start with strategic lighting solutions that eliminate shadows and dark corners. Install motion-activated lights in hallways, stairwells, and entryways so illumination automatically adjusts as someone moves through the space. Position lights at different heights—overhead fixtures for general brightness, wall sconces at eye level, and toe-kick lighting along baseboards to define pathways.
Color contrast is your secret weapon for wayfinding. Paint doorframes, handrails, and stair edges in colors that stand out sharply from surrounding surfaces. A dark door frame against light walls, or light-colored handrails on darker walls, creates instant visual definition. For stairs, apply contrasting tape or paint to the edge of each step, making elevation changes obvious at a glance.
Combine these visual cues with tactile indicators for comprehensive guidance. Install textured flooring strips before staircases or level changes. Use different flooring materials to signal transitions between rooms—the shift from tile to carpet naturally alerts someone they’re entering a new space.
Consider adjustable lighting systems that accommodate different vision needs throughout the day. Dimmer switches and smart bulbs let users customize brightness levels, while under-cabinet lighting in kitchens and task lighting in workspaces prevent eyestrain during detailed activities.
Bathroom and Kitchen Adaptations
Bathrooms and kitchens present unique accessibility challenges, but modern solutions make these essential spaces both functional and beautiful. The key is selecting features that work for everyone while maintaining your home’s design aesthetic.
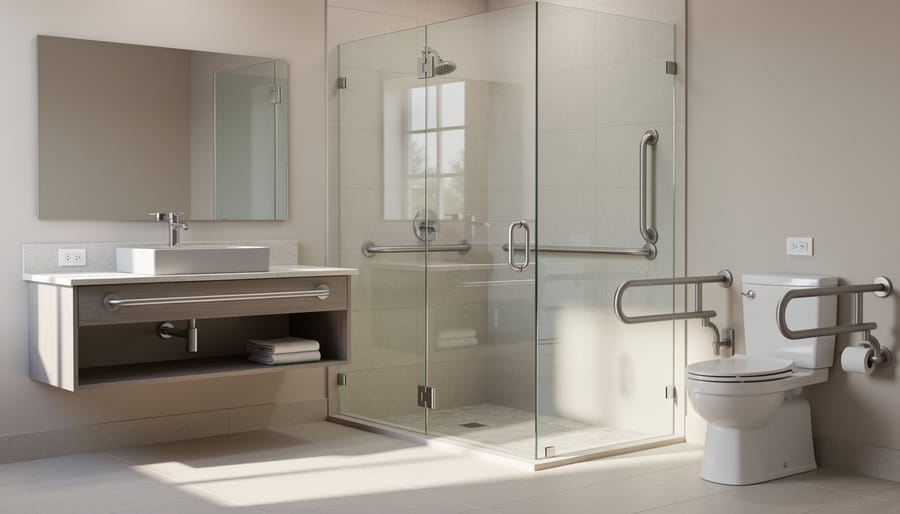
In the bathroom, walk-in showers with curbless entries eliminate tripping hazards and accommodate wheelchairs effortlessly. Add strategically placed grab bars near the toilet and shower—today’s options come in brushed nickel, matte black, and other finishes that blend seamlessly with your fixtures. For a simple DIY project, install grab bars by locating wall studs and using appropriate anchors rated for at least 250 pounds.
Roll-under sinks create wheelchair access while providing a sleek, floating vanity look. Mount the sink at 34 inches high and ensure at least 27 inches of clearance underneath. Insulate exposed pipes to prevent burns.
Kitchen adaptations center on flexibility and reach. Adjustable-height countertops use motorized or manual mechanisms to accommodate different users, though fixed counters at 32-34 inches work well for seated tasks. Consider installing at least one section of lower counter for food prep. Pull-down shelving systems and lazy susans maximize cabinet accessibility without major renovations—a weekend DIY project most homeowners can tackle.
Smart appliances with voice control or app integration add convenience for everyone. Side-opening ovens and front-control cooktops reduce reaching over hot surfaces. D-shaped cabinet pulls are easier to grip than traditional knobs.
These modifications don’t announce themselves as accessibility features—they simply create spaces that work better for daily living.
Flooring and Surface Considerations
Choosing the right flooring is fundamental to creating a safe, accessible home. The surface beneath your feet affects mobility, stability, and navigation for people with various disabilities, making it one of your most important design decisions.
Non-slip surfaces should be your starting point. Look for flooring materials with a coefficient of friction (COF) rating of 0.6 or higher for dry areas and 0.8 for wet spaces like bathrooms. Textured vinyl, matte-finish hardwood, and slip-resistant tile all offer excellent traction without sacrificing style. Avoid high-gloss finishes that become slippery when wet.
When deciding between carpeting and hard flooring, consider your household needs. Low-pile carpet (under half an inch) provides cushioning for falls and reduces noise but can impede wheelchairs and walkers. Hard surfaces like luxury vinyl plank, laminate, or engineered hardwood allow easier mobility device movement and wheelchair navigation. If you prefer carpet, choose tight, dense weaves that resist catching mobility aids.
Strategic texture changes serve as tactile wayfinding cues for people with visual impairments. Transitioning from tile to wood, for example, can signal different room zones. Just ensure transitions are flush—height differences exceeding one-quarter inch create trip hazards and wheelchair barriers.
Speaking of transitions, pay attention to flooring installation considerations to eliminate gaps and lips between rooms. Use tapered transition strips or consider floating floors that expand throughout multiple rooms for seamless navigation. Remove throw rugs entirely or secure them with non-slip backing, and keep electrical cords concealed along baseboards.
DIY Accessibility Upgrades You Can Tackle This Weekend
Making your home more accessible doesn’t always require professional contractors or a major renovation budget. These weekend-friendly projects can significantly improve safety and usability for everyone in your household.
Installing Grab Bars
Start with the bathroom, where falls are most common. Quality grab bars cost between $15-50 each, and you’ll need a drill, appropriate wall anchors or stud finder, level, and pencil for marking. Locate wall studs for the strongest installation, or use specialized toggle bolts rated for at least 250 pounds if mounting to drywall. Position bars at 33-36 inches from the floor near toilets and inside showers. The entire project typically takes 1-2 hours and provides immediate peace of mind.
Adding Contrast Tape to Stairs
Visual contrast dramatically reduces trip hazards, especially for those with low vision. Purchase non-slip contrast tape in bright yellow or white for around $15-25 per roll. Clean each stair edge thoroughly, measure and cut strips to fit the nose of each step, then press firmly to secure. This simple 30-minute project makes stair edges instantly more visible and adds traction.
Upgrading to Lever Door Handles
Lever handles require less grip strength and dexterity than traditional knobs. Most interior doors use standard bore holes, making replacement straightforward. Expect to spend $10-30 per handle, and arm yourself with just a screwdriver. Remove the existing knob by unscrewing the interior faceplate, pull out the mechanism, and install the new lever following package directions. Budget about 15 minutes per door.
Improving Lighting
Better illumination benefits everyone, particularly those with vision challenges. Install motion-sensor night lights in hallways and bathrooms for around $15-30 each. Upgrade dim overhead fixtures with brighter LED bulbs, which cost $5-15 and can triple light output while using less energy. Add under-cabinet lighting in kitchens to eliminate shadows on work surfaces.
Creating Clear Pathways
Sometimes accessibility is about subtraction rather than addition. Spend an afternoon rearranging furniture to create 36-inch-wide pathways throughout your home. Remove throw rugs that create trip hazards, secure electrical cords along baseboards, and relocate frequently used items to easily reachable heights between 15-48 inches from the floor. This costs nothing but makes navigation dramatically easier for everyone.
When to Call in the Professionals
While many accessibility improvements are perfect for DIY enthusiasts, some projects absolutely require professional expertise to ensure safety and code compliance. Structural modifications like widening doorways, installing ramps with proper slope ratios, or removing walls need licensed contractors who understand load-bearing requirements. Electrical work for additional lighting, outlet repositioning, or smart home integration should always be handled by certified electricians to prevent fire hazards and ensure proper installation.
When you’re considering custom home features like wheelchair-accessible showers, stair lifts, or residential elevators, specialized professionals become essential. These complex installations involve plumbing, electrical, and structural considerations that require expert coordination.
To find qualified help, look for Certified Aging-in-Place Specialists (CAPS) through the National Association of Home Builders or seek occupational therapists who specialize in home modifications. Local independent living centers can also recommend trusted accessibility consultants who understand both practical needs and local building codes.
Investment varies widely depending on project scope. Simple grab bar installations might cost a few hundred dollars, while comprehensive bathroom renovations can range from 5,000 to 15,000 dollars. Ramps typically run 1,000 to 3,000 dollars, and stair lifts start around 3,000 dollars. Request detailed quotes from multiple professionals, ask about financing options, and check if modifications qualify for tax deductions or rebates. Remember that quality installation protects your investment and ensures long-term safety for all users.
Creating a more accessible home isn’t just about accommodating specific disabilities—it’s about designing spaces that work better for everyone. Whether you’re planning for aging in place, supporting a family member, or simply making your home more comfortable and navigable, accessibility features add genuine value to your property and improve daily living for all occupants.
The beauty of accessible design is that you don’t need to tackle everything at once. Start small with manageable changes like adding grab bars in the bathroom, improving lighting in hallways, or repositioning light switches to more convenient heights. Each modification you make contributes to a safer, more functional environment. As you become familiar with these adjustments, you can gradually work toward larger projects like widening doorways or installing ramps.
Remember that creating an inclusive home is an ongoing journey rather than a one-time project. Your needs may evolve over time, and so will the available solutions and technologies. Stay open to adapting your space as circumstances change. The modifications you make today might serve different purposes down the road—those grab bars installed for stability could later assist with balance issues, and that zero-threshold shower designed for wheelchair access makes life easier when dealing with injuries or mobility challenges.
By embracing accessible design principles now, you’re investing in a home that will serve you well throughout all stages of life while creating a welcoming environment for visitors of all abilities.
