Install Your Kitchen Tile Backsplash This Weekend (Even If You’ve Never Tiled Before)
Transform your outdated kitchen into a stunning space by installing a tile backsplash yourself—a project that typically costs 50-70% less than hiring a contractor and takes just a weekend to complete. Start by measuring your wall space accurately, accounting for outlets and windows, then purchase 10% extra tile to cover cuts and potential breakage. Clear and clean your work area thoroughly, removing any grease or residue from walls, and gather essential tools including a notched trowel, tile spacers, a wet saw or tile cutter, and premixed adhesive.
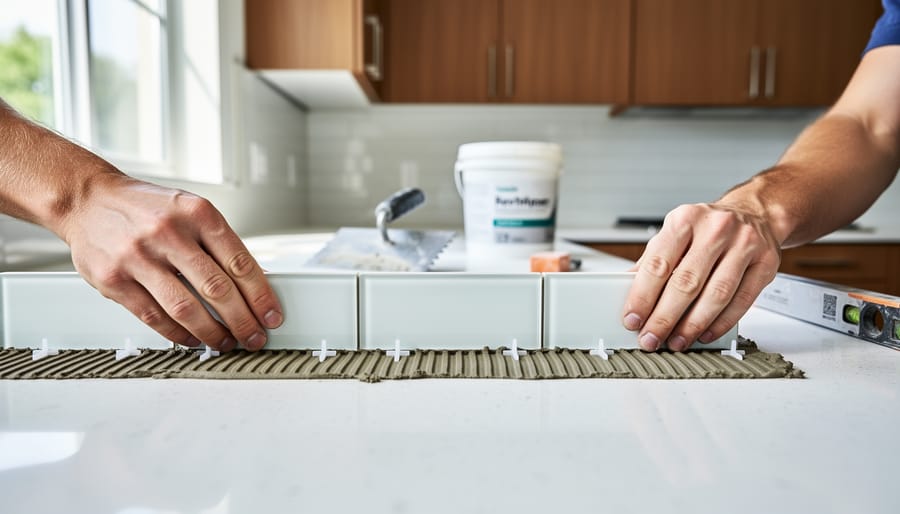
Map your layout before applying any adhesive by dry-fitting tiles on the counter to determine your pattern and identify where cuts will be needed, ensuring your design is centered and visually balanced. Apply thin-set mortar or mastic adhesive in small sections using your notched trowel, working from the center outward to maintain even coverage and prevent premature drying. Press tiles firmly into place with a slight twisting motion, using spacers to maintain consistent grout lines, and work in manageable 3-4 square foot sections.
This ranks among the most rewarding beginner DIY projects because it delivers dramatic visual impact with relatively straightforward techniques. Even first-timers can achieve professional-looking results by following proper preparation steps and allowing adequate drying time between installation and grouting phases.
Why DIY Your Kitchen Backsplash Instead of Hiring Out
Taking on a kitchen backsplash as a DIY project offers several compelling advantages that go beyond just saving money. Let’s break down why rolling up your sleeves might be your best option.
First, the cost savings are substantial. A professional installation typically runs between $800 and $1,500 for an average-sized kitchen backsplash, with labor costs accounting for 60-70% of that total. By doing it yourself, you’re looking at material costs of around $300-$500, depending on your tile choice. That’s a potential savings of $500-$1,000 that you could put toward other affordable home upgrades or higher-end materials for your backsplash.
Beyond the financial benefits, DIY gives you complete creative control. You can experiment with patterns, mix tile styles, or adjust your design on the fly without consulting anyone or paying extra for custom work. Want to create a unique herringbone pattern or incorporate a decorative border? You’re the boss.
There’s also genuine satisfaction in completing a hands-on project. Every time you cook in your kitchen, you’ll feel proud knowing you transformed that space with your own two hands. It’s a confidence builder that often inspires homeowners to tackle even more projects.
Finally, flexibility is a huge advantage. Professional installers work on their schedule, often requiring you to clear out your kitchen for days. With DIY, you work at your own pace, perhaps spreading the project over a few weekends. You can pause when needed and won’t feel rushed to make quick decisions about placement or design adjustments.
Tools and Materials You’ll Actually Need
Essential Tools
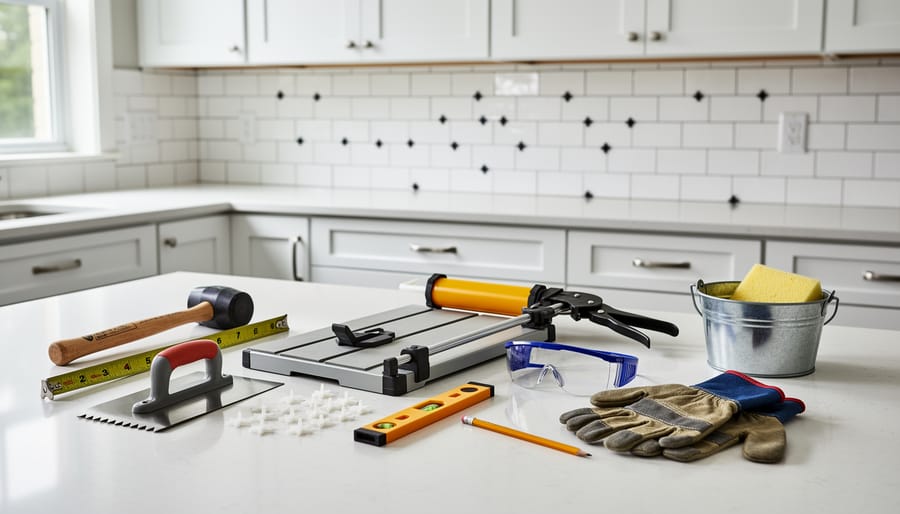
Before you begin tiling, gathering the right tools will make your backsplash project smoother and more professional-looking. Start with a notched trowel for spreading thin-set adhesive evenly across your wall. You’ll need either a manual tile cutter for straight cuts on ceramic tiles or a wet saw if you’re working with porcelain or making detailed cuts around outlets and corners.
Tile spacers are essential for maintaining consistent grout lines, while a level and measuring tape ensure your installation stays straight and accurately positioned. For the grouting phase, pick up a grout float to push grout into the joints and several large sponges for cleanup.
Don’t skip safety equipment. Safety glasses protect your eyes from tile chips, especially when cutting, and work gloves prevent cuts from sharp tile edges. If you’re using a wet saw, ear protection is also recommended.
For a modern touch, consider using a laser level instead of a traditional bubble level. This technology makes it incredibly easy to establish perfectly straight reference lines across your entire workspace, taking the guesswork out of layout and ensuring professional results even for first-time installers.
Materials Checklist
Before you begin your backsplash project, gather all your materials to ensure a smooth installation. You’ll need tiles (ceramic, glass, or subway tiles are popular choices), thin-set mortar or mastic adhesive for attaching tiles to the wall, grout to fill the spaces between tiles, and grout sealer to protect your finished work. If your walls aren’t perfectly smooth or water-resistant, pick up cement backer board and primer as well.
Calculating quantities accurately saves you time and money. Measure your backsplash area in square feet (length times height), then add 10-15% extra for cuts and breakage. Most tile boxes list their coverage area. For grout, check the manufacturer’s recommendations based on tile size and grout line width. A standard kitchen backsplash typically needs 1-2 bags of thin-set and one container of grout.
Pro tip: Use a free tile calculator app on your smartphone to double-check your math and visualize different tile patterns before purchasing. Buy all materials from the same dye lot to ensure consistent color, and keep your receipts in case you need to return extras.
Preparing Your Kitchen Wall for Tile
Cleaning and Repairing the Surface
Before installing your beautiful new backsplash, you’ll need a clean, smooth surface to work with. Start by removing outlet covers and thoroughly cleaning the wall with a degreaser or TSP solution—kitchens accumulate surprising amounts of grease and grime that can prevent tiles from adhering properly.
If you’re replacing an existing backsplash, carefully remove old tiles using a putty knife and hammer. Work slowly to avoid damaging the drywall beneath. Once removed, scrape away any remaining adhesive or grout.
Next, inspect your walls for imperfections. Fill any holes, cracks, or dents with spackling compound, letting it dry completely before sanding smooth. For larger repairs or significant damage, you’ll want to repair walls professionally to ensure a stable foundation.
Run your hand across the surface to check for bumps or rough spots—even small imperfections will show through your finished backsplash. Sand any rough areas until everything feels uniformly smooth.
Finally, wipe down the entire area with a damp cloth to remove dust, then let it dry completely. This prep work might seem tedious, but it’s essential for achieving professional-looking results that last for years.
Measuring and Planning Your Layout
Start by measuring your backsplash area’s height and width with a tape measure. Multiply these numbers to calculate square footage, then add 10% extra for cuts and potential mistakes. Before opening your tile boxes, plan your layout to avoid tiny slivers at the edges.
Find your backsplash’s center point and mark a vertical line using a level. This ensures your tiles stay straight, especially important if your counters aren’t perfectly level. Plan your layout so cut tiles end up in less visible corners rather than front and center.
For outlets and switches, measure their exact position from your starting point. You can use a smartphone app like MagicPlan to photograph and map your space, making it easier to visualize the finished look.
Here’s a game-changer: do a dry run. Lay tiles on your counter in the planned pattern without adhesive. This lets you see how everything fits, identify problem areas, and determine which tiles need cutting. Place tile spacers between each piece to maintain consistent grout lines.
When working around outlets, turn off the power at the breaker first. You’ll either remove outlet covers and tile around the opening, or carefully cut tiles to fit. Mark these cuts during your dry run so installation day goes smoothly.
Protecting Your Countertops and Outlets
Before you start tiling, take a few minutes to protect your workspace and ensure electrical safety. First, lay down drop cloths or old towels over your countertops to prevent scratches from tools or adhesive drips. You might even want to tape cardboard along the edges for extra protection.
Next, safety first with your electrical outlets. Head to your circuit breaker and turn off power to all outlets in your work area. Use a voltage tester to double-check that the power is truly off before proceeding. Once confirmed, carefully remove all outlet and switch covers using a screwdriver, and set the screws aside in a small container so they don’t get lost.
If you’re planning to tile around outlets, you can pick up inexpensive outlet extenders at your local hardware store. These handy devices will bring your outlets flush with your new backsplash once you’re finished. This simple prep work prevents damage and keeps you safe throughout your project.
Installing Your Tile Backsplash: Step-by-Step
Mixing and Applying Adhesive
Start by mixing your thin-set adhesive according to the manufacturer’s instructions. For most backsplash projects, mix only what you can use in about 30 minutes, typically a few cups of dry mix at a time. Add powder to water gradually while stirring with a margin trowel or drill mixer until you achieve a peanut butter-like consistency. Let it rest for 10 minutes, then remix before using.
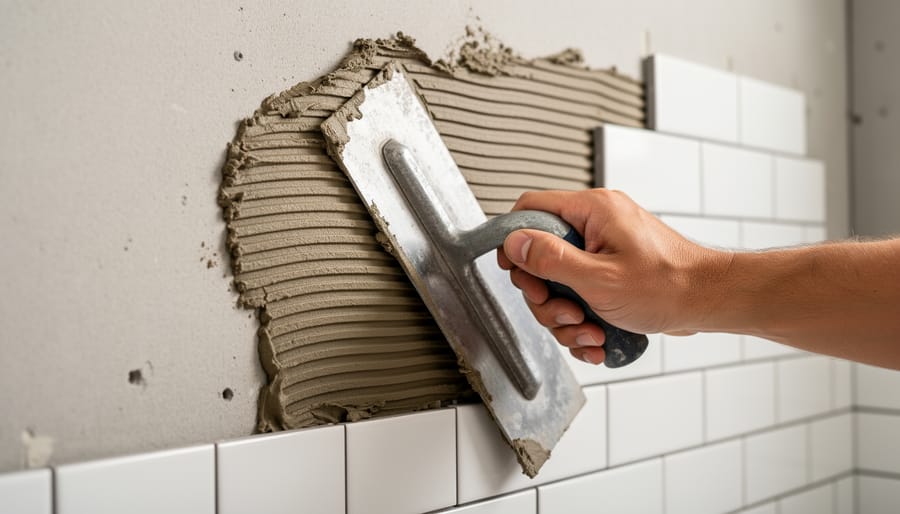
Load your notched trowel with adhesive and spread it on the wall using the flat edge first, holding the trowel at a 45-degree angle. Then, flip to the notched edge and comb through at a consistent angle to create uniform ridges. These ridges ensure proper tile adhesion and help level your installation.
Work in small sections, about 2-3 square feet at a time, so the adhesive doesn’t dry before you set your tiles. Pro tip: use your smartphone timer to track your working time and avoid rushing. The adhesive should feel tacky but not dried out when you press tiles into place.
Always maintain your trowel angle and apply even pressure for consistent coverage. If you’re new to tiling, periodically pull up a tile to check that at least 95 percent of the back surface has good adhesive contact.
Setting Your First Tiles
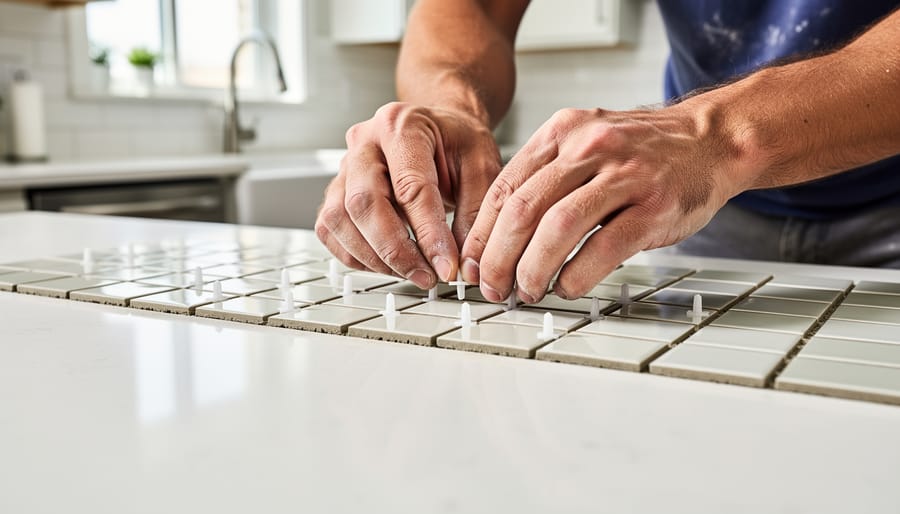
Starting your tile installation correctly sets the tone for the entire project, so take your time with these first crucial rows. Begin at the center point of your backsplash and work outward in both directions. This ensures balanced placement and prevents awkward, tiny cuts at the edges.
Apply your thinset adhesive in small sections, about two feet square, to prevent it from drying before you set the tiles. Using your notched trowel at a 45-degree angle creates ridges that help tiles adhere properly. Press each tile firmly into place with a slight twisting motion, ensuring full contact with the adhesive. You should see a bit of thinset squeeze up between the tiles, confirming good coverage.
Insert tile spacers at every corner where tiles meet. These inexpensive tools maintain consistent grout lines and prevent tiles from shifting as the adhesive sets. Most DIYers find 1/8-inch spacers work well for backsplashes, though you can adjust based on your design preference.
Check your level constantly during these first few rows. Place your level horizontally across multiple tiles and vertically along columns. Even small deviations now will magnify as you continue upward. If a tile sits too high or low, gently remove it, adjust the adhesive, and reset.
Pro tip: Use your smartphone’s level app as a quick backup check between rows. This digital tool helps you catch alignment issues immediately, saving hours of frustration later. The first three rows are your foundation, so perfecting them ensures a professional-looking result throughout your entire backsplash.
Cutting Tiles Around Obstacles
Cutting tiles to fit around outlets and corners takes patience, but with the right approach, you’ll get professional-looking results. Start by turning off power to any outlets in your work area—safety first! Hold your tile up to the obstacle and use a pencil to mark where cuts need to be made. For outlets, measure from the last full tile to each edge of the outlet box, then transfer these measurements to your tile.
A tile wet saw gives you the cleanest cuts for straight lines, while a tile nipper works perfectly for small notches and irregular shapes. For outlet openings, you can drill holes at each corner using a carbide-tipped bit, then carefully cut between them with a rod saw. Alternatively, score and snap smaller sections using your tile cutter.
When cutting, always wear safety glasses and work gloves. Keep your hands away from the blade and let the tool do the work—never force it. For angled cuts around corners, create a template using cardboard first to ensure accuracy before marking your tile.
Pro tip: Use painter’s tape on the tile surface before marking to prevent the pencil from slipping and make lines more visible. Take your time measuring twice and cutting once—it’s easier than redoing sections later.
Letting the Adhesive Cure
Patience is key at this stage! Most tile adhesives need 24 to 48 hours to cure properly before you can start grouting. Check your adhesive manufacturer’s instructions for the exact timing, as some products vary. Temperature and humidity can affect drying time, so on humid days, give it a bit longer.
While waiting, resist the urge to press on tiles or check if they’re secure. Any movement can break the adhesive bond and cause tiles to shift or fall. Keep kids and pets away from the work area, and avoid bumping the wall.
To test if your adhesive is ready, gently try to wiggle a tile in an inconspicuous corner. If it doesn’t budge at all, you’re good to grout. The adhesive should feel completely dry and hard to the touch. If there’s any movement or the adhesive feels soft, wait another 12 hours and test again.
Pro tip: Use this waiting period to organize your grouting supplies and watch tutorial videos to perfect your technique. You can even set a reminder on your phone so you don’t forget to check back at the right time. This downtime is the perfect opportunity to prepare for your next step!
Grouting Your Backsplash Like a Pro
Mixing and Applying Grout
Once your tiles have set for 24 hours, you’re ready to grout. Start by mixing your grout according to the manufacturer’s instructions. You’re aiming for a consistency similar to peanut butter – thick enough to stay on your trowel but smooth enough to spread easily. Let it rest for about 10 minutes, then remix before applying.
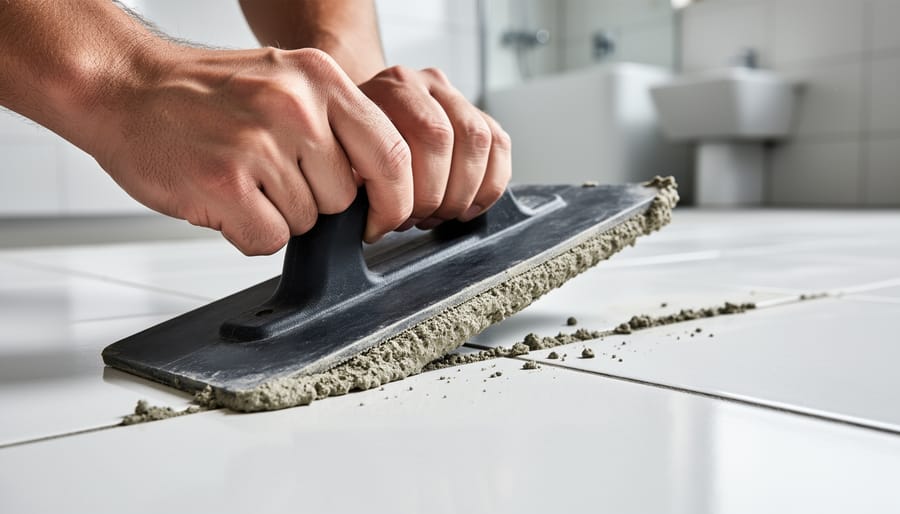
Load grout onto your rubber float and hold it at a 45-degree angle to the tile surface. This angle is key to forcing grout deep into the joints. Work diagonally across the tiles in sweeping motions, pressing firmly to fill all gaps completely. Don’t worry about making a mess – that’s completely normal at this stage.
Continue working in small sections, about 3-4 square feet at a time. This prevents the grout from drying before you can clean it properly. After filling the joints in each section, use the float’s edge to scrape away excess grout by holding it nearly perpendicular to the tiles and dragging diagonally across the surface.
Pro tip: Take a quick photo of your progress to track your technique and timing. This helps you maintain consistency across the entire backsplash and gives you a reference for future tiling projects.
Cleaning and Finishing
Once your grout has set for about 20-30 minutes, you’ll notice a light haze forming on the tile surface. This is your cue to start the initial cleaning. Using a damp sponge (not soaking wet), gently wipe the tiles in circular motions to remove excess grout. Rinse your sponge frequently in clean water, wringing it out well each time. The goal is to clean without pulling grout from the joints, so a light touch is key.
After 24 hours, tackle any remaining grout haze with a clean, dry microfiber cloth. For stubborn haze, a solution of equal parts water and white vinegar works wonders. Spray lightly and buff with a soft cloth until your tiles sparkle.
Allow your grout to cure completely according to the manufacturer’s instructions, typically 48-72 hours. This waiting period is crucial before applying grout sealer. Skipping this step can trap moisture and weaken your grout over time.
When ready, apply grout sealer using a small brush or applicator, carefully coating only the grout lines and avoiding the tile surface. Work in small sections and wipe away any sealer that touches the tiles immediately. Let it dry for the recommended time, usually a few hours, before using your new backsplash normally. Pro tip: Set a reminder on your phone to reapply sealer annually to keep your backsplash looking fresh and prevent staining.
Common Mistakes to Avoid
Even experienced DIYers can stumble when installing a tile backsplash. Knowing these common pitfalls beforehand will save you time, money, and frustration.
Skipping or rushing the prep work is perhaps the biggest mistake. A dirty or uneven wall leads to poor adhesion and tiles that won’t lie flat. Always clean your walls thoroughly and patch any holes or imperfections before you begin. Taking an extra hour here prevents days of headaches later.
Using incorrect amounts of adhesive creates serious problems. Too much causes tiles to slide around and creates uneven surfaces, while too little means tiles won’t stick properly. Apply adhesive in thin, even layers using the notched trowel at a 45-degree angle. You should see consistent ridges that collapse when you press the tile firmly.
Inconsistent spacing between tiles ruins the professional look you’re after. Without spacers, you’ll end up with grout lines that wander and draw the eye for all the wrong reasons. Invest in quality tile spacers and use them religiously on every tile.
Grouting too soon is another frequent error. If your adhesive hasn’t fully cured, the tiles can shift during grouting, creating a mess. Wait the full 24 hours recommended by your adhesive manufacturer, even if tiles seem secure.
Finally, neglecting to seal your grout leaves it vulnerable to stains and moisture damage. Apply grout sealer 48-72 hours after grouting to protect your investment. This simple step, along with other money-saving home improvement tricks, ensures your beautiful backsplash stays that way for years to come.
You’ve made it through the entire process, and now you’re ready to tackle your kitchen tile backsplash project with confidence! Remember, this is absolutely a manageable DIY project for beginners. The key is proper preparation, taking your time with each step, and not rushing through the process. Even if you’ve never worked with tile before, following the steps we’ve outlined will help you achieve professional-looking results.
The rewards of completing this project yourself go beyond just the finished backsplash. You’ll save hundreds or even thousands of dollars compared to hiring a contractor, and there’s an incredible sense of satisfaction that comes from transforming your kitchen with your own hands. Every time you cook or gather in your kitchen, you’ll feel proud knowing you created that beautiful focal point yourself.
Don’t be intimidated if you encounter small hiccups along the way. Most DIY projects involve a learning curve, and minor imperfections often aren’t noticeable once the project is complete. The skills you develop during this backsplash installation will serve you well for future home improvement projects.
Ready to keep the momentum going? If you enjoyed this project, explore more DIY home decor ideas on our site. From bathroom updates to creative accent walls, there are countless ways to personalize your space while building your DIY confidence. Grab your tools, trust the process, and start creating the kitchen you’ve always wanted!
