Transform Your Backyard with the Perfect Outdoor Restaurant Tent
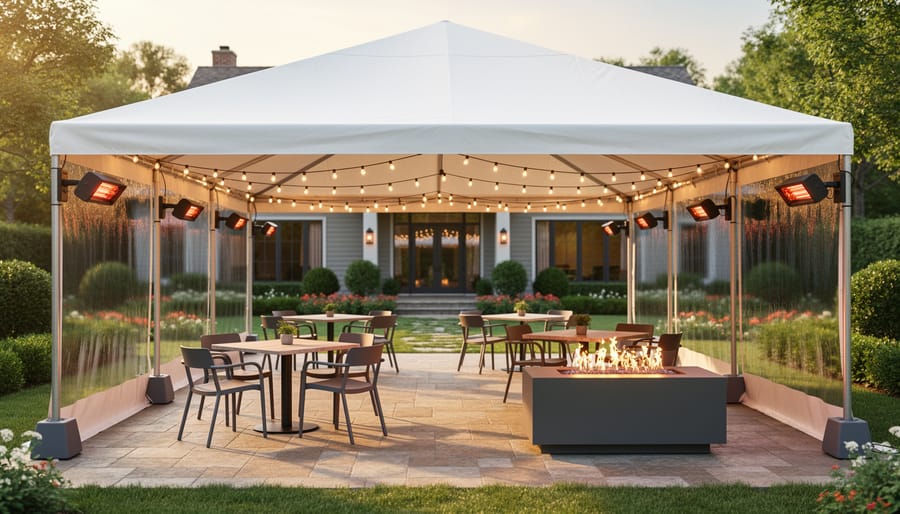
Transform your patio or deck into a profitable dining area by selecting weather-resistant tent structures with UV-protected canopies rated for wind speeds up to 40 mph. Position frame tents with removable sidewalls for year-round flexibility, allowing you to adjust ventilation during warm months and enclose the space completely when temperatures drop. Install commercial-grade pole tents with proper anchoring systems—either ground stakes for grass surfaces or weighted bases for concrete patios—ensuring stability during unexpected weather changes.
Choose tent sizes based on your seating capacity needs, calculating approximately 12-15 square feet per guest to accommodate tables, chairs, and comfortable walkways. Frame tents work best for permanent or semi-permanent installations since they don’t require center poles, maximizing usable space and creating unobstructed sightlines. For temporary setups, pop-up canopy tents offer quick assembly and portability, though they provide less protection against harsh weather.
Integrate heating elements like infrared heaters or fire pits for cool evenings, and string cafe lights across support beams to create ambiance while improving visibility. Add transparent vinyl windows to sidewalls, maintaining views while blocking wind and rain. These strategic additions extend your outdoor dining season significantly, turning underutilized outdoor living spaces into revenue-generating assets for restaurants or inviting entertainment areas for homeowners.
Select materials carefully—polyester fabrics resist fading but require waterproof coatings, while vinyl options offer superior weather protection with minimal maintenance requirements.
Why Outdoor Restaurant Tents Are Game-Changers for Your Space
Picture this: you’ve invested in a beautiful patio set, installed outdoor lighting, and created the perfect grilling station—only to watch your plans get rained out weekend after weekend. That’s where outdoor restaurant tents come in, transforming your space from fair-weather-only to a year-round entertainment hub.
The most obvious benefit is weather protection. These structures shield you and your guests from unexpected showers, intense sun, and even light snow, meaning your outdoor gatherings don’t have to be at the mercy of the forecast. You’ve already created a weather-ready outdoor space, and a quality tent takes that protection to the next level.
Beyond practicality, restaurant tents dramatically extend your usable season. What was once a three-month patio becomes a nine-month dining destination. This extended functionality is particularly valuable for homeowners considering resale value—studies show that open spaces increase property values, and covered outdoor spaces offer even greater appeal to potential buyers.
The ambiance factor shouldn’t be underestimated either. A well-chosen tent creates an intimate, restaurant-quality atmosphere that elevates any gathering. String lights reflecting off white canvas, the gentle patter of rain overhead, or the cozy feeling of dining outdoors on a crisp autumn evening—these moments simply aren’t possible without proper coverage.
For DIY enthusiasts, modern tent systems are surprisingly manageable. Many feature pop-up or modular designs that don’t require professional installation. You can customize your setup with sidewalls for wind protection, mesh panels for airflow, or clear windows to maintain views while staying protected.
Whether you’re a homeowner looking to maximize your outdoor investment or a commercial property owner creating additional dining capacity, restaurant tents offer flexibility that permanent structures can’t match. They’re movable, seasonally adjustable, and significantly more budget-friendly than building a traditional pavilion.
Types of Outdoor Restaurant Tents to Consider
Pop-Up Canopies and Instant Shelters
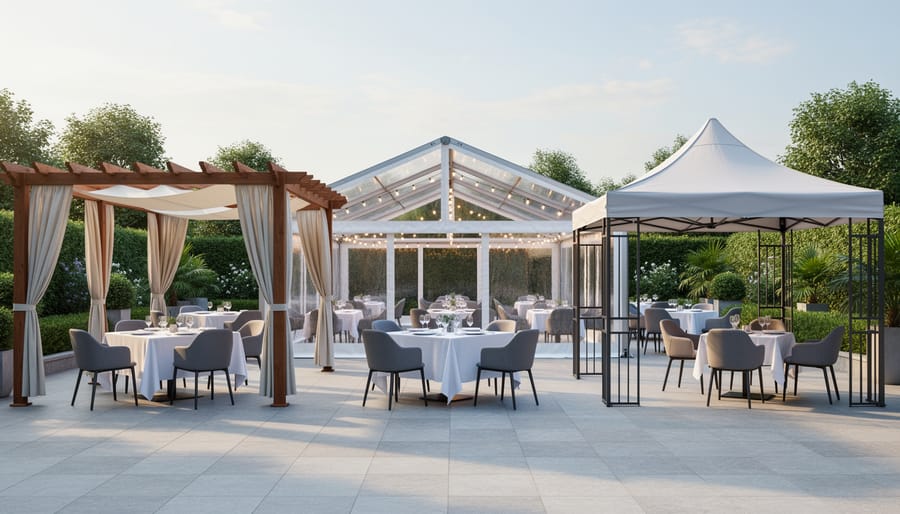
Pop-up canopies and instant shelters offer the ultimate flexibility for outdoor dining spaces without the commitment of permanent structures. These portable options are ideal if you’re testing out an alfresco dining concept, hosting occasional backyard gatherings, or need seasonal coverage that you can easily store during winter months.
Most pop-up canopies feature accordion-style frames that expand in minutes, requiring no special tools or expertise. Simply unfold the frame, lock the legs into place, and attach the canopy top. Many models include adjustable height settings, letting you customize the space for standing cocktail areas or seated dinner configurations.
Look for frames made from powder-coated steel or aluminum for durability and rust resistance. The canopy material should offer UV protection and water resistance—polyester with PU coating strikes a nice balance between affordability and performance. Sidewalls are available as add-ons, providing wind protection and creating a more intimate dining atmosphere.
These shelters work beautifully for cafes, food trucks, farmers market vendors, or homeowners who love entertaining but want the freedom to reclaim their patio space between events.
Frame Tents and Semi-Permanent Structures
Frame tents strike the perfect balance between temporary and permanent outdoor dining solutions. Unlike basic pop-ups, these structures feature a metal framework that doesn’t require center poles, giving you completely unobstructed interior space for tables and guests. The aluminum or steel frames support heavy-duty vinyl or polyester canopies designed to withstand wind, rain, and regular use throughout multiple seasons.
What makes frame tents particularly appealing is their flexibility. You can anchor them to concrete patios using weighted plates, or secure them to grass with ground stakes. Many models include sidewalls with window panels that zip on and off, letting you adapt to changing weather conditions. Installation typically takes 2-4 hours with a small team, and while they’re sturdier than pop-ups, you can still disassemble them for winter storage if needed.
For restaurant owners testing outdoor dining concepts or homeowners planning frequent entertaining, frame tents offer durability without the commitment and permits required for permanent structures.
Clear-Top and Windowed Tents
For an upscale dining atmosphere that doesn’t sacrifice the outdoor experience, clear-top and windowed tents are exceptional choices. These premium options feature transparent vinyl or PVC panels in the roof or walls, allowing natural sunlight to flood your dining area while still protecting guests from rain and wind.
Clear-top tents create an almost invisible ceiling, giving diners the feeling of eating under an open sky while staying completely dry. This design works beautifully for evening service too, as guests can enjoy stargazing between courses. Windowed sidewalls offer adjustable ventilation—you can roll them up on pleasant days or keep them secured during inclement weather.
The visual appeal of these tents is undeniable. They maintain your outdoor space’s connection to surrounding gardens, patios, or landscape features, making them perfect for restaurant owners who’ve invested in beautiful outdoor environments. While they typically cost more than solid-fabric alternatives, the enhanced ambiance and guest experience often justify the investment. Just remember that clear panels require regular cleaning to maintain their pristine appearance and transparency.
Pergola-Style Tent Combinations
Pergola-style tent combinations offer the best of both worlds for outdoor dining spaces. These hybrid structures feature sturdy wooden or metal pergola frames topped with retractable fabric covers, giving you flexibility to adjust coverage based on weather conditions.
The permanent frame provides year-round structure and can support lighting fixtures, ceiling fans, or hanging plants even when the fabric is removed. During pleasant weather, simply retract or remove the canopy to enjoy open-air dining. When rain threatens or the sun gets too intense, deploy the cover for instant protection.
Installation works well as a DIY project if you’re comfortable building a basic pergola. Start with the frame construction, ensuring posts are properly anchored in concrete footings. Then add your choice of retractable awning mechanism or simple removable fabric panels with grommets and tie-downs.
For tech-savvy restaurateurs, motorized retractable systems can integrate with weather sensors that automatically extend coverage when rain is detected. Many homeowners find this setup ideal because it transforms patios into functional dining areas without the permanent enclosed feeling of traditional tents.
Essential Features to Look For
Choosing the right outdoor restaurant tent starts with understanding which features will make or break your outdoor dining experience. Whether you’re setting up a cozy patio for weekend brunch or creating a year-round covered dining area, these essential elements deserve your attention.
Material quality should be your first consideration. Look for commercial-grade fabrics that can withstand daily use and various weather conditions. The best tents use heavy-duty polyester or vinyl with reinforced stitching at stress points. These materials resist tearing and maintain their appearance even after months of exposure to the elements.
Waterproofing and UV resistance go hand in hand when protecting your guests and furniture. Quality tents feature waterproof coatings rated at least 1000mm or higher, ensuring rain won’t drip through during dinner service. UV-resistant fabrics prevent sun damage and keep the space cooler, which your diners will definitely appreciate on hot summer days.
Here’s a practical checklist of must-have features to evaluate:
- Heavy-duty, commercial-grade fabric with reinforced seams
- Waterproof rating of 1000mm or higher
- UV protection to prevent fabric deterioration and reduce heat
- Adequate ventilation systems or mesh panels to promote airflow
- Removable or roll-up sidewalls for weather and seasonal flexibility
- Robust anchoring systems including stakes, weights, or permanent mounting options
- Size specifications that accommodate your furniture layout with walking space
Ventilation often gets overlooked but makes a huge difference in guest comfort. Mesh windows, vented roof panels, or adjustable sidewalls prevent the space from becoming stuffy. Good airflow also reduces condensation buildup that can damage fabrics over time.
When considering sidewalls, versatility matters most. Removable or roll-up panels let you adapt to changing weather conditions throughout the day. Clear vinyl sidewalls offer weather protection while maintaining an open, airy feel that keeps your outdoor space inviting.
The anchoring system determines whether your tent stays put during unexpected weather. For temporary setups, look for weighted bases or heavy-duty stakes. If you’re planning a permanent installation, consider models designed for concrete mounting or professional anchoring systems. Getting this right prevents safety issues and protects your investment.
Sizing Your Tent for Your Outdoor Dining Space
Getting the right tent size isn’t just about covering your dining area—it’s about creating a comfortable, functional space that feels welcoming rather than cramped. Let’s break down how to calculate the perfect fit for your outdoor restaurant setup.
Start with your dining tables as the foundation. A standard 6-foot rectangular table needs about 10 feet of width to allow comfortable chair placement and guest movement. For round tables, add 4-5 feet to the diameter to account for seating and walkways. Don’t forget to measure multiple table configurations if you’re planning flexible seating arrangements.
Next, factor in your guest capacity. As a general rule, allocate 10-12 square feet per person for dining comfort. This includes table space, chair clearance, and walking room. For a 20-person outdoor dining area, you’re looking at roughly 200-240 square feet of covered space at minimum.
Now consider the extras. If you’re incorporating outdoor cooking areas, beverage stations, or server access points, add 50-100 square feet depending on your setup. A small prep station might need 25 square feet, while a full outdoor kitchen requires considerably more.
Here’s a practical sizing example: For four 6-foot tables seating 24 guests total, plus a small service station, aim for a tent that’s at least 20×20 feet (400 square feet). This provides adequate dining space while leaving room for comfortable movement.
Remember to account for tent pole placement too. Center poles can interfere with table arrangements, so consider clearspan designs for more flexible layouts. When in doubt, go slightly larger—a tent that’s too small feels claustrophobic, while extra space always finds a purpose.
DIY Installation vs. Professional Setup
Deciding between DIY installation and hiring professionals for your outdoor restaurant tent comes down to several practical factors, including budget, timeline, and the complexity of your setup.
For smaller, temporary tent structures like pop-up canopies or basic frame tents, DIY installation is often straightforward and budget-friendly. These systems typically come with clear instructions and require just a few people and basic tools. You’ll save significantly on labor costs and can work on your own schedule, making adjustments as you see fit. However, larger permanent or semi-permanent structures demand more expertise, especially when securing permits and meeting building code requirements for tents.
- Saves hundreds to thousands in labor costs depending on tent size.
- Complete control over installation timeline and customization details.
- Valuable learning experience for future maintenance and adjustments.
- No scheduling conflicts with contractor availability.
- Expert installation ensures structural integrity and safety compliance.
- Installation warranties typically cover workmanship issues.
- Significant time savings, often completing in hours versus days.
- Proper permitting assistance and code compliance guidance included.
When should you call the pros? If your tent requires anchoring into concrete, electrical integration, or covers a large dining area, professional installation makes sense. They bring specialized equipment, understand local regulations, and can troubleshoot unexpected challenges. Professional setup also protects your investment—improper installation can void manufacturer warranties and create safety hazards.
Consider a hybrid approach for mid-sized projects: hire professionals for the structural framework and anchoring, then handle finishing touches like lighting and décor yourself. This balances cost savings with safety assurance while giving you creative control over the final look.
Setting Up Your Outdoor Restaurant Tent: A Step-by-Step Approach
Setting up your outdoor restaurant tent doesn’t have to be overwhelming. With the right preparation and a systematic approach, you can have your covered dining space ready for guests in just a few hours. Here’s how to tackle the installation process for a typical frame tent.
Start by preparing your site at least a day before installation. Clear the area of debris, rocks, and any items that could puncture the tent floor or create uneven surfaces. Mark out your tent’s footprint using stakes and string to ensure you have adequate clearance from buildings, trees, and property lines. Check local regulations about setback requirements before you begin.
On installation day, gather your team—most frame tents require at least two people for safe setup. Lay out all components and hardware before starting. This inventory check saves time and prevents mid-installation surprises. Most rental or purchased tents include detailed instructions, so keep those handy.
Begin with the frame assembly. Connect the corner uprights first, ensuring all locking mechanisms click securely into place. Modern frame tents typically use color-coded or numbered poles to simplify this process. Add the horizontal support beams next, working methodically around the perimeter before installing internal cross-braces. Don’t fully tighten all connections yet—leaving them slightly loose allows for adjustments.
Once the frame stands stable, drape the canopy over the top. This step works best on a calm day, as wind can make fabric management challenging. Starting from one end, pull the canopy evenly across the frame, securing it at corner points first, then working toward the center. Most commercial-grade tents use velcro straps, bungee cords, or ratchet systems for attachment.
After securing the canopy, add sidewalls if your setup includes them. These typically attach via zippers, velcro, or pole pockets. Install them starting from windward sides to prevent billowing during installation.
Now return to your frame connections and tighten everything according to manufacturer specifications. This final tensioning ensures structural stability and proper canopy stretch.
Anchor your tent using the appropriate method for your surface. Grass installations need stakes driven at 45-degree angles, while concrete or asphalt requires weight plates—typically 40-50 pounds per leg for smaller tents. Never skip anchoring, even for short-term setups.
Finish with a thorough inspection, checking all connection points, anchor systems, and fabric tension. Add your lighting, heating, or cooling systems last, routing cables safely to prevent tripping hazards.
Styling and Decorating Your Tent Space
Transforming a basic tent into a welcoming restaurant space is all about creating ambiance and comfort that rivals your favorite indoor dining spots. With the right styling choices, your outdoor tent can feel just as polished and inviting as any brick-and-mortar establishment.
Start with a strong foundation by selecting quality flooring. Weather-resistant outdoor rugs or interlocking deck tiles create a finished look while protecting your tent floor from wear and tear. These additions also help define dining zones and add warmth underfoot for your guests.
Lighting makes all the difference in setting the mood. Thoughtful outdoor lighting design can elevate your tent from ordinary to extraordinary. Consider these styling elements to create an inviting atmosphere:
- String lights or bistro lighting draped overhead for warm, ambient illumination
- Weather-resistant outdoor rugs to define spaces and add color
- Coordinated table linens, centerpieces, and place settings that reflect your restaurant’s brand
- Portable heaters or misting fans to maintain comfortable temperatures year-round
- Potted plants and greenery to soften the space and connect with the outdoor setting
These foundational elements work together to establish your dining environment’s overall feel and functionality.
Choose furniture that balances comfort with durability. Stackable chairs and tables make setup easier while weather-resistant cushions add a pop of color and comfort. Mix seating arrangements to accommodate different party sizes, from intimate two-tops to larger communal tables.
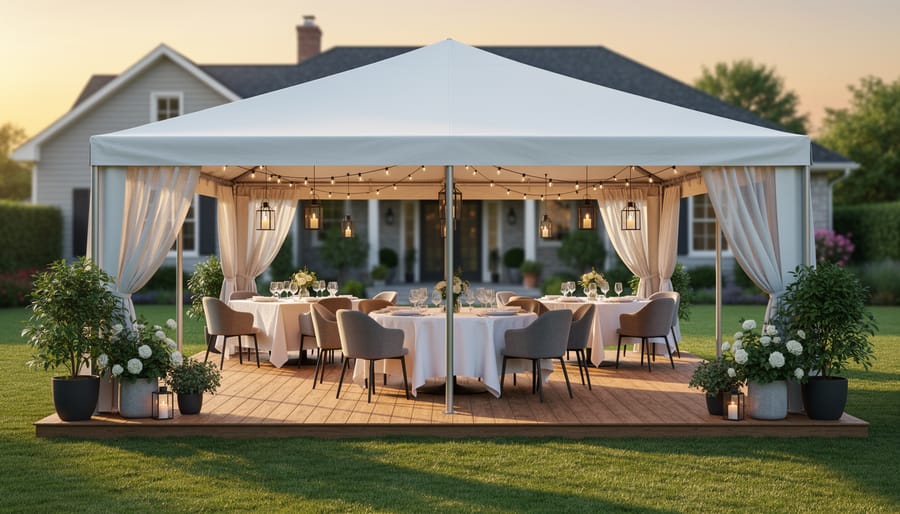
Don’t forget the finishing touches that make guests feel special. Fresh flowers, candles in hurricane holders, and cloth napkins add restaurant-quality polish. Create a cohesive color palette that complements your brand while considering the natural surroundings. Even simple DIY projects like painted planters or custom signage can personalize your space without breaking the budget. The goal is making every diner feel they’ve stepped into a thoughtfully designed destination worth returning to again and again.
Maintenance and Seasonal Care
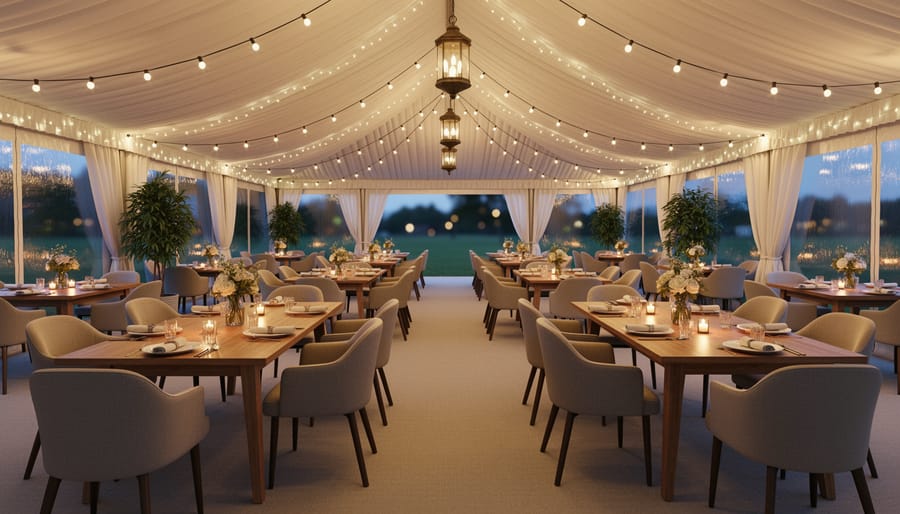
Regular maintenance keeps your outdoor restaurant tent looking fresh and functioning properly for years to come. Start by establishing a weekly cleaning routine—gently brush off debris, wipe down fabric with mild soap and water, and check all zippers and fasteners. Avoid harsh chemicals or pressure washers that could damage waterproof coatings.
Seasonal preparation is key to protecting your investment. Before winter arrives, remove any accumulated snow promptly to prevent structural stress. If you’re in an area with severe weather, consider storing removable tent components indoors during harsh months. For year-round outdoor entertaining, invest in tents with reinforced frames designed to handle temperature fluctuations and winter conditions.
Spring cleaning should include a thorough inspection of all seams, poles, and anchoring systems. Look for signs of mildew, tears, or rust. Address small issues immediately—a simple fabric patch or rust-resistant spray can prevent bigger problems down the road. Summer care focuses on UV protection; apply fabric protectant spray every few months to prevent sun damage and fading.
Don’t forget about proper ventilation year-round. Open windows and vents regularly to prevent moisture buildup and condensation, which can lead to mold growth. After rainstorms, check drainage systems and ensure water isn’t pooling anywhere on the canopy.
Smart maintenance means documenting your care schedule. Set phone reminders for seasonal tasks like reapplying waterproofing treatments or checking anchor points before storm season. With consistent attention, your outdoor tent will remain a beautiful, functional dining space that serves customers comfortably throughout changing weather conditions.
Budget Considerations and Where to Buy
Outdoor restaurant tents vary widely in price depending on size, materials, and features. Basic pop-up canopies start around $100-$300 for residential use, making them perfect for occasional backyard dining. Mid-range frame tents with sidewalls and better weather protection typically run $500-$1,500, offering excellent value for homeowners who entertain frequently. Commercial-grade pole tents and high-end permanent structures can cost $2,000-$10,000 or more, but they’re built to last and withstand heavy use.
For budget-conscious buyers, consider online retailers like Amazon, Wayfair, and Home Depot’s website, where you can compare options and read customer reviews. These platforms often feature competitive pricing and seasonal sales. If you prefer hands-on shopping, visit brick-and-mortar stores like Lowe’s, Home Depot, or specialty outdoor retailers where staff can answer questions and you can inspect material quality firsthand.
To maximize value, shop during off-season months when prices drop significantly—late fall and winter offer the best deals. Look for package deals that include sidewalls, weights, and anchoring systems rather than buying components separately. Don’t forget to factor in accessories like lighting, heating elements, and flooring into your total budget.
For DIY enthusiasts, buying a basic frame and customizing it with your own fabric choices or decorative elements can save money while creating a personalized look. Check local restaurant supply stores too—they sometimes offer commercial-quality tents at competitive prices and can provide valuable installation advice based on your specific needs.
Outdoor restaurant tents have revolutionized the way we think about outdoor entertaining, transforming ordinary patios and yards into sophisticated dining destinations. Whether you’re a homeowner looking to extend your living space or a commercial property owner seeking to maximize seating capacity, these versatile structures offer protection from the elements while creating an inviting atmosphere your guests will love. From simple pop-up canopies for casual weekend barbecues to elegant permanent installations with climate control features, there’s a solution for every budget and style preference. The best part? Many options are surprisingly DIY-friendly, allowing you to customize your space exactly how you envision it. Now’s the time to take that next step—measure your space, consider your needs, and start planning your perfect outdoor dining area. Your dream outdoor entertaining space is more achievable than you think.
