Stop Wasting Paint on Bad Drywall: How to Repair Walls That Look Professional
Inspect your walls carefully before reaching for paint—those hairline cracks, nail pops, and dings will telegraph through even the best paint job, turning your weekend project into a visible disappointment. The good news? Properly repaired drywall creates a flawless canvas that makes any paint color shine, and you don’t need professional skills to achieve invisible repairs.
Start by identifying your damage type: small holes under half an inch need just spackling compound, while larger damage requires patching with actual drywall pieces. The repair method matters less than the finishing technique—multiple thin coats of joint compound, each sanded smooth when dry, create that seamless surface where repairs disappear completely under paint. Most beginners over-apply compound in thick layers, which actually makes damage more visible and extends drying time unnecessarily.
This guide walks you through each repair scenario with the same methods professional painters use to prep walls. Whether you’re tackling one of many beginner DIY projects or preparing an entire room for fresh color, you’ll learn exactly which materials to use, how to apply them for invisible results, and how to avoid the telltale bumps and ridges that scream “amateur repair” once painted.
Identifying What Type of Damage You’re Actually Dealing With
Small Holes and Dents (Under 1 Inch)
Small holes and dents under an inch are the most common drywall damage you’ll encounter. These minor dings typically happen from everyday living—doorknobs bumping into walls, furniture edges grazing surfaces during rearranging, or removed picture hangers and wall anchors leaving behind small craters. You might also notice these imperfections where shelving brackets once hung or from accidental impacts with toys, vacuum cleaners, or moving boxes. The good news? These shallow depressions are the easiest repairs to tackle and respond beautifully to lightweight spackling compound. Most can be fixed in under 15 minutes of active work time, requiring just a putty knife and minimal sanding before painting.
Medium Holes (1-6 Inches)
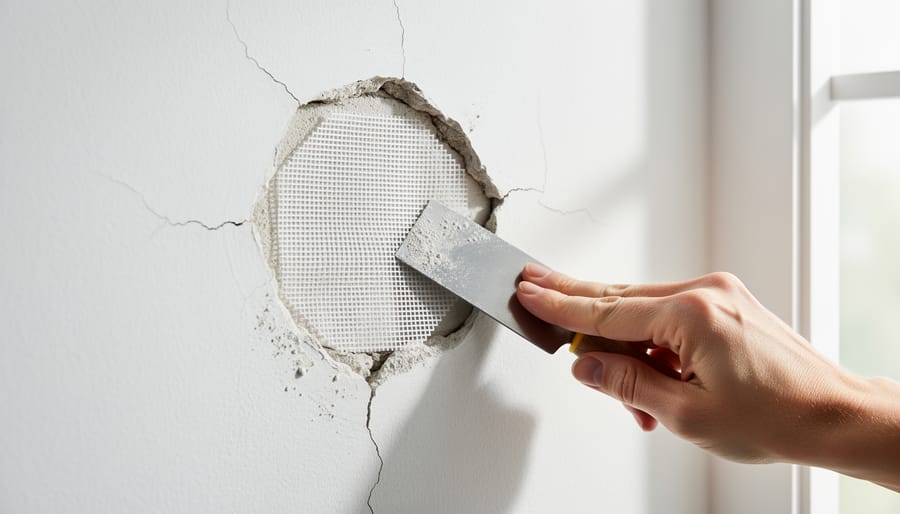
Holes between 1-6 inches require a bit more effort than small repairs but are totally manageable with the right approach. These medium-sized damages need backing material for support since there’s no solid surface behind them to hold your patching compound. You’ll want to grab a drywall repair patch kit from your local hardware store, or create your own backing using mesh tape and a piece of scrap drywall or wood. The key is ensuring whatever backing you use extends beyond the hole’s edges for proper adhesion. Once your backing is secured, apply joint compound in thin layers, feathering the edges outward to blend seamlessly with the existing wall. This creates a smooth, paint-ready surface that won’t telegraph through your fresh paint job.
Cracks and Why They Keep Coming Back
Not all cracks signal disaster. Hairline cracks along walls and ceilings often result from normal house settling, temperature changes, or minor foundation shifts. These typically measure less than 1/8 inch wide and stay stable over time. You can safely repair these with joint compound or flexible caulk before painting.
However, widening cracks, horizontal foundation cracks, or those accompanied by uneven floors need professional evaluation. Take photos over several weeks to track any growth. If a crack returns within months after repair, it’s likely still moving and requires structural attention first.
For persistent settling cracks, use flexible filler products designed for movement rather than standard joint compound. This prevents the frustrating cycle of repair, paint, and reappearance that wastes your time and money.
Essential Tools and Materials That Actually Matter
You don’t need a professional contractor’s toolkit to get smooth, paint-ready walls. Here’s what actually matters for your repair project.
For patching compound, spend a bit more on lightweight spackling for small holes and pre-mixed joint compound for larger repairs. These ready-to-use options save time and provide consistent results compared to powder versions that require mixing. A quality 4-inch and 6-inch putty knife are worth the investment since flexible blades create smoother finishes. Cheap plastic knives leave ridges that show through paint.
Grab medium-grit sandpaper (120-grit) and fine-grit (220-grit) for finishing touches. A sanding sponge works great for getting into corners and won’t cost much. Don’t skimp on primer. A good stain-blocking primer prevents repairs from showing through your topcoat and is one of those home improvement tricks that makes everything look professional.
For holes larger than a half-dollar, you’ll need drywall patches or a repair kit with self-adhesive mesh. These are inexpensive and eliminate complicated cutting. A utility knife, measuring tape, and dust mask round out your essentials.
Skip specialized corner tools and expensive multi-tool kits unless you’re tackling extensive damage. Most repairs need just these basics, and you’ll likely spend under fifty dollars for everything. Keep a damp cloth handy for wiping tools clean between applications to extend their life.
Repairing Small Holes and Dents: The Quick Fix
Prep Work That Prevents Paint Problems
Before you even think about applying compound or primer, proper prep work makes the difference between a repair that blends seamlessly and one that telegraphs through every coat of paint. Start by removing all loose paper, crumbled drywall, and flaking paint with a putty knife. Don’t be gentle here—anything that comes off easily now will eventually bubble up under your fresh paint later.
Next, wipe down the entire area with a damp cloth to remove dust and debris. This simple step ensures your patching compound actually adheres instead of sitting on top of a dirty surface. Check the edges of your damaged area too—they should feel solid and stable. If you can press on the surrounding drywall and feel it give or flex, you’ll need to secure it before moving forward.
Finally, use a shop vacuum or brush to clear away sanding dust from previous attempts. Think of this prep phase as creating a clean canvas—the quality of your surface preparation directly determines whether your repair disappears or stands out like a sore thumb once painted.
Application Technique for Invisible Repairs
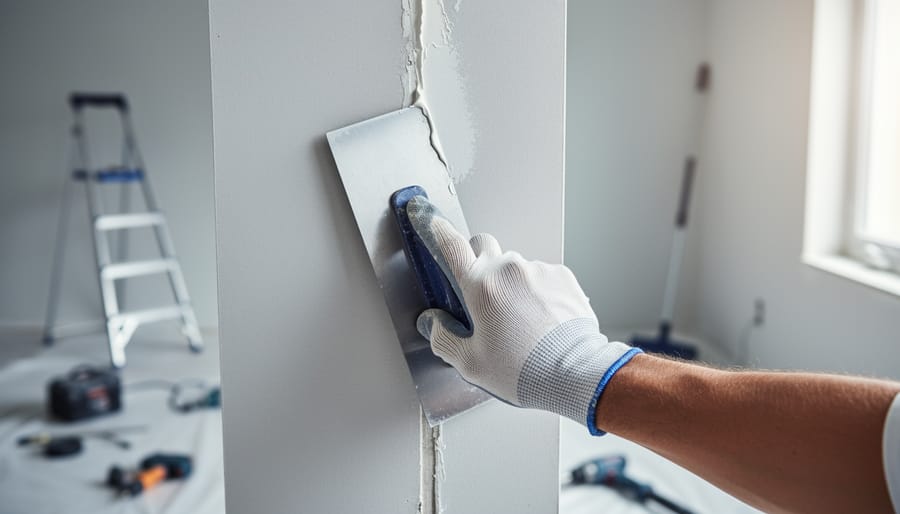
The secret to invisible repairs lies in your application technique. Think thin layers over thick globs—you can always add more, but removing excess creates unnecessary work. Load a small amount of spackle or joint compound onto your putty knife, then press it firmly into the damaged area at a 45-degree angle. Make one smooth pass to fill the hole, then immediately feather the edges by gradually reducing pressure as you move outward from the center.
This feathering technique is crucial. It creates a gradual transition from the repair to the existing wall surface, preventing the telltale bump that screams “amateur repair job.” Each layer should extend slightly beyond the previous one, building up the repair gradually rather than all at once.
Avoid the common mistake of overfilling. That satisfying feeling of packing compound into a hole often leads to bulging repairs that require extensive sanding. Instead, leave the first coat slightly recessed. After it dries completely (typically 2-4 hours for spackle, longer for joint compound), apply a second thin coat. Multiple thin layers always beat one thick application for creating paint-ready surfaces that truly disappear.
Sanding Without Creating More Problems
Start with 120-grit sandpaper for initial smoothing, then switch to 150-grit for final finishing. This progression creates seamless transitions between patched and existing surfaces. Sand in circular motions, feathering edges outward so repairs blend invisibly with surrounding drywall.
Keep a shop vacuum nearby or attach a sanding pole to a dust collection system to minimize airborne particles. For small jobs, a damp sponge works surprisingly well for smoothing joint compound without creating dust clouds. Always wear a dust mask, and seal doorways with plastic sheeting to contain the mess.
Test smoothness by running your hand across the repair—you shouldn’t feel ridges or bumps. A handheld work light held at an angle reveals imperfections your eyes might miss under normal lighting.
Patching Medium-Sized Holes: The Mesh Method
Why Your Patch Keeps Cracking (And How to Stop It)
Patches crack because of three common mistakes. First, applying joint compound too thick creates uneven drying that leads to cracking. Instead, apply thin coats, letting each dry completely before adding the next. Think layers like you’re frosting a cake, not slapping on spackling paste.
Second, skipping primer on the mesh tape itself causes poor adhesion. The tape needs to bond properly with the compound, so always embed it fully in a thin base layer of compound.
Third, using the wrong compound matters more than you’d think. Lightweight compounds shrink less than traditional varieties, making them ideal for patches that won’t crack.
Here’s your winning technique: press mesh tape firmly against the wall, apply a thin coat over it, let it dry 24 hours, then add two more thin coats. Sand lightly between coats. This creates a flexible, crack-resistant repair that disappears under paint.
Building Up Layers for a Flat Finish
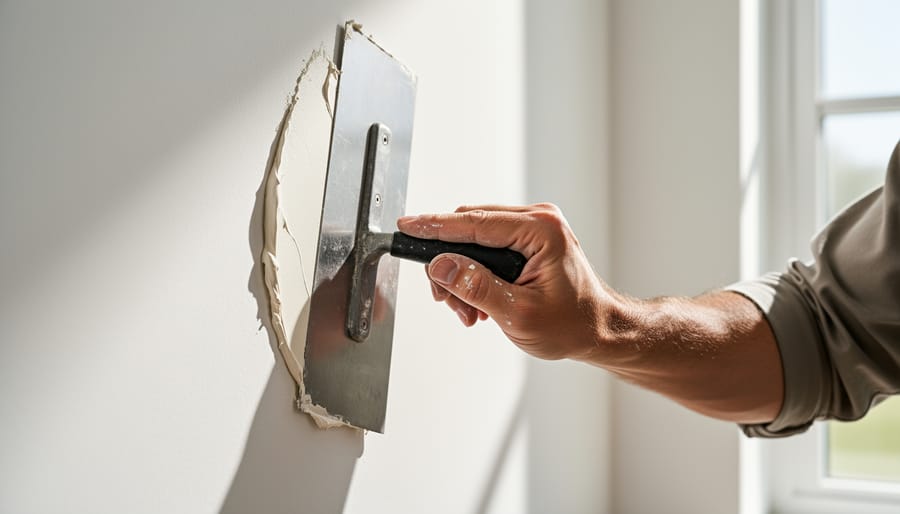
Achieving an invisible repair requires patience and multiple thin coats rather than one thick application. Start with your first coat of joint compound, applying it slightly beyond the damaged area. Let it dry completely, typically 24 hours depending on humidity and temperature. Once dry, lightly sand the surface with fine-grit sandpaper.
Apply your second coat, feathering the edges outward to blend seamlessly with the surrounding wall. This coat should extend a bit further than the first. After another 24-hour drying period, sand again using gentle circular motions.
Most repairs need a third coat to achieve that perfectly flat finish. Apply an even thinner layer, focusing on any remaining imperfections. After the final drying period, test for smoothness by running your hand across the repair with your eyes closed. You shouldn’t feel any ridges or bumps. Use a work light held at an angle to spot any remaining imperfections that might show through paint. If you detect unevenness, apply one more thin coat and repeat the process until satisfied.
Fixing Cracks That Won’t Show Through Paint
The right repair material makes all the difference when dealing with cracks. For hairline cracks less than 1/8 inch wide, lightweight spackle is your best friend. It dries quickly, usually within 30 minutes, and sands smoothly without much effort. Just press it firmly into the crack with a putty knife, scraping away excess material as you go.
Wider cracks demand a more robust approach. Joint compound provides better flexibility and durability for cracks between 1/8 and 1/4 inch. Here’s the catch: joint compound shrinks as it dries, so plan on applying two thin coats rather than one thick layer. Wait for complete drying between coats, typically 24 hours.
For cracks wider than 1/4 inch or any crack that keeps reappearing, mesh tape is essential. These persistent cracks often signal underlying movement in your walls, whether from settling, temperature changes, or structural shifts. Apply a thin layer of joint compound first, press self-adhesive mesh tape over the crack, then cover with another coat of compound. The mesh acts like a bridge, preventing the crack from telegraphing through your fresh paint.
Before making repairs, investigate what’s causing the crack. If you’re seeing recurring damage in the same spot, you might need to address moisture issues or foundation concerns. Sometimes a simple repair won’t stick until you fix the root problem. Once you’ve addressed the cause, your repair work will last for years rather than months.
The Final Prep That Separates DIY from Professional Results
Primer: The Step You Can’t Skip
Bare drywall compound is porous and absorbs paint differently than the surrounding wall, creating dull spots called “flashing” that ruin your finish. That’s why primer is non-negotiable for patched areas. Use a PVA (polyvinyl acetate) drywall primer for small repairs or a stain-blocking primer if you’re covering water damage or discoloration. Apply primer only to the repaired areas, feathering the edges slightly onto the existing paint. Let it dry completely, usually 30 minutes to an hour. This crucial step seals the compound, creates uniform texture, and ensures your topcoat goes on evenly. Skipping primer is the number one mistake that makes repairs visible, so don’t cut corners on this part of your home improvement projects. Pro tip: if you can still see the patch after priming, apply a second coat before painting.
Matching Wall Texture (When You Need To)
If your walls have texture, you’ll want to recreate it on your repaired spots so they blend seamlessly. For orange peel texture, the easiest method is using a spray can of texture from your local hardware store. Hold it about 18 inches from the wall and apply in short, light bursts. Practice on cardboard first to get the spray pattern right.
For knockdown texture, spray on the texture, then wait 10-15 minutes until it’s slightly tacky. Using a clean drywall knife held at a low angle, lightly drag across the peaks to flatten them partially. The key is gentle pressure and a consistent motion. If you’re matching an existing texture, study it closely and adjust your technique accordingly. Let the textured area dry completely, then prime and paint. With a little practice, your repair will disappear into the surrounding wall.
The Flashlight Test
Before you commit to painting, grab a flashlight and perform a simple quality check that professional painters swear by. Hold the flashlight at a low angle, nearly parallel to your repaired wall, and slowly move it across the surface. This raking light technique reveals every tiny bump, dimple, and uneven spot that overhead lighting misses. It’s like having X-ray vision for your drywall! Catch these imperfections now while they’re still easy to fix with a quick skim coat of joint compound. This two-minute test saves you from the frustration of seeing flaws magically appear after your final paint coat dries.
Common Mistakes That Ruin the Paint Job
Even when you follow all the steps carefully, sometimes things don’t turn out quite right. The good news? Most mistakes are fixable.
If your repair shows through the paint, the most common culprit is inadequate priming. The repair area absorbs paint differently than the surrounding wall, creating what’s called “flashing.” To fix this, apply a stain-blocking primer specifically to the repair area, let it dry completely, then repaint with two coats if needed.
Cracking usually means you rushed the drying process or applied compound too thickly in one go. For small cracks, scrape out the crack slightly, fill with compound, and sand smooth once dry. For persistent cracking, you may need to remove the repair completely and start over with thinner layers.
Uneven texture is another frustration. If your repair looks flat while the rest of the wall has texture, you’ll need to match it before painting. Practice your texture technique on cardboard first. Use a sponge, brush, or spray texture depending on your wall’s original finish. Let it dry, then prime and paint.
The key to avoiding these issues? Patience. Give each layer proper drying time, prime thoroughly, and don’t skip the sanding steps. Taking an extra day for proper prep beats repainting the entire wall later.
Achieving professional-looking drywall repairs doesn’t require expensive tools or years of experience—just patience and proper technique. The key is taking your time with each layer, allowing proper drying between steps, and not rushing the sanding process. With the straightforward methods covered here, you can confidently tackle holes, cracks, and dings as part of your affordable home upgrades. That said, extensive damage covering large wall sections, serious water damage, or structural concerns warrant calling a professional. But for everyday wear and tear? You’ve got this. Your repaired walls will look seamless once painted, and you’ll save money while gaining valuable skills for future projects.
