Stop Overpaying for Bathroom Fixtures That Don’t Fit Your Space
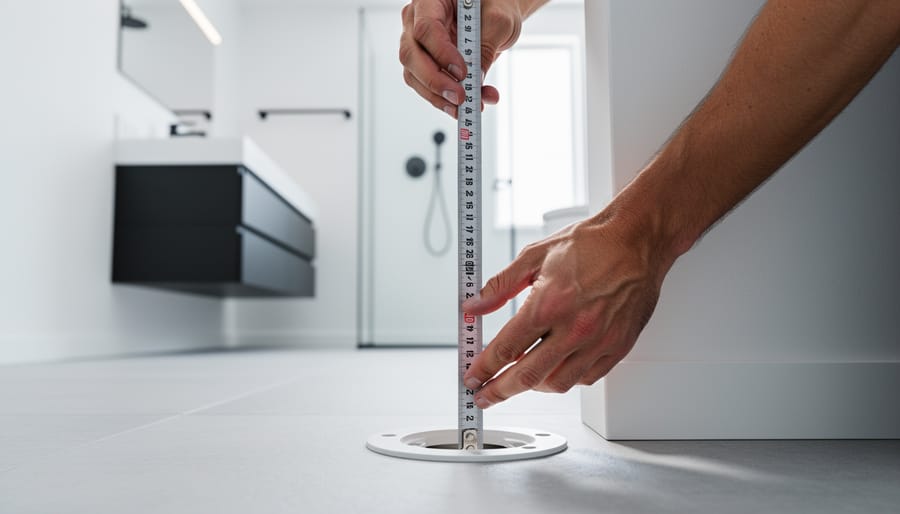
Measure your bathroom space before shopping to avoid buying fixtures that don’t fit—record distances from walls to drain pipes, water supply lines, and electrical outlets, since moving plumbing later costs hundreds or thousands of dollars. Check your existing rough-in dimensions (the distance from the wall to the toilet drain center, typically 10, 12, or 14 inches) to ensure your new toilet will install without costly modifications.
Match fixture finishes throughout your bathroom for a cohesive look, choosing between chrome, brushed nickel, oil-rubbed bronze, or matte black, and stick with one metal finish for faucets, showerheads, towel bars, and cabinet hardware. This decision affects both aesthetics and long-term maintenance, as different finishes show water spots and fingerprints differently.
Prioritize water-efficient fixtures with WaterSense certification to cut utility bills by up to 30 percent annually—look for toilets using 1.28 gallons per flush instead of older 3.5-gallon models, and low-flow showerheads delivering 2.0 GPM or less. These upgrades pay for themselves within two to three years through reduced water consumption.
Consider your household’s daily traffic when selecting fixture quality and durability. A master bathroom serving two adults needs different fixtures than a powder room used occasionally or a full bath shared by children. Whether you’re furnishing your first apartment checklist or renovating an established home, understanding your specific usage patterns prevents costly replacements and ensures long-term satisfaction with your investment.
Understanding Your Bathroom’s Real Needs Before You Shop
Measuring Your Space (And Why the Rough-In Matters)
Before you fall in love with that beautiful pedestal sink or sleek modern toilet, grab your measuring tape. Getting accurate measurements now will save you from the heartbreak of returning fixtures that don’t fit.
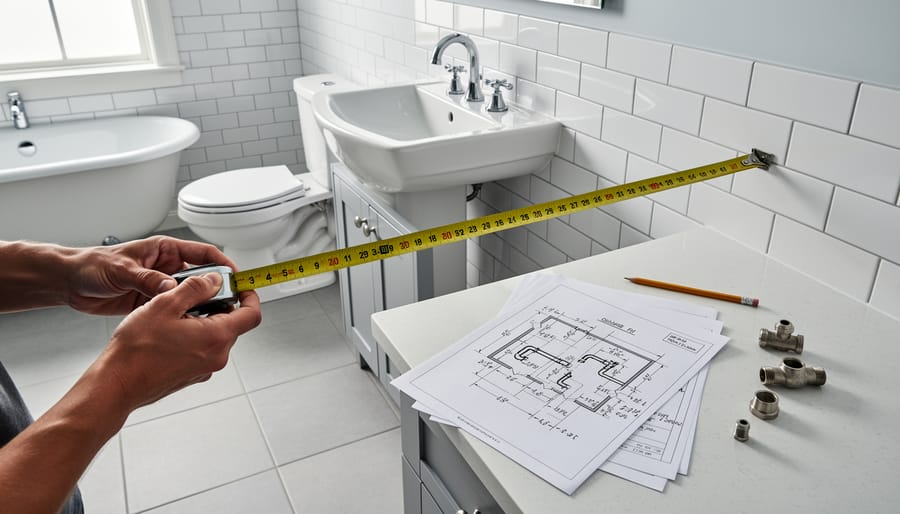
Start by measuring your bathroom’s overall dimensions, then focus on where each fixture will go. For existing bathrooms, measure the space your current fixtures occupy, plus the clearance around them. Building codes typically require at least 15 inches from the toilet centerline to any wall or fixture, and 30 inches of clear space in front.
Here’s where the rough-in becomes crucial. The rough-in distance is the measurement from your finished wall to the center of your toilet’s drainpipe. In most homes, this is 12 inches, but older houses might have 10-inch or 14-inch rough-ins. Measure from the wall (not the baseboard) to the center of the bolts holding your current toilet. Buying a toilet with the wrong rough-in means it simply won’t fit your existing plumbing.
For sinks and vanities, measure the distance between supply lines and drain locations. Note any obstacles like windows, doors, or electrical outlets that might affect placement.
Pro DIY tip: Create a simple bathroom floor plan on graph paper, marking all measurements and existing plumbing locations. Bring this with you when shopping, or keep a photo on your phone. This visual reference makes it much easier to evaluate whether new fixtures will work in your space.
Matching Fixtures to Your Water Pressure
Before you fall in love with that gorgeous rainfall showerhead or sleek kitchen faucet, let’s talk about water pressure—it’s the difference between a luxurious shower and a disappointing trickle.
Most homes operate between 40-60 PSI (pounds per square inch), which is the sweet spot for standard fixtures. Testing your current pressure takes just minutes with an inexpensive pressure gauge from any hardware store. Simply screw it onto an outdoor spigot or washing machine connection, turn on the water fully, and read the dial.
Why does this matter? Low-flow showerheads designed for moderate pressure won’t perform well if your home runs below 40 PSI—you’ll get weak spray patterns and longer rinse times. Conversely, pressure above 80 PSI can damage fixtures, cause leaks, and create annoying water hammer sounds in your pipes.
If you discover low pressure, look for fixtures specifically rated for low-pressure systems. Many modern showerheads and faucets now include pressure-compensating technology that optimizes performance across varying conditions. High pressure situations? Consider installing a pressure-reducing valve before replacing fixtures—it’ll protect your entire plumbing system and extend fixture lifespan. This simple check saves you from purchasing beautiful fixtures that simply won’t deliver the performance you expect.
Toilets: Beyond Just Flushing
One-Piece vs. Two-Piece vs. Wall-Mounted
Choosing the right toilet configuration affects both your bathroom’s look and your installation experience. Let’s break down the three main styles so you can pick what works best for your space.
One-piece toilets feature the tank and bowl molded together as a single unit. They’re sleek, easy to clean (no crevice between tank and bowl to collect dust), and generally more compact. However, they’re heavier and trickier to maneuver during installation, which might be challenging for a DIY project. They typically cost more upfront but require less maintenance over time. These work beautifully in modern bathrooms where clean lines matter.
Two-piece toilets have separate tanks and bowls bolted together during installation. They’re the most common and budget-friendly option, easier to transport and install since you can carry each piece separately. The downside? That seam between components needs regular cleaning and can eventually develop leaks. They’re perfect for straightforward replacements and traditional bathroom styles.
Wall-mounted toilets attach directly to the wall with the tank hidden inside the wall cavity. They create a floating appearance that’s stunning in contemporary spaces and make floor cleaning a breeze. Installation requires opening your wall and installing a carrier system, making this the most complex and expensive option. The hidden tank also means repairs require wall access. Choose wall-mounted toilets when you’re doing major renovations and want maximum floor space in smaller bathrooms.
Flushing Technology That Actually Works
Understanding how your toilet actually flushes makes a huge difference when choosing the right one for your home. Let’s break down the three main systems you’ll encounter.
Gravity-fed toilets are the traditional workhorses of bathroom fixtures. They use, well, gravity to pull water from the tank into the bowl, creating a siphon effect that clears waste. These are the quietest option and the easiest to repair yourself, with readily available parts at any hardware store. They’re perfect for most residential bathrooms and work reliably without much fuss. The downside? They sometimes need a second flush for solid waste.
Pressure-assisted toilets use compressed air trapped in the tank to force water into the bowl with serious power. If you’ve ever heard a toilet that sounds like a jet engine taking off, that’s pressure-assisted technology. These rarely need double-flushing and are excellent for commercial spaces or homes with multiple people. However, they’re noticeably louder and replacement parts can be pricier and harder to find.
Dual-flush systems give you two buttons: one for liquid waste (using less water) and another for solid waste (full flush). These are the water conservation champions, potentially saving thousands of gallons annually. They’re ideal if you’re environmentally conscious or have high water bills. Most use gravity-fed technology, so repairs stay straightforward.
For most homeowners, we recommend gravity-fed or dual-flush systems. Save pressure-assisted models for high-traffic commercial spaces or large families where clogging is a persistent problem.
Comfort Height and ADA Compliance
Comfort height toilets, typically 17-19 inches tall compared to standard 15-inch models, make sitting and standing easier for most adults. These taller fixtures align with ADA (Americans with Disabilities Act) guidelines and work beautifully for aging-in-place design without looking institutional.
When selecting comfort height options, consider who’ll use the bathroom most. Taller users often find them more comfortable, while households with young children might prefer standard heights or use step stools temporarily. Many manufacturers now offer comfort height versions across their product lines at minimal price differences.
For true accessibility, look beyond height. ADA-compliant fixtures include grab bar compatibility, lever-style handles instead of knobs, and adequate clearance space around the toilet (60-inch turning radius for wheelchairs). Wall-mounted sinks with knee clearance underneath accommodate wheelchair users while maintaining a sleek appearance.
Installing comfort height fixtures now costs the same as standard versions but adds significant resale value and future-proofs your home. Position blocking behind walls during installation to support grab bars later, even if you don’t install them immediately. This simple step makes future modifications much easier and less expensive.
Sinks and Faucets: Function Meets Style
Sink Styles and Mounting Options
Your sink choice dramatically influences both your bathroom’s functionality and aesthetic appeal. Let’s explore the main mounting styles to help you find the perfect fit for your space.
Undermount sinks attach beneath the countertop, creating a seamless, modern look that’s incredibly easy to clean. Simply wipe debris straight into the sink without worrying about a raised rim. These work best with solid countertop materials like granite or quartz and require professional installation for proper support and waterproofing.
Vessel sinks sit on top of the counter like decorative bowls, making a bold design statement. They’re perfect for powder rooms or when you want to create a spa-like atmosphere. Keep in mind you’ll need a compatible faucet with adequate height clearance and should consider counter space for everyday items.
Drop-in sinks are the most common DIY-friendly option, with a rim that rests on the countertop. They’re affordable, easy to install, and work with virtually any counter material. The downside? That rim can collect grime and makes wiping the counter slightly less convenient.
Pedestal sinks combine classic elegance with space-saving benefits, ideal for small bathrooms or achieving a cozy bathroom design. However, they offer minimal storage underneath, so plan accordingly.
Wall-mounted sinks float above the floor, creating an ultra-modern, minimalist look while making floor cleaning effortless. They require solid wall backing and exposed plumbing, though decorative pipe covers can enhance the aesthetic. These are excellent for tight spaces and accessible design requirements.
Faucet Configurations and Valve Types
When you’re standing in the plumbing aisle staring at rows of faucets, understanding the basic configurations can save you from buyer’s remorse and future headaches.
Single-handle faucets operate with one lever that controls both temperature and water flow. They’re incredibly user-friendly and perfect for smaller sinks where space is tight. You’ll find them easier to install and they typically cost less than their double-handle cousins. The downside? Some people find it tricky to get the exact temperature they want on the first try.
Double-handle faucets feature separate hot and cold controls, giving you precise temperature control. They offer a classic look that works beautifully in traditional bathroom designs. Just keep in mind that two handles mean two potential points for leaks down the road.
Next, let’s talk mounting styles. Centerset faucets have handles and spout mounted on a single base, with holes spaced four inches apart. They’re the most common option and work great for standard bathroom sinks. Widespread faucets have separate components, typically requiring three holes spaced eight inches apart. They deliver a high-end, custom look but require more counter space.
The real longevity secret lies in the cartridge type inside your faucet. Ceramic disc cartridges are the gold standard, lasting longest and providing smooth operation for years. Compression cartridges are budget-friendly but wear out faster. Ball-type and cartridge systems fall somewhere in the middle.
When shopping, ask about replacement parts availability. Even premium faucets eventually need repairs, and you’ll thank yourself later when parts are easy to find and swap out without calling a plumber.
Finishes That Last (And Those That Don’t)
Chrome remains the most durable and budget-friendly option, resisting corrosion and water spots with simple cleaning. It’s practically indestructible and works in any bathroom style. Brushed nickel offers similar longevity with a softer look that hides fingerprints and water marks better than chrome, though it costs slightly more.
Oil-rubbed bronze delivers stunning character but demands more maintenance. The protective coating can wear through with aggressive cleaning, and it shows water spots easily. If you love the look, commit to gentle cleaning with mild soap and immediate drying after each use.
Matte black has surged in popularity, but buyer beware: quality varies wildly. Premium matte black finishes resist scratching and maintain their color, while budget versions can chip or fade within months. This finish shows every water drop and requires daily wiping to look its best. Consider it high-maintenance but high-impact.
For longevity, stick with physical vapor deposition finishes when available. They cost more upfront but resist tarnishing, scratching, and corrosion far better than standard coatings. Whatever finish you choose, avoid abrasive cleaners and rough sponges to maximize lifespan.
Showers and Tubs: Creating Your Personal Retreat
Tub Types for Every Bathroom Size
Choosing the right tub size and style can transform your bathroom from cramped to comfortable. Let’s break down your options based on the space you’re working with.
Alcove tubs are the most common choice for standard bathrooms, fitting snugly between three walls. These typically measure 60 inches long and are budget-friendly with straightforward installation. If you’re handy with basic plumbing, this is your most DIY-friendly option, though you’ll still want a helper for the heavy lifting.
Freestanding tubs make a stunning statement piece but demand breathing room on all sides. Plan for at least 6 inches of clearance around the tub, making them ideal for spacious master bathrooms. Installation complexity increases since plumbing often needs floor or ceiling access, and you’ll likely need professional help.
Corner tubs maximize awkward spaces while offering a luxurious soaking experience. They work beautifully in medium-sized bathrooms where a standard tub feels cramped. Installation sits somewhere between alcove and freestanding in terms of difficulty.
Walk-in tubs prioritize safety and accessibility with built-in doors and seats. While they require similar floor space to alcove tubs, installation is more complex due to door seals and additional plumbing for faster drainage. Professional installation is strongly recommended to ensure proper waterproofing and functionality.
Shower Configurations and Door Options
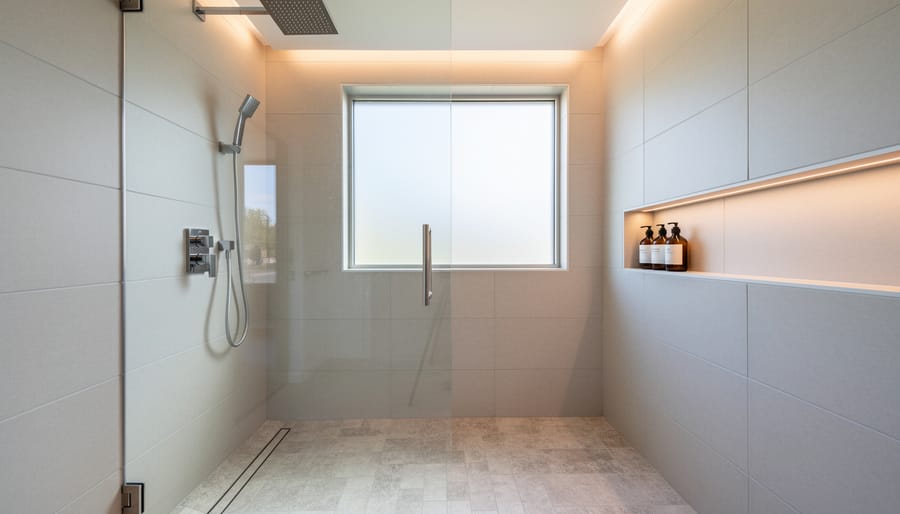
Your shower configuration depends largely on your bathroom layout and available space. Alcove showers fit snugly between three walls, making them ideal for smaller bathrooms and offering the most budget-friendly installation. Corner showers tuck into—you guessed it—corners, saving floor space while providing decent elbow room. Walk-in showers create that luxurious spa feel and work beautifully in larger bathrooms, though they require careful planning to prevent water from escaping. Neo-angle showers feature an angled front door that maximizes space in tight corners, perfect for compact bathrooms that need every square inch.
When it comes to glass doors, you’ll choose between frameless and framed options. Frameless doors deliver a sleek, modern look with minimal hardware, making your bathroom feel more spacious and easier to clean. They’re pricier but add serious visual appeal. Framed doors use metal frames around the glass panels, offering more structural support at a lower price point. They’re practical and durable, though the frames can collect soap scum.
For DIY installation, framed doors are more forgiving since the frame provides stability. Frameless doors typically require professional installation to ensure proper alignment and prevent leaks. Consider your bathroom’s style, your budget, and whether you’ll tackle installation yourself when making your selection.
Showerheads and Valve Systems Worth the Investment
Modern showerheads transform your daily routine while potentially saving water and money. Rain heads deliver a luxurious, spa-like downpour from overhead, typically ranging from 8 to 12 inches in diameter. Look for models with flow rates around 2.0 gallons per minute to balance indulgence with efficiency.
Handheld options offer flexibility for everything from washing kids and pets to cleaning the shower itself. Many quality systems combine a fixed showerhead with a detachable wand on a slide bar, giving you the best of both worlds.
Body sprays create a surrounding water experience by mounting multiple jets along shower walls. These work best with adequate water pressure and a larger water heater to maintain temperature.
Thermostatic valves are worth every penny for safety and comfort. They maintain consistent water temperature even when toilets flush or dishwashers start, preventing dangerous scalding. Digital displays show exact temperatures, perfect for households with children or elderly family members.
For water efficiency, choose WaterSense certified models that use 20 percent less water without sacrificing performance. Install low-flow aerators and consider a shower timer to monitor usage. Most quality valve systems accept different showerhead styles, so you can upgrade components individually as your budget allows.
Material Choices That Impact Your Budget and Maintenance
Choosing the right material for your bathroom fixtures isn’t just about aesthetics—it directly affects how much you’ll spend upfront and how much time you’ll invest in maintenance down the road.
Porcelain and vitreous china are the workhorses of bathroom fixtures, particularly for toilets and sinks. These materials are essentially the same thing, with vitreous china being porcelain coated with a glassy enamel finish. They’re incredibly durable, stain-resistant, and easy to clean with regular household cleaners. Expect these fixtures to last 20-30 years or more with minimal care. The downside? They’re heavy and can chip if you drop something hard on them.
Acrylic is a popular choice for bathtubs and shower bases, and for good reason. It’s lightweight, warm to the touch, and budget-friendly. Acrylic fixtures resist chipping better than porcelain and come in countless colors and styles. However, they can scratch more easily, so stick to non-abrasive cleaners. With proper care, quality acrylic fixtures last 10-15 years.
Fiberglass is the most affordable option for tubs and shower enclosures, making it perfect for rental properties or tight budgets. The trade-off is durability—fiberglass is prone to scratching, cracking, and fading over time. You’ll typically need to replace these fixtures within 10 years, sometimes sooner with heavy use.
Cast iron tubs are the luxury option, coated with a porcelain enamel finish. They’re exceptionally durable, retain heat beautifully, and can last 50 years or more. The catch is weight—they’re extremely heavy and may require floor reinforcement. They’re also the priciest option upfront.
Composite materials, like quartz or granite composites for sinks, offer the best of both worlds: durability similar to stone with easier maintenance. They resist stains and scratches well but typically cost more than standard porcelain options. Expect 15-25 years of service with basic care.
Smart Technology Integration for Modern Bathrooms
Modern bathrooms are getting smarter, and the good news is that many tech upgrades are easier to install than you might think. These innovations combine convenience with efficiency, making your daily routine more comfortable while potentially reducing water and energy consumption.
Touchless faucets lead the pack for accessible upgrades. They reduce germ spread and water waste, and many models simply replace your existing faucet. Look for battery-powered options to avoid electrical work. Installation typically takes under an hour if you’re comfortable with basic plumbing—just follow the manufacturer’s mounting instructions and connect the batteries or AC adapter.
Smart toilets offer features like heated seats, bidet functions, and automatic lids. While full smart toilets require professional installation, you can achieve similar benefits with bidet seat attachments that fit standard toilets. These DIY-friendly additions connect to your existing water line and a nearby outlet, transforming your current toilet without major renovation.
Digital shower controls let you preset water temperature and flow, eliminating the morning guessing game. Basic models can replace standard shower valves with moderate plumbing skills, though complex systems with multiple spray heads benefit from professional installation. For smart home integration, choose Wi-Fi enabled models that work with your existing ecosystem.
Heated floors deliver luxury underfoot and can be retrofitted during bathroom renovations. Electric mat systems install beneath new tile and require an electrician to connect to a dedicated circuit. While not strictly DIY, the comfort factor makes this investment worthwhile for cold climates.
When selecting smart fixtures, prioritize compatibility with your home’s existing systems and choose reputable brands with solid warranties and customer support.
What to Spend and What to Save On
Smart budgeting starts with understanding where quality truly matters. Your faucet is worth the investment. You’ll use it dozens of times daily, and a well-made faucet with ceramic disc valves can last 15-20 years compared to 3-5 years for budget models. Look for solid brass construction and reputable brands offering lifetime warranties. The same applies to your toilet. A quality dual-flush or WaterSense model saves water and reduces maintenance headaches, paying for itself through lower bills and fewer repairs.
Showerheads offer excellent savings opportunities. You don’t need to spend hundreds on designer models when mid-range options deliver the same water pressure and spray patterns. Check flow rates and read reviews rather than focusing on brand prestige. Similarly, towel bars, toilet paper holders, and other accessories provide minimal return on premium spending. Save your money here and choose attractive mid-range options that match your finish.
Vanities present a middle ground. Solid wood cabinets with dovetail joints justify higher prices if you’re staying long-term, but quality laminate or engineered wood works beautifully for shorter timelines or rental properties. Focus your budget on soft-close hinges and drawer glides, which dramatically improve daily experience.
For finding quality at lower prices, shop seasonal sales at big-box stores, particularly during holiday weekends. Floor models and discontinued finishes offer deep discounts on identical performance. Online retailers frequently undercut showroom prices by 20-30 percent. Similar to smart appliance shopping, comparing specifications across price points reveals where you’re paying for features versus branding.
Consider mixing price points strategically. Pair a premium faucet with a budget mirror, or invest in luxury tile while choosing affordable grout and sealant. This approach maximizes impact where you interact most while keeping overall costs reasonable. Remember, installation quality matters as much as fixture quality, so don’t cut corners on professional help for complex plumbing work.
Installation Realities: When to DIY and When to Call a Pro
Let’s be real: some bathroom fixture installations are weekend projects, while others can turn into plumbing nightmares that cost thousands to fix. Here’s how to know which category your project falls into.
The Safe Zone for DIYers
Toilet replacement is surprisingly manageable if you’re swapping like-for-like with matching rough-in measurements. If your floor flange is in good shape and you’re comfortable with basic tools, this falls into the DIY installation category. The same goes for faucet replacement when you’re not changing plumbing locations. Showerheads, towel bars, and medicine cabinets? Absolutely tackle these yourself.
Replacing a vanity with a drop-in sink becomes doable when the existing plumbing lines up perfectly with your new fixture. Just remember: if the shutoff valves are corroded or haven’t been turned in years, don’t force them. That’s your sign to call backup.
When to Speed-Dial a Professional
Anything involving moving water lines or drain pipes needs a licensed plumber. This includes relocating sinks, installing wall-mounted toilets, or adding new shower valves. These jobs require knowledge of building codes, proper venting, and waterproofing that most homeowners don’t possess.
Tub and shower installations are also professional territory. One mistake with waterproofing membranes or drain assembly can lead to hidden water damage that won’t show up until you’re facing rotted subfloors and mold remediation bills.
If your project requires soldering copper pipes, rerouting gas lines for a tankless water heater, or working with cast iron drains, protect your investment and hire a pro. The permit and inspection process alone makes professional help worthwhile for major plumbing work.
Here’s the truth about bathroom fixtures: the shiniest, trendiest option isn’t always the right one for your home. What works beautifully in a magazine spread might be a maintenance nightmare in your actual bathroom, or worse, incompatible with your existing plumbing setup.
Before you commit to anything, take the time to measure your space properly. And yes, measure twice. There’s nothing quite as frustrating as falling in love with a freestanding tub only to discover it won’t fit through your doorway. Similarly, research thoroughly before purchasing. Read reviews from real homeowners who’ve lived with these fixtures for months or years, not just the glowing descriptions on product pages.
Think carefully about how you actually use your bathroom. A rainfall showerhead looks amazing, but if you have low water pressure, it’ll deliver a disappointing trickle. That ultra-modern wall-mounted toilet might look sleek, but consider whether you have the right wall structure to support it. Match your fixtures to your lifestyle, your home’s capabilities, and your honest maintenance commitment.
Smart choices today prevent expensive regrets tomorrow. Ripping out and replacing fixtures because you chose style over substance gets costly fast, both in materials and labor. Take your time, ask questions, consult with professionals when needed, and prioritize function alongside form. Your future self will thank you every single day when your bathroom works exactly as it should.
