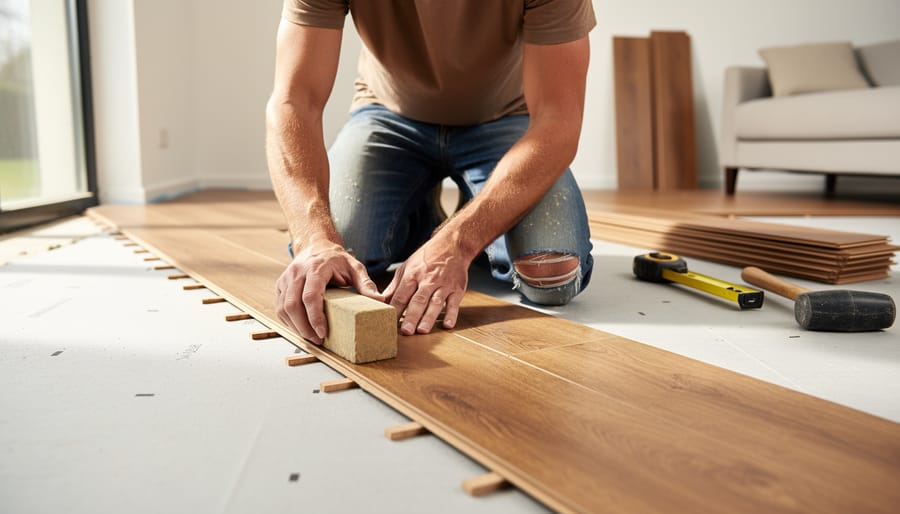
Install Laminate Flooring Like a Pro Without Hiring One
Transform your living space and save hundreds of dollars by installing laminate flooring yourself—a project that’s entirely achievable in a weekend with the right guidance. Unlike beginner DIY projects, laminate installation requires careful planning, but theClickLock technology in modern laminate planks has revolutionized the process, eliminating the need for glue or specialized carpentry skills.
Start by calculating your square footage and adding 10% extra for cuts and mistakes—this buffer prevents mid-project runs to the hardware store. Acclimate your planks in the installation room for 48 hours before beginning, as temperature and humidity changes cause expansion that could ruin your finished floor. Clear the entire space, remove baseboards carefully for reuse, and ensure your subfloor is completely level within 3/16 inch over 10 feet, using self-leveling compound where needed.
The installation itself follows a systematic left-to-right, row-by-row approach that even first-timers can master. You’ll need just a few basic tools: a circular saw or laminate cutter, tapping block, pull bar, spacers, and measuring tape. Most importantly, maintain that critical quarter-inch expansion gap along all walls—laminate needs room to breathe with seasonal changes.
This guide walks you through every step, from subfloor preparation to that final satisfying click of the last plank, ensuring your DIY laminate floor looks professionally installed.
Why Laminate Is Your Best Friend for DIY Installation
If you’re considering a flooring upgrade but worried about your DIY skills, laminate flooring might just become your new favorite material. Unlike hardwood, which requires precise nailing and professional-level finishing, or vinyl that demands perfectly smooth subfloors, laminate flooring is remarkably forgiving and designed with DIYers in mind.
The game-changer here is the click-lock system. Most modern laminate planks simply snap together like puzzle pieces, requiring no glue, nails, or special tools beyond basic equipment you probably already own. You can literally hear when the planks lock correctly, giving you instant feedback that you’re doing it right. Made a mistake? No problem. The planks can be pulled apart and repositioned without damage, something you definitely can’t do with glued-down vinyl or nailed hardwood.
Laminate’s durability also works in your favor during installation. The tough wear layer means you won’t scratch or dent the surface while working, even if you accidentally drop tools or drag materials across it. This resilience extends to your finished floor, making it perfect for high-traffic areas or homes with pets and kids.
Perhaps the biggest advantage is that laminate doesn’t require acclimation like hardwood does. While it’s good practice to let it sit in the room for 48 hours, the consequences of skipping this step are far less severe than with real wood. Whether you’re tackling a bedroom makeover or improving your workspace, laminate gives you room for minor errors without ruining your investment. The floating installation method means individual planks can even be replaced years later if needed, offering peace of mind that one mistake won’t doom your entire project.
Everything You Need Before You Start
Essential Tools and Materials
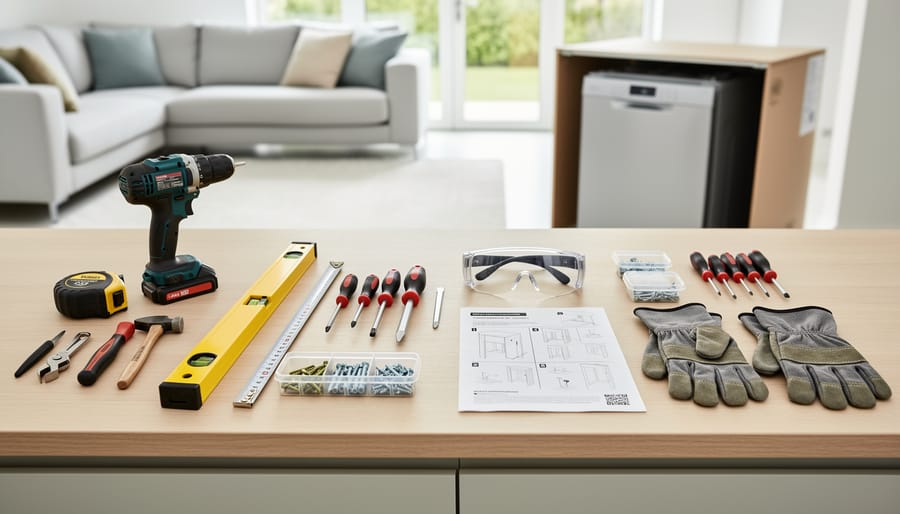
Before you dive into your laminate flooring project, gathering the right tools and materials will make the installation process smoother and more enjoyable. Start with your laminate planks—calculate your room’s square footage and add 10% extra for cuts and future repairs. You’ll also need quality underlayment, which provides cushioning and moisture protection beneath your floor.
Your toolkit should include spacers to maintain proper expansion gaps along walls, a reliable tape measure for accurate measurements, and a sharp utility knife for trimming underlayment. A tapping block and rubber mallet are essential for clicking planks together without damaging edges. Don’t forget a speed square or carpenter’s square for marking straight cut lines.
Other helpful items include masking or duct tape to secure underlayment seams, a pull bar for those tricky last-row installations, and safety glasses for protection during cutting. A circular saw or miter saw will handle plank cuts, though a handsaw works for smaller jobs. Finally, grab pencils for marking and a clean broom for keeping your workspace debris-free. Having everything ready before starting ensures you won’t interrupt your flow with trips to the hardware store.
Optional Items That Make Life Easier
While you can absolutely install laminate flooring with just the basics, a few specialized tools can transform your project from a weekend marathon into a smooth, frustration-free experience.
A pull bar is your best friend for those tricky last rows where your tapping block won’t fit. This flat metal bar with angled ends helps you snap planks together in tight spaces along walls. You’ll thank yourself for having one when you reach those final boards.
Consider renting or buying a jamb saw if you need to undercut door frames. This specialized saw cuts horizontally at floor level, allowing you to slide flooring neatly underneath trim instead of removing it. The clean result looks professional and saves hours of trim work.
A laminate flooring cutter works like a paper guillotine for planks. It makes perfectly clean, dust-free cuts in seconds without the noise of a power saw. If you’re installing in an occupied home or apartment, neighbors will appreciate the quieter approach.
A quality miter saw stand can also be a game-changer, giving you a stable, portable cutting station that saves your back from constant bending. While these tools add to your initial investment, they reduce installation time and physical strain considerably, especially for larger rooms.
Prep Work That Prevents Problems Later
Checking and Preparing Your Subfloor
Before you start laying down beautiful new laminate, you need a solid foundation. Your subfloor must be clean, dry, and level—think of it as the canvas for your flooring masterpiece.
Start by checking for levelness using a long straight edge or carpenter’s level. Move it across the floor in different directions, looking for gaps underneath. Laminate flooring requires strict tolerances: no more than 3/16 inch variation over a 10-foot span, or 1/8 inch over a 6-foot span. Any dips or humps beyond this will cause your flooring to flex, gap, or even break over time. If you discover significant unevenness, you’ll need to fix uneven subfloors using self-leveling compound for low spots or sanding for high areas.
Next, remove any existing flooring materials like old carpet, vinyl, or damaged tiles. Don’t forget to pull up tack strips, staples, and nails—these little troublemakers will telegraph through your new floor.
Now comes the deep clean. Sweep thoroughly, then vacuum every corner. Any debris, even small pebbles or dust buildup, can create bumps under your laminate. Check for moisture issues by taping plastic sheets to the concrete overnight; condensation underneath means you need a moisture barrier.
Finally, repair any damaged areas. Fill cracks with patching compound and replace any rotten or severely damaged wood sections. Your subfloor should be structurally sound before proceeding.
Acclimating Your Laminate
Before you start laying planks, give your laminate flooring time to adjust to your home’s environment. Laminate expands and contracts with temperature and humidity changes, so skipping this step can lead to buckling, warping, or gaps down the road.
Store the unopened boxes flat in the room where you’ll install them for at least 48 hours before beginning. Ideally, maintain room temperature between 60-80°F during this period. This acclimation time lets the material stabilize to match your home’s conditions, ensuring a proper fit and long-lasting results.
If you rush this step, you might not notice problems immediately, but within weeks or months, you could see boards lifting at the seams or unsightly gaps appearing. Think of it as letting your flooring get comfortable in its new home before permanently settling in. A little patience now saves you from costly repairs later.
Room Preparation Checklist
Before you lay a single plank, proper room preparation sets you up for success. Start by carefully removing your baseboards using a pry bar and hammer. Label each piece with painter’s tape so reinstallation is a breeze later. Next, tackle those door jambs by undercutting them with a handsaw or jamb saw. This allows your laminate to slide neatly underneath for a professional finish. Simply lay a plank next to the jamb as a height guide and cut horizontally.
Planning your layout direction matters more than you might think. Generally, running planks parallel to the longest wall creates visual flow and makes smaller rooms feel larger. If natural light streams through windows, consider running planks in the same direction as the light enters.
Now for the math. Measure your room’s length and width in feet, multiply them together for square footage, then add 10 percent for cuts and mistakes. Divide this number by the coverage per box (listed on packaging) to determine how many boxes you need. Pro tip: order an extra box. Leftover planks are perfect for future repairs, and returning unopened boxes is easier than running short mid-project.
Installing Your Laminate Floor Step-by-Step
Laying the Underlayment
Underlayment is your flooring’s best friend, providing cushioning, sound reduction, and moisture protection. You’ll typically choose between foam, cork, or combination underlayment with an attached vapor barrier. For concrete subfloors, a moisture barrier is essential, while wood subfloors may only need basic padding depending on your home’s humidity levels.
Start by rolling out the underlayment perpendicular to the direction you’ll lay your planks. This prevents seams from aligning with your flooring seams, which could create weak spots. Cut pieces to fit using a utility knife, being careful not to overlap sheets. Instead, butt the edges together tightly and secure them with the manufacturer’s recommended tape, usually moisture-resistant or aluminum tape for vapor barriers.
Pay special attention to seams, ensuring they’re completely sealed to prevent moisture from seeping through. If your underlayment doesn’t have a built-in vapor barrier and you’re installing over concrete, lay down a separate 6-mil plastic sheeting first, overlapping edges by at least eight inches and taping them securely.
Pro tip: Some laminate flooring comes with pre-attached underlayment, eliminating this step entirely. Always check your flooring specifications before purchasing separate underlayment to avoid doubling up unnecessarily.
Starting Your First Row Right
Getting your first row right sets the foundation for your entire floor, so let’s make sure it’s spot-on. First, decide which direction to lay your planks. Running them parallel to the longest wall typically makes rooms feel more spacious, while installing perpendicular to floor joists provides extra stability in upper-level rooms. Natural light from windows also plays a role—planks running toward light sources tend to minimize visible seams.
Next, choose your starting wall. Pick the straightest, longest wall in the room, ideally one without doorways. This becomes your reference point for everything that follows. Don’t assume your walls are perfectly straight—they rarely are! Measure from your chosen wall to the opposite side at several points to identify any irregularities.
Now for those expansion gaps. Laminate flooring expands and contracts with temperature and humidity changes, so you need space around all edges. Insert quarter-inch spacers along your starting wall and both side walls before laying any planks. These simple plastic wedges maintain consistent gaps and prevent buckling down the road.
Here’s the critical part: ensuring that first row is laser-straight. Even minor angles multiply across the room, creating noticeable problems later. Use a chalk line or straight edge to mark your guideline. Double-check measurements at both ends before clicking planks together. Some installers recommend dry-fitting the first three rows without locking them to verify alignment. Take your time here—rushing this step causes headaches you’ll regret when you’re halfway across the room.
The Click-Lock Technique That Works Every Time
Getting those planks to snap together properly is where the magic happens. The click-lock system is designed to make your life easier, but there’s a technique to it that’ll save you frustration.
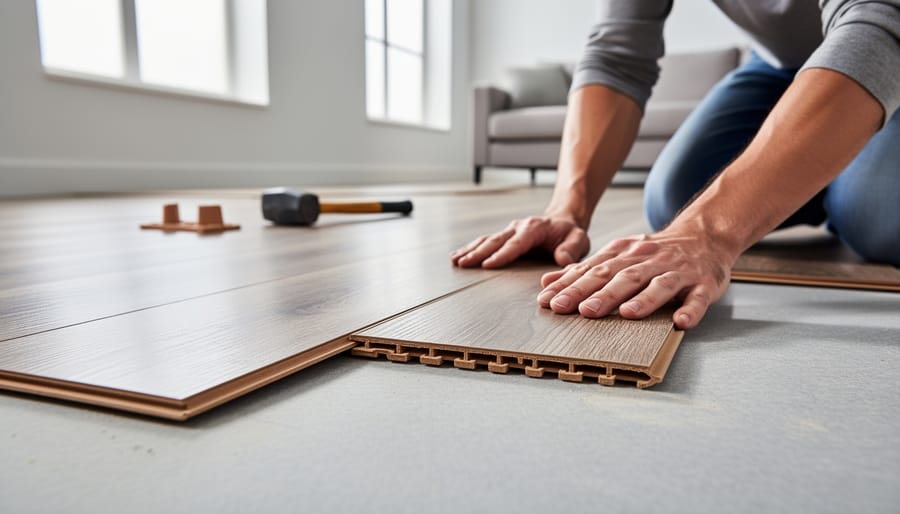
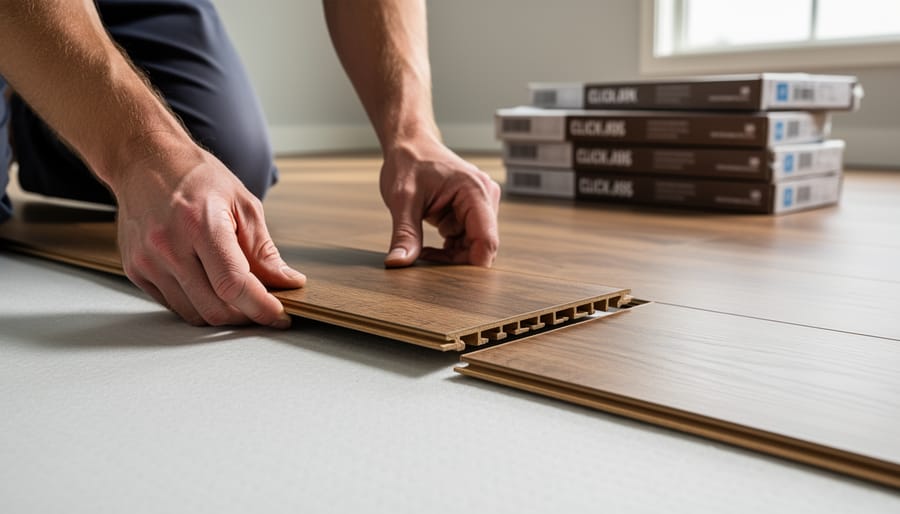
Start by holding your plank at about a 30-degree angle to the already-installed row. Line up the tongue edge with the groove of the previous plank, then gently lower it down. You should hear a satisfying click when it locks into place. If you don’t hear that click, it’s not fully engaged, and you’ll end up with gaps.
For those stubborn planks that won’t quite lock in, this is where your tapping block becomes your best friend. Place the block against the plank edge and give it a few firm taps with your hammer. The block distributes the force evenly, preventing damage to the plank edges. Never hammer directly on the flooring itself, that’s a rookie mistake that’ll leave you with chipped edges.
Maintaining tight seams is all about working methodically. As you complete each row, run your hand along the seams to check for any separation. If you feel a gap, use your tapping block to close it up before moving to the next row.
Here’s the golden rule for professional-looking results: stagger your end joints by at least 12 inches between rows. This creates a more natural appearance and dramatically increases the floor’s structural integrity. Think of it like bricklaying, you never want seams lining up vertically. This pattern also helps distribute weight and foot traffic more evenly across your entire floor.
Cutting Planks for Edges and Obstacles
Getting a perfect fit around edges and obstacles is easier than you’d think. For width cuts along walls, measure the distance from the wall to your last full plank, subtract your expansion gap (usually 1/4 inch), and mark this measurement on your plank. Use a straightedge as a guide and score the plank with a utility knife, then snap it cleanly along the line. A simple jigsaw works great for these cuts too.
For door frames, the easiest approach is undercutting the frame itself. Use a small handsaw to trim the bottom of the door jamb just high enough to slide the laminate underneath. This creates a cleaner look than trying to notch around it.
Pipes and vents require a bit more patience. Measure their exact position and diameter, then transfer these measurements to your plank. Drill a hole slightly larger than the pipe diameter (remember that expansion gap), then cut a straight line from the hole to the plank edge. After installation, the cut piece slides back into place, and you can cover the gap with an inexpensive pipe collar from any hardware store.
For irregular corners, create a simple template using cardboard or paper. Trace the shape, transfer it to your plank, and cut carefully with your jigsaw. Take your time with these custom cuts—they’ll make your installation look professionally done.
Finishing the Last Row Without Frustration
The final row requires a bit more finesse, but you’ve got this! Measure the gap between your last installed plank and the wall, remembering to account for your expansion space. Subtract about 3/8 inch for breathing room, then use a straight edge and utility knife to score and snap planks to width. If you’re working with especially tight spaces, a table saw or circular saw gives cleaner cuts.
Here’s where your pull bar becomes your best friend. Since you can’t use your hands to angle and click that last row into place, slide the pull bar’s hooked end against the plank edge and tap gently with your hammer. The leverage pulls the plank snugly into the previous row. Work in short sections rather than trying to install the entire length at once.
For those ultra-tight spots near doorways or odd corners, trim planks lengthwise as needed and consider using a tapping block turned sideways. Take your time with these final pieces since they’re highly visible. Once everything clicks together beautifully, stand back and admire your work—you’ve just conquered one of DIY’s most rewarding projects!
Common Mistakes (And How to Avoid Them)
Even experienced DIYers can stumble during laminate installation, but knowing what to watch for makes all the difference. Let’s walk through the most common mistakes and how to dodge them.
The biggest culprit? Skipping acclimation. Many people are eager to start and lay planks immediately after bringing them home. Your laminate needs at least 48 hours to adjust to your home’s temperature and humidity. Otherwise, you’ll end up with buckling or gaps later. Simply leave the unopened boxes in the installation room for two days before starting.
Not leaving expansion gaps is another frequent problem. Laminate expands and contracts with temperature changes, so you need that quarter-inch gap around all room edges and fixed objects. Use spacers religiously during installation, and don’t remove them until you’re completely finished. If you’ve already installed without gaps, you’ll need to trim the edges with a jamb saw or circular saw to create that necessary space.
Installing on an uneven subfloor creates a bouncy, noisy floor that won’t last. Always check for levelness using a long level or straight edge. Any dips or bumps over 3/16 inch across 10 feet need fixing with leveling compound or sanding. Trust me, this prep work saves massive headaches later.
Forgetting the underlayment or installing it incorrectly dampens both sound and comfort. Make sure seams are taped and there are no gaps or overlaps. Some laminate comes with attached underlayment, so check before doubling up unnecessarily.
Finally, forcing planks together damages the locking mechanisms. If a plank won’t click easily, check the angle or look for debris in the groove. A gentle tap with a tapping block and rubber mallet should be all you need. Forcing it means something’s wrong, so stop and reassess before creating permanent damage that requires plank replacement.
Finishing Touches That Make It Look Professional
You’re in the home stretch! Installing the finishing elements is what transforms your DIY laminate floor from a functional surface into a polished, professional-looking result. These final touches hide gaps, create smooth transitions, and give your project that store-bought quality you’re after.
Start with transition pieces between rooms and where your laminate meets different flooring types. T-moldings work perfectly when connecting two laminate floors of equal height, while reducer strips handle transitions to lower surfaces like vinyl or tile. For doorways, you’ll want threshold strips that bridge the gap and create a clean line between spaces. Measure each opening carefully, cut your transition piece to length with a hacksaw or miter saw, and secure it according to the manufacturer’s instructions—some snap into tracks while others require adhesive or screws.
Next, install your baseboards to cover the expansion gap around the room’s perimeter. If you’re reusing your original baseboards, simply nail them back into place. For new baseboards, use a miter saw to cut 45-degree angles at corners for seamless joins. Nail them into the wall studs, not the flooring, so your laminate can still expand and contract freely.
Quarter round molding adds the final touch, concealing any remaining gaps between baseboards and flooring. This flexible trim adapts to minor floor irregularities and gives a finished look. Attach it to the baseboard with finishing nails, placing them at slight downward angles.
Fill all nail holes with wood filler, let dry, and touch up with paint. Step back and admire your work—you’ve just completed a professional-quality laminate installation!
Caring for Your New Laminate Floor
Congratulations on completing your laminate floor installation! Now let’s keep it looking fantastic for years to come with some straightforward maintenance practices.
For daily cleaning, simply sweep or vacuum with a soft brush attachment to remove dirt and debris that can cause scratches. When it’s time for a deeper clean, use a damp microfiber mop with a laminate-specific cleaner or a solution of one cup white vinegar mixed with a gallon of warm water. The key word here is damp, not soaking wet. Excess water is laminate’s worst enemy, so always wring out your mop thoroughly.
Here’s what to avoid: Never use steam mops, abrasive cleaners, wax-based products, or polishes on your laminate. These can damage the protective layer or leave a dull film that’s tough to remove. Skip the furniture polish and oil soaps too.
Preventing damage is easier than fixing it. Place felt pads under furniture legs and use area rugs in high-traffic zones. Welcome mats at entryways will catch dirt and grit before they reach your floor. If you have rolling chairs, invest in a protective mat designed for hard floors.
Address spills immediately by blotting them up with a soft cloth. For stubborn spots like nail polish or permanent marker, use acetone on a clean cloth, then wipe the area with a damp cloth.
With these simple habits, your beautiful new floor will maintain its fresh appearance and serve you well for many years ahead.

Congratulations! You’ve just completed a beautiful laminate flooring installation that transforms your space and saves you hundreds, possibly thousands, of dollars. Take a moment to admire your handiwork—you’ve earned it. By choosing to tackle this project yourself, you’ve joined the ranks of successful DIY enthusiasts who understand that with the right guidance and a bit of patience, professional results are absolutely within reach.
The skills you’ve developed during this installation will serve you well on future projects. You’ve learned about proper subfloor preparation, precision cutting, and the importance of acclimation—knowledge that transfers to many other money-saving home improvements. Let this success boost your confidence as you consider your next endeavor.
That said, there’s no shame in calling a professional when projects involve structural issues, extensive water damage, or complex layouts with multiple angles and transitions. Sometimes the investment in expertise prevents costly mistakes. For straightforward installations like the one you’ve just mastered, though, you’ve proven that DIY is definitely the way to go. Now get out there and enjoy your stunning new floors!
