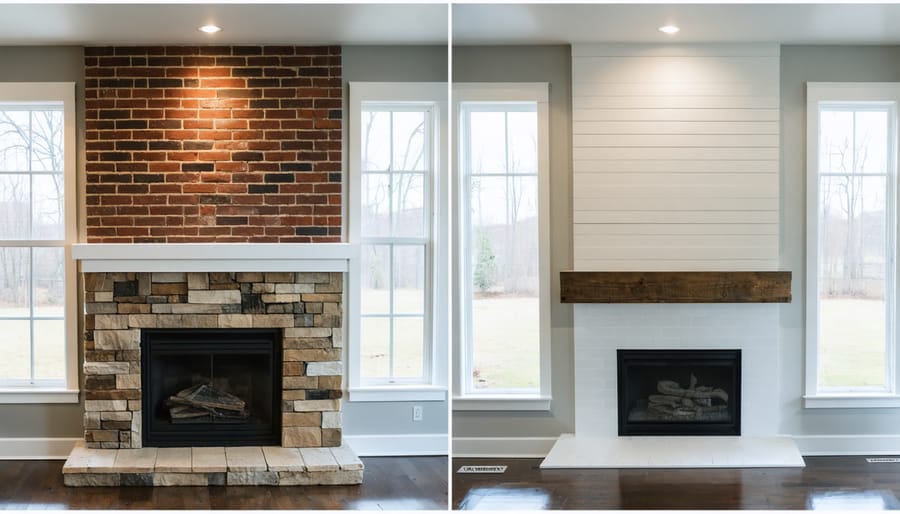
Transform Your Outdated Fireplace Into a Modern Masterpiece (DIY Renovation)
Transform your outdated fireplace into a stunning focal point with a weekend fireplace makeover that adds instant value to your home. Paint tired brick surfaces with high-temperature masonry paint for a modern look, or apply German smear technique using white mortar for a timeless European aesthetic. Modernize brass or dated metal surrounds with heat-resistant spray paint in matte black or brushed nickel finishes. Install a floating wood mantel to create architectural interest and practical display space, securing it with heavy-duty mounting brackets rated for masonry installation.
Replace worn hearth tiles with large-format porcelain slabs or natural stone to establish a clean, contemporary foundation. Frame your fireplace opening with trim molding to define crisp lines and cover rough edges where brick meets drywall. Consider adding LED strip lighting behind the mantel for ambient lighting that highlights your renovation work. These strategic updates deliver professional-quality results using basic DIY skills and readily available materials from any home improvement store.
Planning Your Fireplace Makeover
Safety First: Inspection and Permits
Before swinging that sledgehammer, let’s talk about keeping everything safe and legal. Your first step should be reviewing the essential fireplace safety guidelines and contacting your local building department. Most areas require permits for fireplace modifications, and skipping this step could lead to serious consequences down the road.
Schedule an inspection with a certified chimney specialist to assess your fireplace’s current condition. They’ll check for structural issues, proper ventilation, and potential fire hazards. This inspection is crucial as it helps identify any hidden problems that could affect your renovation plans.
Make sure to document everything – take photos before you start and keep copies of all permits and inspection reports. If you’re making structural changes, you’ll likely need additional permits and possibly an engineer’s approval. Remember, while getting permits might seem like a hassle, they’re designed to protect you and your home. Plus, having proper documentation can be invaluable if you ever decide to sell your property.
Design Options and Material Selection
When it comes to choosing the right materials and design for your fireplace renovation, you’ll find several popular options that can transform your space. Stone veneer offers a classic, rustic look and is relatively easy to install, though it can be pricey. Brick remains a timeless choice, providing durability and authenticity, but requires more skill to work with. For a modern touch, ceramic or porcelain tiles offer endless design possibilities and are easier to clean, though they may not provide the same traditional feel.
Consider contemporary options like concrete overlays, which create a sleek, industrial look while being cost-effective. Metal surrounds, particularly in brushed nickel or matte black, can add a dramatic modern statement. For a budget-friendly option, paint-grade MDF or wooden mantels can be customized to your preferred color and style.
The hearth material deserves special attention too. Granite and marble provide luxury appeal and heat resistance but come at a higher price point. Slate offers natural beauty and durability at a moderate cost, while concrete can be stamped or stained for a custom look on a budget.
Remember that your choice should complement your home’s existing style while meeting practical needs. Factor in heat resistance, maintenance requirements, and installation complexity when making your decision. For traditional homes, natural materials like stone or brick often work best, while contemporary spaces might benefit from sleek, minimal designs using metal or large-format tiles.
Step-by-Step Renovation Process
Surface Preparation
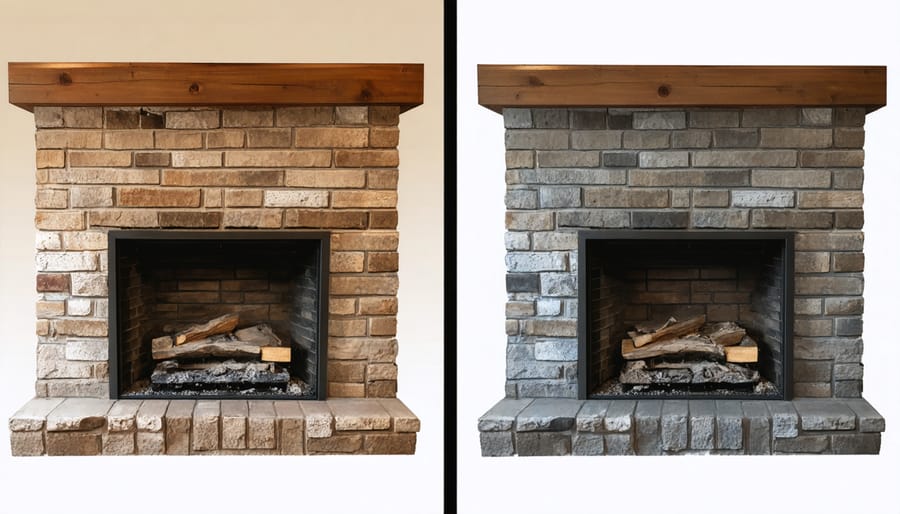
Before diving into any renovation work, proper surface preparation is crucial for achieving professional-looking results. Start by thoroughly cleaning the existing fireplace surface using a mixture of warm water and mild detergent. For stubborn soot and creosote buildup, use a specialized fireplace cleaner and a stiff-bristled brush, working in circular motions to remove all residue.
Next, inspect the entire surface for any cracks, chips, or loose mortar. Mark these areas with painter’s tape for easy identification. Using a wire brush, remove any loose material and clean out the damaged areas until you reach solid surface. For deeper cracks, you may need to use a chisel and hammer to create a clean edge for better repair adhesion.
If your fireplace has old paint or a dated finish, you’ll need to strip it completely. Apply a quality paint stripper according to the manufacturer’s instructions, and use a plastic scraper to remove the softened material. For particularly stubborn areas, you might need multiple applications. Once stripped, sand the entire surface with medium-grit sandpaper, followed by fine-grit for a smooth finish.
Before applying any new materials, ensure the surface is completely dry and free from dust. Use a shop vacuum to remove debris, followed by a tack cloth to pick up fine particles. If you’re planning to paint or apply a new finish, consider using a suitable primer designed for masonry surfaces. This will ensure better adhesion and a more durable result.
For brick surfaces that are severely damaged or unsightly, you may want to consider applying a skim coat of masonry resurfacer. This creates a smooth, even surface that’s perfect for painting or other decorative treatments. Remember to wear appropriate safety gear throughout the preparation process, including safety glasses, a dust mask, and work gloves.
Applying New Materials
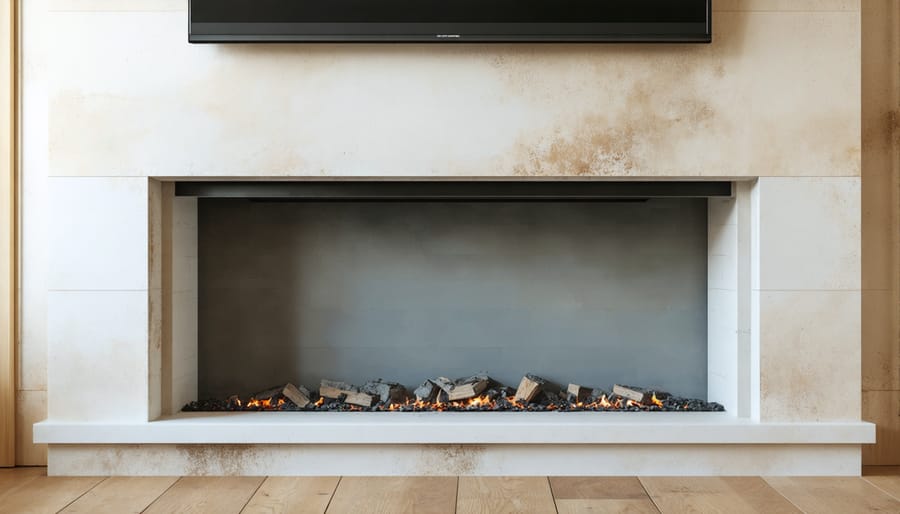
Once you’ve prepared your surface, it’s time to apply your chosen materials. Start by laying out your tiles or stones in a dry pattern on the floor to ensure you’re happy with the arrangement and have enough materials. This also helps you identify any pieces that need cutting before you begin.
For tile installation, mix your thinset mortar according to package instructions until it reaches a peanut butter-like consistency. Apply the mortar using a notched trowel, working in small sections to prevent it from drying out. Hold the trowel at a 45-degree angle and create even ridges in the mortar. Place your tiles, using spacers to maintain consistent gaps, and press firmly into place.
If you’re working with natural stone, the process is similar, but you’ll need to pay extra attention to the weight distribution. Start from the bottom and work your way up, ensuring each piece is level before moving to the next. For irregular stones, you might need to back-butter each piece (apply mortar to both the wall and stone) for better adhesion.
For brick veneer, apply a layer of mortar to the prepared surface and to the back of each brick. Press the bricks firmly into place, using a level frequently to maintain straight lines. Remove excess mortar from the joints before it dries, and tool the joints for a finished look.
When installing wood or reclaimed materials, use construction adhesive and finishing nails for secure attachment. Always check for level and plumb as you go, and use shims if needed to maintain even surfaces.
Let your installation dry completely according to the material manufacturer’s instructions – typically 24-48 hours. Once dry, apply grout for tile installations, working diagonally across the joints with a rubber float. Clean excess grout with a damp sponge before it sets.
For natural stone or brick installations, point the joints with mortar using a pointing tool to create clean, professional-looking lines. Allow all materials to cure fully before applying any sealants or final finishes.
Remember to step back periodically during installation to check your work from different angles. This helps ensure pattern consistency and allows you to catch any alignment issues early. Take your time with this phase – rushing can lead to visible mistakes that are difficult to correct later.
Mantel and Trim Work
The mantel and trim work phase of your fireplace renovation can dramatically transform the entire look of your room. Whether you’re working with an existing mantel or installing a new one, this stage requires careful attention to detail and precise measurements.
For existing mantels, you have two options: refinish the current piece or restore old mantels to their former glory. If you’re refinishing, start by thoroughly cleaning the surface and removing any old paint or varnish with a chemical stripper or sandpaper. Fill any holes or cracks with wood filler, then sand until smooth. Apply your chosen stain or paint in thin, even coats.
When installing a new mantel, begin by locating the wall studs using a stud finder. Mark their positions clearly, as these will be crucial for secure mounting. For a floating mantel, install a mounting cleat by drilling it directly into the studs. Ensure the cleat is level before securing it. The mantel itself should slide snugly over this support structure.
For trim work, consider adding decorative molding above the mantel or around the fireplace opening. Crown molding can create an elegant frame, while simple panel molding adds architectural interest. Pre-cut your pieces using a miter saw for precise 45-degree angles at the corners. Dry-fit all pieces before applying construction adhesive and securing with finish nails.
Popular trim styles include:
– Traditional crown molding
– Fluted pilasters
– Dentil details
– Simple box frames
– Carved medallions
When selecting materials, choose heat-resistant options that complement your home’s style. MDF works well for painted finishes, while solid wood offers natural beauty and durability. Remember to maintain proper clearance between any wooden elements and the firebox to comply with fire safety codes.
For a modern touch, consider incorporating hidden LED lighting beneath the mantel or behind crown molding. This creates ambient lighting and highlights your fireplace as a focal point. Just ensure any electrical work meets local building codes and safety standards.
Finishing Touches
Sealing and Protection
Proper sealing is crucial for ensuring your renovated fireplace stands the test of time and functions safely. Start by inspecting all joints and seams around your fireplace, paying special attention to where the fireplace meets the wall and floor. Apply high-temperature silicone caulk to seal any gaps smaller than 1/4 inch, ensuring smoke and gases can’t escape into your living space.
For larger gaps, use fire-rated expanding foam designed specifically for fireplaces. When working around the firebox, apply heat-resistant mortar to repair any damaged joints between bricks or stones. This step is essential for preventing heat transfer to surrounding materials.
Don’t forget to seal the chimney crown – the concrete top that protects your chimney structure. Apply a waterproof sealant designed for masonry to prevent water damage and deterioration. For the hearth area, use a penetrating stone sealer to protect against stains and moisture while maintaining the natural look of your materials.
Consider applying a clear masonry sealer to any exposed brick or stone surfaces to protect against soot and make future cleaning easier. Remember to test all sealants on a small, inconspicuous area first to ensure they don’t discolor your materials. Allow all sealants to cure completely according to manufacturer instructions before using your fireplace.
Styling Your New Fireplace
Now that your fireplace renovation is complete, it’s time to bring it to life with thoughtful styling. The mantel and hearth area offer perfect opportunities for seasonal mantel decorating and creating an eye-catching focal point in your room.
Start with a statement piece like a large mirror or artwork above the mantel to anchor your design. Layer smaller decorative items in varying heights, creating visual interest through asymmetrical groupings of three or five pieces. Consider incorporating natural elements like potted plants, driftwood, or river rocks to add organic texture.
For the hearth area, arrange decorative fireplace tools alongside an attractive log holder if you have a working fireplace. If your fireplace is non-functional, try placing a cluster of pillar candles in different sizes or a collection of battery-operated LED candles for a cozy ambiance without the flame.
Don’t forget to coordinate your fireplace décor with your room’s existing color scheme and style. Use metallic accents to add sparkle, textured throws nearby for warmth, and switch out accessories seasonally to keep the space fresh and inviting. Remember to maintain proper clearance for safety if your fireplace is operational, and avoid overcrowding the mantel with too many items.

Transforming your fireplace doesn’t have to be an overwhelming project. As we’ve explored throughout this guide, a DIY fireplace renovation can dramatically enhance your home’s aesthetic and value while staying within your budget. By carefully planning your design, gathering the right materials, and following proper safety protocols, you can successfully complete this transformation on your own.
Remember that the key to success lies in thorough preparation. Take time to research local building codes, ensure proper ventilation, and select materials that complement your home’s style. Whether you’ve chosen to update with a modern tile surround, add a rustic stone veneer, or simply give your existing fireplace a fresh coat of paint, the results can be truly remarkable.
Don’t be afraid to get creative with your design while maintaining safety standards. Your fireplace can become more than just a heat source – it can be the stunning focal point that ties your entire room together. The satisfaction of completing this project yourself will add an extra layer of pride to your newly renovated space.
If you encounter challenges along the way, take a step back and consult additional resources or seek advice from your local hardware store. Remember that many homeowners have successfully completed similar projects, and you can too. With patience, attention to detail, and the right tools, your fireplace renovation can become a rewarding DIY achievement that you’ll enjoy for years to come.
Ready to begin your fireplace transformation? Start with a solid plan, take it step by step, and watch as your vision becomes reality. Your dream fireplace awaits!
