Unconventional Art Supplies That Turn Everyday Finds Into Stunning Home Decor
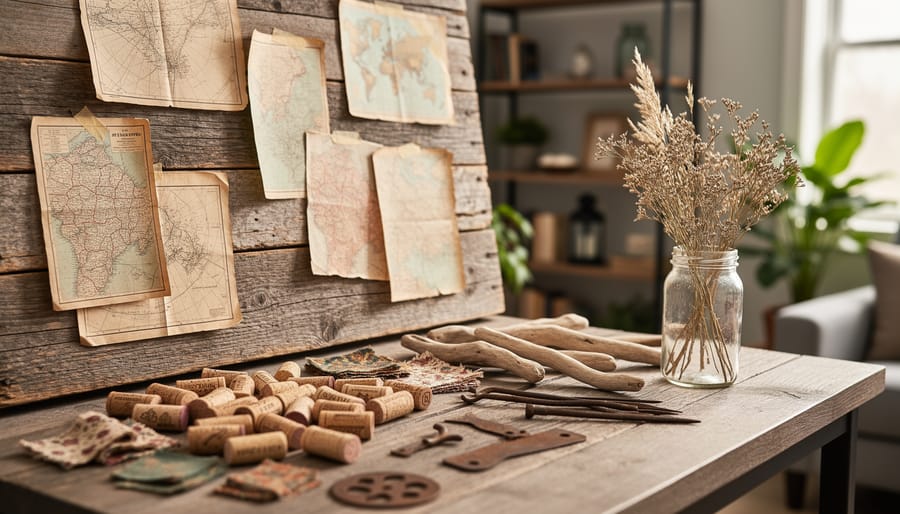
Skip the craft store aisle: some of the best materials for handmade decor are sitting in your recycling bin, garage, or local thrift shop. Salvaged wood, old maps, wine corks, fabric scraps, driftwood, and bits of scrap metal can become wall art, planters, or accent pieces in a single afternoon, usually for a few dollars or nothing at all.
These materials work because they already have texture, history, and character that new supplies struggle to fake. A weathered plank carries its own patina. A stack of corks makes a bold mosaic without any special skill.
Finding them is part of the fun. Community swaps, maker groups, and local workshops often hand out leftover materials, and they’re a great place to trade ideas, too. Even your phone helps: a free app or a quick photo search can identify a piece of reclaimed material or show you how others have used it.
Below, you’ll find where to source each material, one hands-on project you can finish this weekend, and the safety and finishing basics that keep your creations looking good and holding up at home.
Why Unconventional Materials Fit Community-Driven Artisanal Decor
Handmade decor works best when it’s built from things that already live nearby, and that’s exactly where unconventional materials shine. A pallet board, a stack of old linens, or a jar of dried botanicals costs next to nothing, and you can usually find them within a few blocks of home. That low barrier is what makes craft communities so welcoming: nobody needs a big budget or a specialty store run to join in.
Shared sourcing makes it even easier. Neighborhood swaps let you trade the half-used rope or leftover fabric you’ll never finish for something you can actually use. Local makers’ collectives often pool salvaged materials, so one person’s tear-down leftovers become another person’s wall hanging. Community workshops add the final piece, teaching techniques while you work with the same humble supplies as everyone else.
There’s a sustainability payoff too. Every wine bottle, corked stopper, or scrap of denim you reuse is one less item headed to the landfill, and you skip the packaging and shipping that come with new craft products.
Then there’s the uniqueness factor, which designers and homeowners both love. A piece made from reclaimed barn wood or a neighbor’s vintage buttons can’t be bought off a shelf. Each material carries its own history, so your finished decor comes with a story you can actually tell when guests ask, “Where did you get that?”
Unconventional Art Supplies Worth Collecting
Reclaimed Wood, Metal, and Glass
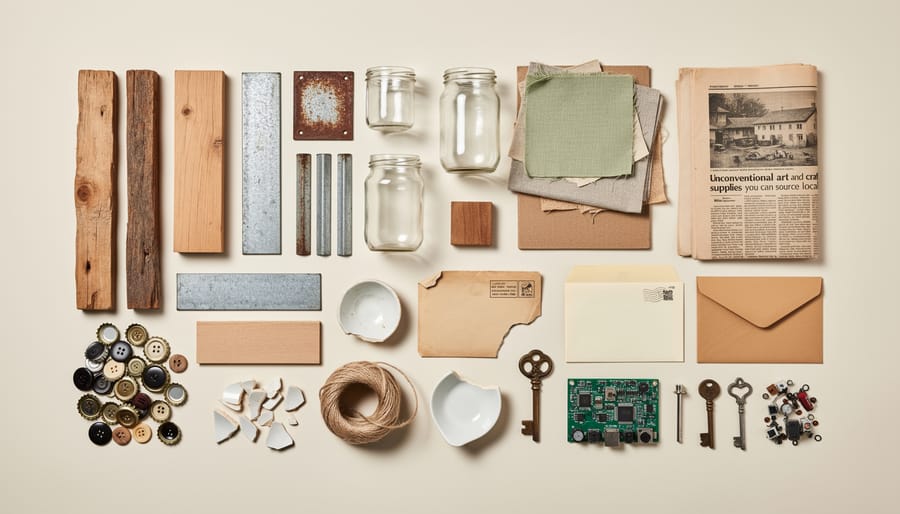
Pallet boards are the gateway material. Their weathered grain and uneven edges give you instant character, and they’re easy to cut into shelves, backdrops, or wall panels. Old cabinet doors work just as well as ready-made frames or canvases, especially the ones with raised panels or tired paint you can sand back. Wine bottles and mason jars bring a different quality: glass catches light, so they’re perfect for candle holders, small vases, or lantern-style accents. Scrap hardware like hinges, knobs, bolts, and bent brackets adds a rustic, industrial finish when you mount it as a focal detail.
Finding these is half the fun. Salvage yards and architectural reclamation shops are goldmines for doors and metal pieces. If you spot a renovation or construction site with leftover lumber, always ask permission first, since most crews are happy to hand over offcuts they’d otherwise pay to haul away. Community swap groups and buy-nothing pages are also great for jars, bottles, and odds and ends from neighbors clearing out garages.
Before you start creating, prep carefully. Scrub wood with a stiff brush and mild soap, then let it dry fully. Check pallets for a heat-treated (HT) stamp, and skip any marked with MB, which means methyl bromide treatment. Wear gloves and eye protection when handling rusty metal or sanding old finishes. Soak glass in warm, soapy water to lift labels, and file down any sharp edges so your finished piece is safe to handle.
Textiles and Fiber Finds
Fabric has a way of piling up in every household, and most of it is far from finished. Fabric scraps from old sewing projects, worn-out denim, frayed rope, leftover twine, and faded linens all make excellent material for wall hangings, pillow covers, and woven accents. Denim is especially forgiving: cut it into strips for weaving, or patch squares together for a textured panel that looks rugged and a little vintage.
Rope and twine bring instant texture. Wrap them around a branch, knot them into a macrame-style hanging, or coil them into a small basket. Old linens work well when you want something softer, like tea-stained tablecloths turned into layered wall art or napkin remnants stitched into a patchwork cushion.
You don’t have to buy any of this. Quilting circles are a goldmine, because members often have bags of offcuts they’re happy to pass along, and many groups welcome beginners who just want to learn. Local fabric swaps work the same way: bring what you no longer use, and take home something new to you. Check community centers, libraries, and neighborhood groups for upcoming meetups.
Before you start, wash secondhand textiles on a gentle cycle. It removes dust and odors, and it prevents surprises later, like shrinkage after you’ve already stitched everything together.
Natural and Kitchen-Cabinet Surprises
Your pantry and backyard are quietly stocked with art supplies. You just have to look at them differently.
Start with coffee grounds. Used grounds, dried on a baking sheet, make a gritty brown texture paste when mixed with white glue. Brew a strong pot of coffee or tea and you’ve got a soft, vintage-looking wash for paper, canvas, or even pale fabric. Let it dry between coats for deeper tones.
Eggshells are mosaic gold. Rinse them, let them dry, then crush them into small flakes and press them into a thin layer of glue on a wooden frame or a picture mat. Paint them before or after gluing for a crackled, ceramic-like finish.
Corks are ready-made building blocks. Slice them into rounds for a bulletin board, or glue the halves together into a bold geometric panel for a trivet or wall piece.
From the yard, collect driftwood, smooth stones, and dried botanicals. Wipe them down and let them dry fully before using them indoors. Driftwood makes a rustic hanging bar for a wall display. Stones can be stacked, painted, or set in a shallow tray with dried flowers for a tabletop centerpiece. Press leaves and petals between book pages for a week, then glue them under glass for simple botanical art.
Start small. One jar of coffee-dyed paper or a handful of eggshell flakes is enough to see how much character these humble materials add.
Finding and Sharing Supplies With Your Community
The best unconventional supplies usually come from people nearby. Start with a local buy-nothing group, where neighbors give away fabric scraps, old frames, jars, and half-used paint for free. Post a simple “looking for” request and you’ll be surprised how fast it gets answered. Thrift stores are another goldmine, especially for mismatched hardware, linens, and wooden trays you can take apart or paint over.
Libraries and community centers often run low-cost craft workshops, and they’re a friendly way to meet other makers and see how they handle found materials. If you want tools and space, look for a local makerspace, which usually offers saws, sanders, and sewing machines on a drop-in or membership basis. Many of these groups also trade materials informally, so ask around.
Once you’ve got a few contacts, try hosting a simple supply swap. It’s easier than it sounds:
- Pick a space that’s easy to reach, like a garage, a community room, or a shared backyard, and set a date a few weeks ahead.
- Invite neighbors through your buy-nothing group, a flyer at the library, or a quick social post, and ask everyone to bring clean, usable materials.
- Set up tables in advance and label each one by type, such as wood and metal, fabric and fiber, glass and jars, and natural items.
- Have guests sort what they brought onto the right table as they arrive, so browsing is quick and tidy.
- Keep a “free box” for leftovers and agree on who will donate unclaimed items afterward.
- Invite people to bring a photo or a finished piece made from earlier swaps, so the conversation naturally turns to ideas.
Swaps work best when they feel casual, so keep the rules light and the snacks simple. Afterward, it’s worth planning how you’ll share finished pieces whether through a group photo thread, a small gathering, or a “show and tell” table at your next swap. Seeing what others made from the same pile of scraps is half the fun, and it’s how a lot of neighborhood art traditions start to grow.
DIY Project: Make a Mixed-Material Wall Art Piece

Here’s a simple weekend project that pulls together the materials we’ve covered. It takes about two hours, and you don’t need any special skills.
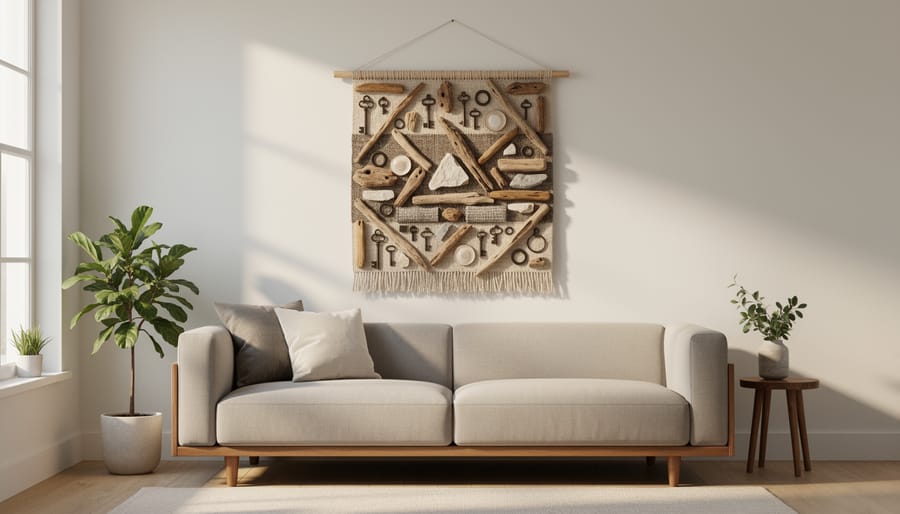
What you’ll need: a few reclaimed wood boards (pallet slats or cabinet door panels work well), fabric scraps, a handful of found objects like corks, keys, or smooth stones, sandpaper, wood glue, a staple gun, a small saw or hand tool for trimming, and two sawtooth hangers.
Step 1: Prep your materials. Wipe the wood with a damp cloth, let it dry fully, and sand any rough edges or splinters. Give the fabric a quick press so it lies flat. Make sure every found object is clean and dry.
Step 2: Build the base. Lay your boards side by side on the floor and trim them to roughly the same height. Attach two backing strips across the back with wood glue and short screws or nails to hold the boards together as one panel.
Step 3: Arrange before you commit. Place your fabric pieces and objects on the panel and shuffle them around. Aim for layers: fabric as the background, then larger objects, then small accents on top. This is a good moment to try a little technology. Snap a photo of your bare wall, then use a free mockup app or your phone’s photo markup tool to overlay a picture of your arrangement. You’ll see how the piece fits the space before you drill anything. If you like exploring this idea further, our guide to tech-enhanced decor has plenty more ways to mix handmade pieces with smart tools.
Step 4: Attach everything. Staple the fabric to the wood, folding the edges behind for a clean look. Glue the lighter objects in place and let them set for the time listed on your adhesive. Heavier items may need small screws.
Step 5: Finish and hang. Brush on a light clear sealant to protect the wood. Once it’s dry, screw the sawtooth hangers to the back and mount the piece on a stud or with proper wall anchors.
For a final touch, tuck a battery-powered LED strip along the top edge or behind the frame. It casts a soft glow that highlights the textures, and there’s no wiring involved.
Safety, Durability, and Finishing Tips
Found materials come with a history, so it pays to check them before you bring them inside. If a piece of wood or metal has chipped, peeling paint and the building was put up before 1978, assume it could contain lead and skip it. Pressure-treated lumber is another one to avoid for indoor decor, since it’s often treated with chemicals you don’t want sitting in your living room. When in doubt, choose untreated, clean boards or ask the salvage yard what you’re getting.
Next, clean everything well. Wash glass and metal with warm soapy water, and wipe wood down with a damp cloth, then let it dry completely. Trapped moisture is what causes mold and warping later.
Sealing gives your piece staying power. A clear water-based sealer works on wood, stone, and dried botanicals, while a light spray sealant helps protect fabric and paper elements from dust and fading. Always test on a hidden spot first.
For adhesives, match the glue to the job. Wood glue suits wood-to-wood joins, strong construction adhesive handles heavy objects like hardware, and fabric glue keeps textiles from fraying. Let everything cure fully before you move it.
Finally, mount with care. Use wall anchors rated for more than your piece weighs, and hang heavier art on two hooks, not one. Give it a gentle tug before you step back and admire it.
Common Questions About Using Unconventional Supplies
Unconventional pieces get a bad rap, but a little care goes a long way. Here are the questions readers ask most.
Will found materials look high-end enough?
Yes, if you keep the presentation tidy. Clean edges, a consistent color palette, and a good frame or backing make reclaimed wood and fabric scraps read as intentional design rather than clutter.
How do I make handmade pieces last?
Clean everything first, then seal it with a clear finish suited to the material and use strong adhesive or proper hardware. Keep pieces out of damp spots and direct sun when you can.
How do I blend handmade decor with the furniture I already have?
Borrow one color or texture from your existing room and repeat it in your piece. A single standout item surrounded by calmer neighbors tends to look curated.
Where should a beginner start?
Pick one small project, like the wall hanging above, and use materials you already own or can grab from a neighbor’s swap pile. Starting small keeps the cost low and lets you learn what you enjoy.
If you’re ever unsure about a material, test a small patch first. A quick trial on a scrap piece can save you from redoing a whole project.
Every home has a story, and the best ones aren’t bought in a single shopping trip. They’re built from a weathered pallet board here, a scrap of favorite denim there, and a few pretty stones picked up on a walk. That’s the quiet magic of unconventional art supplies. They turn ordinary spaces into places that feel like you.
You don’t need a big project or a full workshop to begin. Grab one jar, one fabric remnant, or one piece of driftwood and see what it wants to become. Then take it a step further: swing by a local swap, join a neighborhood maker group, or trade supplies with a friend down the street.
Once your piece is finished, share it. Post a photo, show it off at the next community gathering, or hand your leftover materials to someone just getting started. Handmade decor grows richer when it’s passed around, and your home will be better for every story you add to it.