How to Design a Laundry Room That Actually Breathes (and Why It Matters)
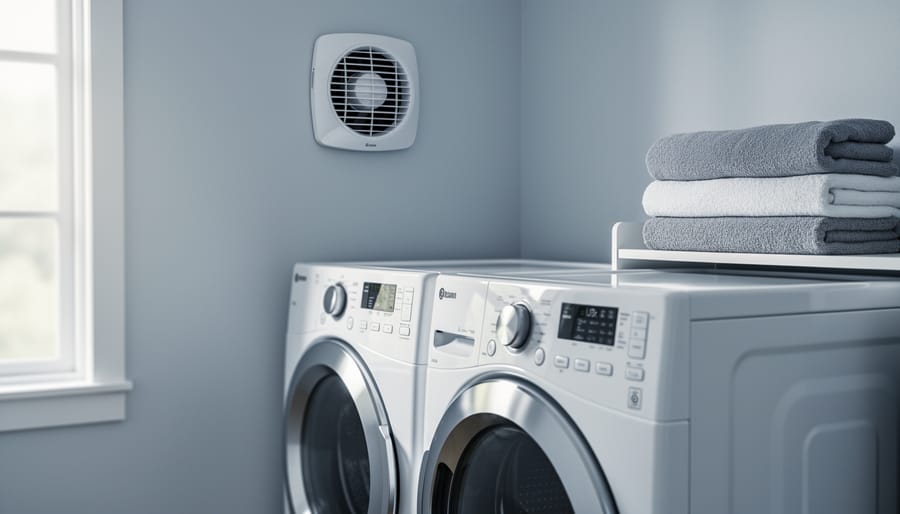
Designing a laundry room that breathes means creating proper ventilation and air circulation to eliminate moisture buildup, prevent mold, and keep the space fresh. The method combines strategic exhaust ventilation (typically a 90-120 CFM vent fan), adequate supply air through transfer grilles or undercut doors, and moisture control through dryer venting and dehumidification. Most homeowners can implement basic improvements in a weekend, though installing a dedicated exhaust fan requires intermediate electrical and carpentry skills.
Without proper airflow, your laundry room becomes a breeding ground for problems. Wet clothes, steam from washing machines, and dryer heat create humidity levels that encourage mold growth behind walls and leave persistent musty odors in your freshly washed towels. The solution isn’t complicated, but it does require understanding how air moves through your space and addressing both intake and exhaust.
The good news? You don’t need a major renovation to make meaningful improvements. Simple fixes like adding a timer-controlled exhaust fan, ensuring your dryer vent runs efficiently, and creating proper air pathways can transform a stuffy, damp laundry room into a space with continuous fresh air circulation. The key is matching your ventilation approach to your room’s size, layout, and moisture load.
Why Proper Ventilation Is Non-Negotiable in Laundry Spaces
Every time you run your washer or dryer, you’re introducing significant moisture into your laundry space. A single load of laundry releases approximately one to two gallons of water vapor into the air, and that moisture has to go somewhere. Without proper ventilation, it settles on walls, floors, and ceiling surfaces, creating the perfect breeding ground for problems you definitely don’t want.
The science is straightforward: warm, moist air from your appliances rises and spreads throughout the room. When it hits cooler surfaces, condensation forms. This constant cycle of moisture accumulation creates an environment where mold spores thrive, often in hidden spots like behind machines or inside walls. The musty smell you notice isn’t just unpleasant, it’s a sign of active microbial growth that can trigger allergies, asthma attacks, and respiratory issues for your family.
Poor ventilation also takes a toll on your property itself. Excess humidity warps wooden shelving, peels paint, rusts metal fixtures, and can even compromise drywall integrity over time. Your appliances suffer too, dryers work harder and less efficiently in humid environments, shortening their lifespan by years. The lint buildup combined with moisture creates a genuine fire hazard, which is why regular Dryer Vent Cleaning Spring Hill services emphasize proper airflow as a safety priority.
Whether you’re working with a compact closet setup or a spacious dedicated room, the ventilation challenges remain the same. Smaller spaces concentrate moisture faster, but larger rooms can trap humid air in corners and create uneven circulation. Both scenarios demand intentional design to keep air moving, moisture levels controlled, and your space genuinely healthy.
Essential Tools and Materials for a Breathing Laundry Room
Before you start your laundry room ventilation project, gather these essential tools and materials. Having everything on hand prevents mid-project trips to the hardware store and helps you budget accurately.
Exhaust Fans and CFM Requirements
An exhaust fan removes humid air directly from your laundry room. CFM (cubic feet per minute) measures how much air the fan moves, higher CFM means more powerful ventilation. For most laundry rooms, you’ll need 50-100 CFM, calculated by multiplying your room’s square footage by 8 (for 8-foot ceilings) and dividing by 7.5. A 10×8 laundry room needs roughly 85 CFM. Quality exhaust fans range from $80-$300 depending on features like humidity sensors and noise ratings.
Your Complete Shopping List
- Exhaust fan (50-100 CFM): Wall or ceiling-mounted unit with exterior venting capability, $80-$300
- Rigid metal dryer duct (4-inch diameter): Aluminum or galvanized steel only, never flexible plastic, $25-$60 for materials
- Exterior vent cap with backdraft damper: Prevents outside air and pests from entering, $15-$40
- Dehumidifier (30-50 pint capacity): For supplemental moisture control in larger or basement rooms, $180-$350
- Hygrometer: Digital device to monitor humidity levels (aim for 30-50%), $15-$45
- Moisture-resistant paint: Mold and mildew-resistant formula for walls and ceiling, $30-$50 per gallon
- Weatherstripping and door sweep: Seals gaps while allowing controlled airflow, $10-$25
- Circulation fan: Portable or wall-mounted for supplemental airflow, $25-$80
- Duct tape (foil-backed) and metal clamps: For sealing all vent connections, $15-$30
Most materials are available at home improvement stores like Home Depot, Lowe’s, or local hardware shops. Specialized exhaust fans with smart features may require ordering online from HVAC suppliers.
Permits and Professional Help
Check with your local building department about permits before installing exhaust fans or modifying ductwork. Permit costs typically run $50-$150. If your project involves new electrical circuits or extensive ductwork modifications, budget $200-$500 for licensed professionals. Some municipalities require permitted work for any bathroom or laundry ventilation that vents to the exterior.
Safety Warnings and Building Code Requirements
Before you start cutting holes or wiring fans, understand the risks. Improper ventilation work can create fire hazards, electrical dangers, and code violations that complicate future home sales.
Electrical work for exhaust fans requires careful consideration. If you’re comfortable with basic wiring and your local code allows homeowner electrical work, installing a simple fan on an existing circuit is manageable. However, if you need to run new circuits, work near water sources, or aren’t confident identifying your breaker box’s capacity, hire a licensed electrician. Moisture and electricity make a dangerous combination.
Dryer vent installation carries serious fire risks. Never use flexible plastic or foil ducting, which traps lint and can ignite. Use only rigid or semi-rigid metal ducts, keep runs as short as possible with minimal bends, and ensure all connections are sealed with metal foil tape, not standard duct tape. Your vent must terminate outdoors, never into attics, crawl spaces, or garages. Check your local building department for outdoor termination requirements before drilling exterior walls.
Gas dryers present additional hazards. These appliances produce carbon monoxide, making proper venting absolutely critical. If you have a gas dryer, never compromise on vent quality or length. Consider installing a carbon monoxide detector in or near your laundry room as a backup safety measure. Any gas line work requires a licensed professional, this isn’t negotiable.
Local building codes vary significantly for laundry room ventilation. Many jurisdictions require permits for exhaust fan installation, especially if you’re cutting through exterior walls or running new electrical circuits. Some areas mandate specific CFM ratings based on room size or require makeup air provisions. Contact your local building department before starting work. While adding best small dehumidifiers or interior climate solutions like smart humidity sensors typically doesn’t require permits, structural modifications and electrical work usually do.
When does DIY end? If you encounter load-bearing walls, need to reroute gas lines, lack attic or crawl space access for ductwork, or feel uncertain about any step, stop and consult professionals. The cost of proper installation is far less than repairing fire damage or fixing code violations.
Step-by-Step: Creating Optimal Airflow in Your Laundry Room
Step 1: Assess Your Current Ventilation Situation
Start by closing the door and running your washer and dryer for 15 minutes. Does the room feel noticeably warmer or more humid? That’s your first clue. Walk the perimeter and look for condensation on windows, walls, or pipes, these damp spots signal trapped moisture. Run your hand along the ceiling corners and behind appliances where mold typically takes hold first.
Check for musty odors, especially near the washer drum and in enclosed cabinets. Smell the towels you just dried; if they’re not completely fresh, you’ve got airflow problems. Measure your room’s length, width, and ceiling height to calculate cubic footage, you’ll need this for sizing exhaust fans later.
Note your appliance types: gas dryers produce more moisture and require different venting than electric models, while high-efficiency washers trap humidity inside the drum. Document where existing vents, windows, and doors are located, and whether you have exterior wall access.
Take photos of problem areas. These baseline conditions will help you spot improvements after implementing your ventilation strategy, and they’re crucial if poor indoor air quality has already affected your home.
Step 2: Plan Your Ventilation Strategy
With your assessment complete, you need a concrete ventilation plan before buying a single component or cutting into walls. Start by calculating your exhaust fan requirements: multiply your room’s cubic footage by 8 to get the minimum CFM (cubic feet per minute) rating. For a 10x8x8-foot laundry room, that’s 640 cubic feet times 8, requiring a 5,120 CFM fan, but most residential exhaust fans range from 50-150 CFM, so you’ll likely need multiple units or a more powerful inline fan for larger spaces. As a practical baseline, aim for at least 100 CFM in laundry rooms under 100 square feet.
Position your primary exhaust fan on the ceiling or upper wall opposite your dryer, pulling moist air away from appliances. Map your dryer vent route next: the shortest, straightest path to an exterior wall wins. Every 90-degree elbow reduces efficiency by roughly 5 feet of straight duct, so minimize bends. Rigid metal ducting should never exceed 25 feet total equivalent length.
Identify where fresh air enters, an undercut door, a transfer grille, or a passive vent near the floor. Finally, mark dehumidifier placement away from direct appliance exhaust but central to airflow patterns, and note spots for supplemental circulation fans in corners where air stagnates.
Step 3: Install or Upgrade Your Exhaust System
Turn off power at the breaker before starting any electrical work. Choose your mounting location based on your ventilation plan, ceiling fans work best for general moisture removal, while wall-mounted units excel when positioned near the dryer. For ceiling installation, locate a joist using a stud finder and cut the opening according to your fan’s housing template. Wall mounts require cutting through drywall and exterior siding, then installing a weatherproof vent cap on the outside.
Retrofitting existing spaces presents specific challenges. You’ll need to route ductwork through walls or ceilings to reach an exterior wall. Use rigid metal ducts when possible, they resist moisture better than flexible options and maintain stronger airflow. Keep duct runs under 25 feet total with no more than two 90-degree elbows. Each elbow reduces efficiency, so plan the straightest path to outside.
Connect the fan housing to ductwork using foil tape and metal clamps, never screws that penetrate the duct interior. Seal all joints completely to prevent moisture escaping into wall cavities. Wire the fan according to manufacturer specs, connecting black to black, white to white, and ground to ground. Install a wall switch rated for the fan’s amperage.
New construction offers easier routing since you can plan ductwork before walls close up. Run ducts between joists or studs, maintaining proper slope for condensation drainage. Test the fan before completing drywall to confirm proper operation and airflow direction.
Step 4: Optimize Dryer Venting
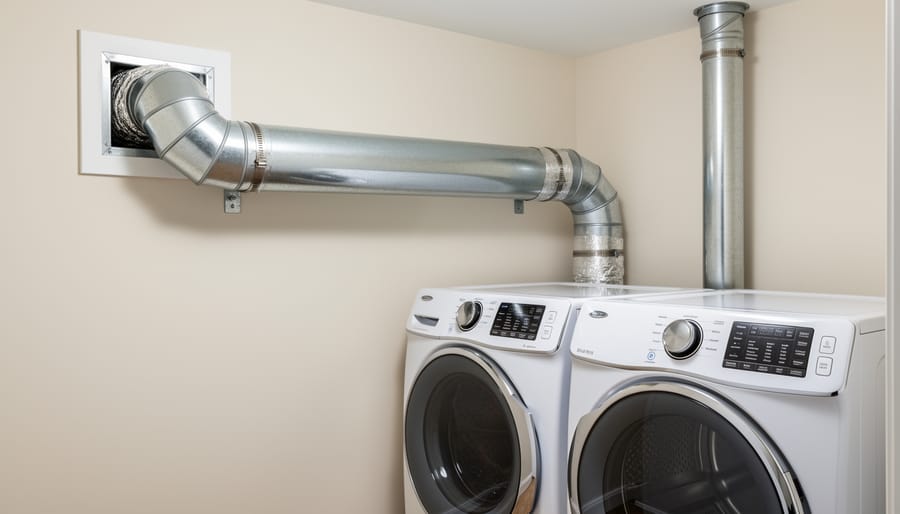
Your dryer vent is one of the most critical components of a breathing laundry room, and it’s where many DIY projects go wrong. Replace any flexible plastic or foil ducts immediately, they trap lint, restrict airflow, and create serious fire hazards. Use rigid metal ducting (aluminum or galvanized steel) for the entire run. The diameter must be at least 4 inches, and you cannot reduce it anywhere along the path.
Plan the shortest possible route to the exterior, ideally less than 25 feet of straight run. Every 90-degree elbow you add subtracts 5 feet from your effective length, so minimize bends. If you must turn, use gradual elbows rather than sharp angles.
Seal every joint with foil tape, not duct tape or screws that penetrate the duct interior and catch lint. The connection to your dryer should be snug but allow the appliance to move slightly during operation.
At the exterior terminus, install a vent cap with a backdraft damper that closes when the dryer isn’t running. This prevents cold air, pests, and moisture from entering while still allowing unrestricted exhaust flow. Position it at least 12 inches off the ground and away from windows or intake vents.
Step 5: Add Supplemental Circulation and Moisture Control
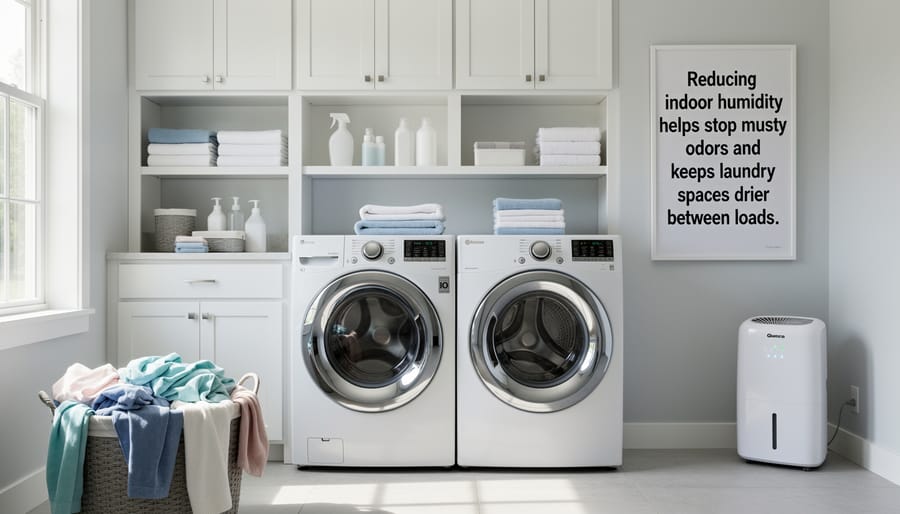
Even with solid exhaust and dryer venting in place, strategic supplemental systems push your laundry room’s breathability to the next level. Start by adding a circulation fan, not for exhaust, but to keep air moving throughout the space. Mount an oscillating or clip-on fan on a high shelf or wall, angled to sweep across the room rather than blowing directly at appliances. This prevents stagnant pockets where moisture settles.
Position your dehumidifier in a central spot at least six inches from walls, never tucked behind the dryer where airflow gets blocked. Aim for a model rated 30-50 pints per day for typical laundry rooms. Set it to maintain 40-50% relative humidity, and run it during and after laundry sessions, not 24/7 unless you live in a very humid climate.
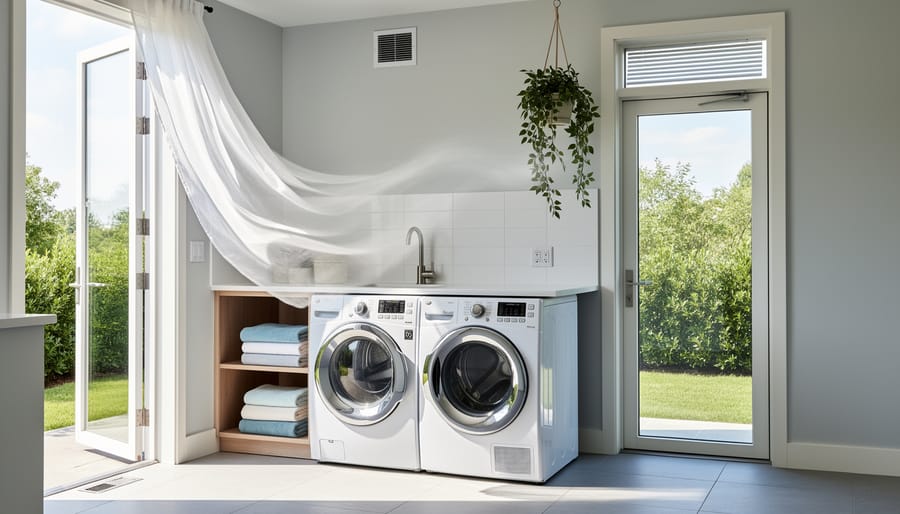
For passive circulation, install a louvered door or cut in a door transfer grille near the bottom. This pulls replacement air naturally without powered fans. If your laundry room has a solid door and no exterior window, this simple vent prevents negative pressure that chokes your exhaust system.
Consider smart upgrades: plug your dehumidifier and circulation fan into humidity-activated smart outlets that trigger automatically when moisture rises above your set threshold. This hands-free approach catches humidity spikes you’d otherwise miss.
Step 6: Finish with Moisture-Resistant Materials
After you’ve addressed airflow and ventilation, protecting your laundry room surfaces from moisture completes the breathing equation. Start with walls: apply a mildew-resistant or moisture-blocking primer, then two coats of semi-gloss or satin latex paint. These finishes repel water better than flat paint and wipe clean easily.
Seal every gap where moisture can hide. Run a bead of silicone caulk along baseboards, around windows, and where walls meet the ceiling. Check behind the washer and dryer connections, unsealed holes around plumbing or vent pipes create pathways for humid air to reach wall cavities.
Install a door sweep if your laundry room door sits flush to the floor, but ensure it doesn’t block necessary air circulation. If you removed a door to improve airflow, that’s fine, just maintain consistent ventilation.
For flooring, vinyl plank or ceramic tile handles moisture best. Both resist water damage and clean up spills without warping. Avoid carpet and engineered wood in laundry spaces.
Choose storage that breathes too. Wire shelving allows air circulation around detergents and linens. Skip solid wood cabinets unless they’re marine-grade or properly sealed.
How to Verify Your Laundry Room Is Breathing Properly
After installing your ventilation improvements, verification ensures everything works as intended. Start testing 24 hours after completing your final modifications to get accurate baseline readings.
Run these verification tests in sequence:
- Humidity test: Use a hygrometer to measure relative humidity during and after a dryer cycle. Target range is 30-50% humidity; readings above 60% indicate insufficient ventilation.
- Tissue test: Hold a single tissue near your exhaust fan and vent openings while running. The tissue should be pulled noticeably toward the vent, confirming active airflow.
- Condensation check: Run three consecutive wash-and-dry cycles, then inspect walls, windows, and cold surfaces for moisture beads or fog. Any condensation means your system needs adjustment.
- Air movement test: Light a stick of incense near the dryer and washer. Smoke should drift steadily toward exhaust points, not pool or swirl aimlessly in the room.
- Temperature differential: Measure room temperature before and immediately after drying. A rise greater than 10°F suggests heat and moisture are not escaping efficiently.
For ongoing monitoring, check your hygrometer weekly for the first month, then monthly thereafter. If humidity consistently exceeds 55% or you notice musty smells returning, your ventilation capacity may be undersized for your usage patterns.
Call an HVAC professional if you’ve verified proper fan operation and duct integrity but still see condensation, if humidity won’t drop below 60%, or if you smell mold despite all improvements. These signs often indicate hidden moisture sources, inadequate CFM for your space, or structural issues requiring expert diagnosis.
Next Steps: Maintaining Your Breathing Laundry Room
Your breathing laundry room won’t stay that way without regular upkeep. Set reminders for these maintenance tasks to keep everything running smoothly:
- Monthly: Check humidity levels with your hygrometer (aim for 30-50%)
- Quarterly: Clean dryer vents and ductwork completely, inside and out
- Quarterly: Empty and clean dehumidifier reservoirs; wash filters
- Biannually: Replace or clean exhaust fan filters
- Annually: Schedule a professional HVAC inspection of your ventilation system
Watch for warning signs that your ventilation needs attention: condensation returning to windows or walls, musty odors despite cleaning, visible mold spots, or clothes taking longer to dry. These signals mean your system is struggling. A well-maintained breathing laundry room also considers universal airflow access for all household members, ensuring vents and controls remain reachable.
If you notice persistent moisture problems even with regular maintenance, your ventilation capacity may have been undersized from the start. Don’t ignore it, upgrading now prevents expensive mold remediation later. Keep a simple log of your maintenance dates; it takes two minutes and helps you stay consistent.
Frequently Asked Questions
Can I design a breathing laundry room without exterior access?
Yes, but it requires a more aggressive approach. Install a high-quality dehumidifier (50-70 pint capacity for average rooms), use ventless heat pump dryers instead of traditional vented models, and create passive airflow by undercutting doors or adding transfer grilles to connect with HVAC-served areas.
How much does it cost to add proper ventilation?
Basic DIY ventilation runs $200-600 for a quality exhaust fan, ducting, and dehumidifier. Professional installation with electrical work and ductwork adds $500-1,500, while comprehensive basement systems with dedicated HVAC tie-ins can reach $2,000-4,000 depending on complexity and regional labor costs in 2026.
Do stackable washer-dryer units need different ventilation?
The dryer component needs identical venting to standalone units, a 4-inch rigid metal duct to the exterior with minimal bends. The tighter installation space often makes routing more challenging, so plan your duct path carefully before committing to the unit placement.
Can I use my existing bathroom fan for laundry room ventilation?
Only if it meets the CFM requirements for your laundry room size (typically 50-100 CFM minimum) and runs on a separate switch you can control independently. Most bathroom fans are underpowered for laundry moisture loads and share ductwork, which reduces effectiveness.
What’s the difference between a vented and ventless dryer for air quality?
Vented dryers exhaust hot, moist air outside through dedicated ducts, removing humidity from your home entirely. Ventless models (condenser or heat pump) release some moisture into the room and require excellent general ventilation plus a dehumidifier to prevent air quality issues.
How do I ventilate a basement laundry room?
Install an exhaust fan vented through the rim joist or an existing window, add a dehumidifier rated for basement humidity levels, and consider a fresh air intake if the basement feels stuffy. Basement concrete naturally traps moisture, so monitoring humidity with a hygrometer and keeping levels below 50% becomes even more critical than in above-grade spaces.
These questions reflect the real concerns that trip up most laundry room projects. The exterior access issue comes up constantly in apartments, condos, and interior closet conversions where traditional venting seems impossible. Cost questions matter because ventilation often gets skipped when budgets tighten, even though it’s foundational to the room’s function.
The stackable unit question addresses a specific pain point, people assume the compact format changes the rules, but physics doesn’t care about aesthetics. That bathroom fan question reveals a common shortcut that seems logical until you understand CFM requirements and shared ductwork limitations.
Ventless dryers confuse buyers who think “no vent” means “no moisture problem,” when the reality is just a shifted burden. And basement laundry rooms deserve their own consideration because they’re fighting both appliance moisture and the natural dampness of below-grade spaces. Getting these fundamentals right from the start saves you from discovering mold behind the washer two years later.
Creating a laundry room that breathes isn’t complicated, but it does require intention. Start with your assessment, check humidity levels, inspect existing ventilation, and understand your space’s needs. Then work through the steps systematically: calculate your exhaust requirements, install proper venting, and add moisture control where needed.
The payoff is substantial. You’ll notice fresher air immediately, and over months you’ll see fewer musty smells, no mildew spots, and appliances that run more efficiently. Your clothes will dry faster, linens will smell cleaner, and you won’t dread opening that laundry room door. Better yet, you’re protecting your home’s structure and your family’s health. A breathing laundry room transforms what’s often the most neglected space in your home into one that actually works for you, not against you.