This Hidden Layer Could Save Your Home From Fire Damage
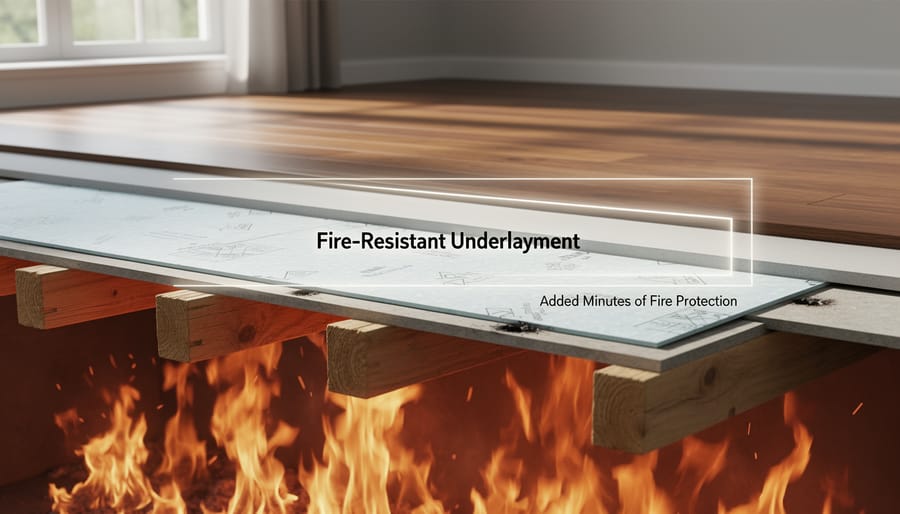
Fire-resistant underlayment creates a protective barrier between your subfloor and finished flooring, slowing flame spread and buying precious evacuation time during a fire emergency. This specialized material has become increasingly important as building codes tighten and insurance companies offer premium discounts for homes with enhanced fire safety features.
Choose fire-resistant underlayment rated for at least Class A fire resistance, which means it won’t contribute to flame spread and produces minimal smoke. Look for products made from mineral-based materials like calcium silicate or treated synthetic fibers that can withstand temperatures up to 1,200 degrees Fahrenheit without igniting. These underlayments work beneath hardwood, laminate, vinyl, and tile flooring in any room of your home.
Install this protective layer in high-risk areas first: kitchens where cooking fires start, attached garages where flammable materials are stored, and rooms with fireplaces or wood stoves. Many homeowners also prioritize bedrooms and escape routes to maximize safety during nighttime emergencies when most residential fires occur.
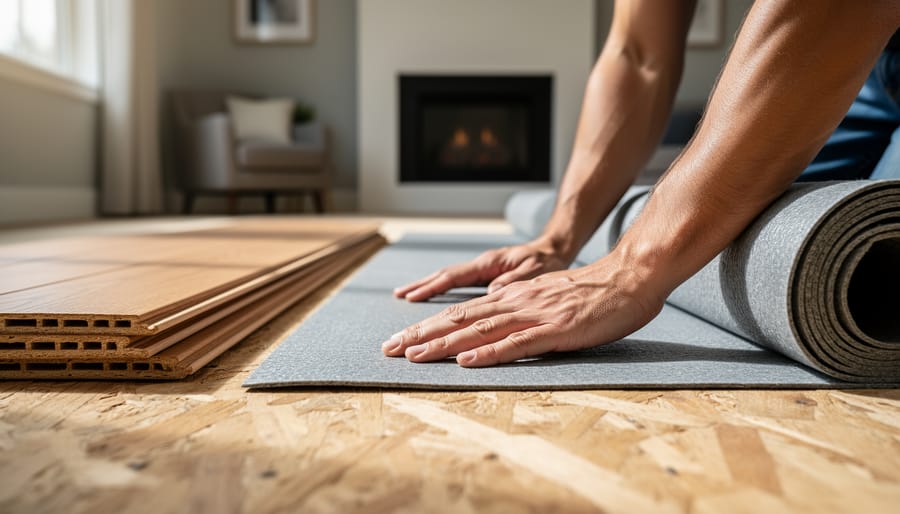
The installation process mirrors standard underlayment techniques, making it an accessible DIY project for most skill levels. You’ll roll out sheets across your subfloor, trim them to fit room dimensions, and secure edges with appropriate fasteners or adhesive. The material typically adds only 1/8 to 1/4 inch to floor height, so it won’t interfere with door clearances or create tripping hazards at transitions.
Beyond fire protection, quality fire-resistant underlayment offers sound dampening, moisture resistance, and improved thermal insulation, delivering multiple benefits from a single upgrade that protects your family and property investment.
What Fire-Resistant Underlayment Actually Does
Fire-resistant underlayment works as a protective shield between your home’s structure and the finished surfaces you see every day. Think of it as an invisible safety layer that sits beneath your flooring, behind your walls, or above your ceiling, quietly doing the important job of slowing down fire spread if the worst should happen.
The magic behind fire-resistant underlayment lies in its composition. Most products combine materials like fiberglass, gypsum, or specially treated minerals that don’t easily catch fire. When exposed to flames or extreme heat, these materials create a barrier that resists ignition and limits how quickly fire can move through your home. Some advanced underlayments even contain intumescent compounds that expand when heated, forming a protective char layer that insulates the surface underneath.
Here’s what makes it different from regular underlayment: standard products might provide moisture protection or soundproofing, but they often burn readily when exposed to fire. Fire-resistant versions add that crucial extra layer of defense, buying precious time for evacuation and potentially preventing small fires from becoming catastrophic.
The science is straightforward. Fire needs three things to spread: fuel, oxygen, and heat. Fire-resistant underlayment interrupts this cycle by being a poor fuel source. It either won’t burn at all or burns so slowly that it significantly delays fire progression. Many products are rated by how long they can withstand direct flame exposure, typically ranging from 30 minutes to several hours.
For homeowners, this translates to real-world protection. Whether you’re installing new hardwood floors, renovating a kitchen, or finishing a basement, choosing fire-resistant underlayment adds an affordable safety upgrade that works silently in the background, protecting what matters most.
Where You Need Fire-Resistant Underlayment Most
Kitchen and Cooking Areas
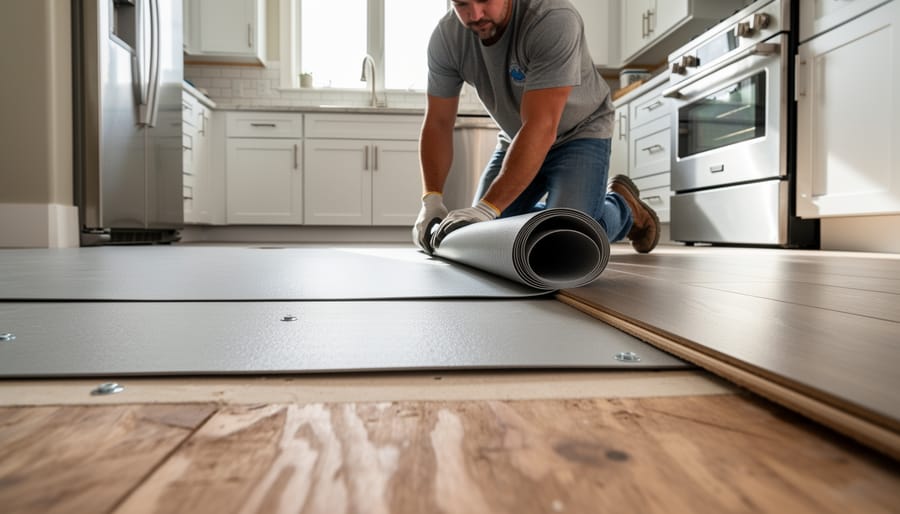
Kitchens rank among the highest-risk areas in any home for fire hazards. Between stovetops, ovens, electrical appliances, and potential grease fires, these spaces see more fire incidents than nearly any other room. Installing fire-resistant underlayment beneath your kitchen flooring creates a critical protective barrier that can slow fire spread and give you precious extra minutes to evacuate safely.
This specialized underlayment works beneath tile, hardwood, laminate, and luxury vinyl flooring, adding protection without compromising your design vision. Just as homeowners prioritize safety in bathroom renovation projects, kitchen updates benefit tremendously from fire-resistant materials. The underlayment prevents flames from quickly traveling through subflooring, potentially containing a kitchen fire long enough for emergency response. It’s an invisible safety feature that protects your family and investment while supporting beautiful flooring choices you’ll love for years to come.
Around Fireplaces and Wood Stoves
Areas around fireplaces and wood stoves require extra attention when it comes to fire safety. These high-heat zones demand fire-resistant underlayment rated for direct thermal exposure, typically Class A or similar certifications. When installing flooring near these features, check your local building codes—many require specific clearances from the heat source, usually 18 to 36 inches depending on your appliance type.
For DIY projects, measure carefully and extend your fire-resistant underlayment beyond the minimum code requirements. Consider using cement board or specialized high-temperature underlayment products designed specifically for hearth areas. These materials can withstand radiant heat and protect your subfloor from ember damage. Always pair fire-resistant underlayment with appropriate flooring materials like tile, stone, or approved hardwood with proper spacing. Adding a non-combustible hearth pad provides an extra layer of protection and peace of mind during cozy winter evenings by the fire.
Garages and Workshops
Garages and workshops present unique fire risks with paint cans, solvents, power tools, and often cluttered storage areas. Fire-resistant underlayment provides an essential safety layer beneath your flooring, helping contain potential fires before they spread to the rest of your home. This is especially important if your garage is attached to your living space. When planning garage floor upgrades, consider installing fire-resistant underlayment beneath epoxy coatings, tiles, or interlocking floor systems. Look for products rated for high-traffic areas that can withstand dropped tools and heavy equipment. The installation process is straightforward for most DIYers—simply ensure the concrete surface is clean and level before rolling out the underlayment. This affordable upgrade adds a protective barrier that could save your property and give you peace of mind while working on projects.
Multi-Family and Shared Walls
In multi-family buildings like apartments, condos, and townhomes, fire-resistant underlayment becomes a crucial safety layer in shared walls. When fire breaks out in one unit, these protective barriers can buy residents precious minutes to evacuate and help prevent flames from spreading to neighboring homes. Building codes often require enhanced fire protection in party walls, the vertical dividers between separate living spaces.
Installing fire-resistant wall systems with proper underlayment isn’t just about compliance—it’s about protecting your neighbors and your investment. For property owners, this upgrade can also reduce insurance premiums and increase property value. The installation process mirrors standard wall construction, making it feasible for experienced DIYers tackling renovation projects, though professional installation ensures proper sealing and code adherence for maximum protection.
Types of Fire-Resistant Underlayment Materials
Gypsum-Based Underlayment
Gypsum-based underlayment is a popular choice for fire-resistant flooring applications, especially in multi-family buildings and commercial spaces. Made from naturally fire-resistant gypsum mixed with Portland cement and other additives, these products typically come as a pourable mixture that creates a smooth, level surface. The beauty of gypsum underlayment is its dual purpose—it provides excellent fire protection while also correcting uneven subfloors in one step.
These products typically offer 1 to 2-hour fire ratings depending on thickness and can be applied over wood, concrete, or radiant heating systems. They’re self-leveling, which makes installation relatively straightforward for experienced DIYers, though you’ll want a helper since the material sets quickly once mixed. Best applications include apartment buildings, condos, and commercial properties where fire codes are strict. The underlayment also provides great sound dampening, which is a bonus for upstairs floors. Just remember that gypsum products need proper moisture protection in wet areas like bathrooms and kitchens.
Cement Board and Fiber-Cement Options
Cement board and fiber-cement underlayment deliver exceptional fire resistance thanks to their non-combustible mineral composition. These materials combine cement, sand, and reinforcing fibers to create rigid panels that won’t ignite or contribute fuel to fires, making them ideal beneath tile, stone, and other flooring materials in kitchens, bathrooms, and high-risk areas.
Installation is straightforward for DIYers with basic carpentry skills. Cut panels with a utility knife by scoring and snapping, or use a circular saw with a dust mask for cleaner edges. Secure boards to your subfloor with corrosion-resistant screws spaced every 8 inches along joists. Leave 1/8-inch gaps between panels for expansion, and seal seams with fiberglass mesh tape and thin-set mortar.
While heavier and pricier than standard plywood underlayment, cement board offers unmatched durability and moisture resistance alongside its fireproof qualities. It’s particularly valuable in areas requiring both water and fire protection, giving you long-term peace of mind for your flooring investment.
Mineral Wool Underlayment
Mineral wool underlayment offers a winning combination that’s hard to beat: excellent fire resistance paired with outstanding insulation properties. Made from natural stone or recycled slag that’s been melted and spun into fibers, this material naturally resists flames and won’t contribute fuel to a fire. What makes it particularly appealing for homeowners is its dual-purpose functionality. While protecting your floors from fire hazards, mineral wool also dampens sound beautifully and helps regulate temperature between floors, making it ideal for multi-story homes or apartments above garages.
Installation is straightforward for DIY enthusiasts. The material comes in semi-rigid batts or flexible rolls that you can cut with a utility knife to fit your space. Just remember to wear gloves, a mask, and eye protection during installation, as the fibers can irritate skin and lungs. The investment pays off through lower energy bills and added peace of mind knowing you’ve installed a truly fire-resistant barrier beneath your flooring.
Treated Plywood and Engineered Wood
Fire-retardant treated (FRT) plywood and engineered wood offer excellent fire resistance while maintaining the structural benefits of traditional wood products. These materials undergo pressure treatment with fire-retardant chemicals that penetrate deep into the wood fibers, helping them resist ignition and slow flame spread. Unlike regular wood that can quickly fuel a fire, FRT plywood is rated to meet strict building codes and can actually char rather than burn.
You’ll find FRT plywood commonly used as roof decking in commercial buildings, but it’s equally valuable for residential applications like attic floors, garage ceilings, and basement walls. The treatment process doesn’t compromise the wood’s strength or workability, so you can cut, nail, and install it just like standard plywood. One significant advantage is compatibility with sustainable flooring materials, allowing you to build fire-safe spaces without sacrificing environmental consciousness.
When selecting FRT products, look for certification labels indicating compliance with Class A fire ratings. Keep in mind that some treatments are designed specifically for interior use, as exterior exposure can reduce effectiveness. While FRT plywood costs roughly 50-75% more than untreated wood, the added protection and potential insurance savings often justify the investment.
How to Choose the Right Fire-Resistant Underlayment
Understanding Fire Ratings and Certifications
When shopping for fire resistant underlayment, you’ll come across Class A, B, and C ratings. Think of these as grades that tell you how well a material performs when exposed to fire.
Class A is the gold standard. Materials with this rating offer the highest level of fire resistance, with flames spreading slowly across the surface. They’re your best bet for maximum protection and are often required by building codes in high-risk areas or commercial buildings.
Class B provides moderate fire protection. These materials still resist flames reasonably well, making them suitable for many residential applications where codes are less stringent.
Class C offers basic fire resistance. While not as protective as A or B ratings, Class C materials still provide more safety than non-rated options.
Here’s what matters for your project: most building codes specify minimum fire ratings based on your location and building type. Check with your local building department before purchasing. If you’re in a wildfire-prone area or installing flooring in a multi-family building, Class A is typically required. For standard residential renovations, Class A remains the safest choice, though it may cost slightly more upfront. The peace of mind and potential insurance benefits usually make it worthwhile.
Matching Underlayment to Your Surface Material
Choosing the right fire-resistant underlayment depends heavily on what you’re installing on top of it. Each surface material has specific requirements for stability, moisture control, and fire safety.
For tile installations, cement board underlayment with fire-resistant properties works beautifully. It provides a stable, waterproof base while adding fire protection, making it ideal for kitchens and bathrooms. The rigid surface prevents tile cracking and meets building codes in most areas.
When working with hardwood or engineered wood floors, opt for thin fire-resistant foam or cork underlayment. These materials allow the wood to breathe while providing sound dampening and thermal insulation. Make sure your product is compatible with your flooring warranty—some manufacturers have specific requirements.
Laminate flooring pairs well with foam or felt fire-resistant underlayment. These materials cushion the floating floor system while blocking moisture from below. Look for products with integrated vapor barriers if you’re installing over concrete.
Carpet installations benefit from fire-resistant padding that adds comfort underfoot. Memory foam or rubber options with fire-retardant treatments provide both safety and luxury. Check that your carpet pad meets local fire codes, especially in multi-family dwellings.
For wall applications behind decorative panels or wainscoting, thin fire-resistant barrier boards create protection without eating up room space. These work particularly well when updating older homes with modern flooring options and finishes.
Always verify that your underlayment choice complements both your surface material and your home’s specific fire safety needs.
Installing Fire-Resistant Underlayment: What DIYers Need to Know
Basic Installation Steps
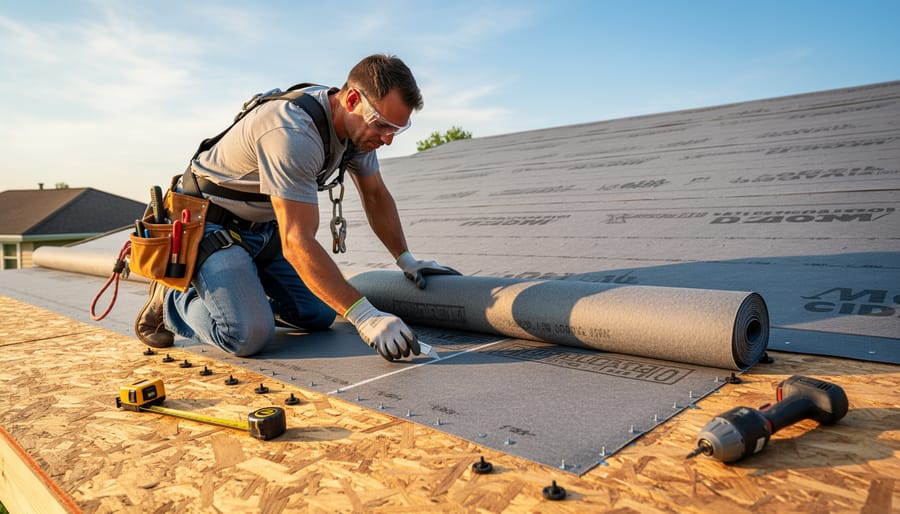
Installing fire resistant underlayment is a straightforward process that most DIY enthusiasts can tackle with basic tools and patience. While specific steps vary depending on whether you’re preparing for flooring, roofing, or wall applications, the general approach remains consistent across projects.
Start by preparing your surface. Remove any old underlayment, debris, or protruding nails. The substrate should be clean, dry, and structurally sound before you begin. For flooring projects, sweep thoroughly and fill any gaps or holes. Roofing applications require inspecting the deck for damage and making necessary repairs first.
Next, measure your space carefully and plan your layout. Most fire resistant underlayment comes in rolls, so you’ll want to minimize seams and waste. Roll out the material perpendicular to your finish surface whenever possible. For example, if you’re installing hardwood flooring running north to south, your underlayment should run east to west.
Secure the underlayment according to manufacturer specifications. Some products use staples, while others require adhesive or specific fasteners. Overlap seams by the recommended amount, typically two to four inches, and seal them with compatible tape to maintain the fire barrier integrity.
Work methodically from one end of the room or section to the other, keeping the material flat and smooth. Avoid wrinkles or bunching, as these can create uneven surfaces that affect your final installation. Trim edges neatly around obstacles and along walls, leaving a small gap for expansion where recommended.
Always wear appropriate safety gear, including gloves and knee protection, to make the installation process more comfortable and safe.
Common Mistakes to Avoid
Even with the best materials, installation mistakes can undermine fire protection. One common error is leaving gaps between underlayment sheets, which creates pathways for fire spread. Always overlap seams according to manufacturer specifications and tape them properly. Another pitfall is using the wrong adhesive or fasteners—not all products are fire-rated, so verify compatibility before installation.
Skipping moisture barriers is also problematic, especially in bathrooms or kitchens. Fire-resistant underlayment still needs protection from water damage to maintain its integrity. Additionally, don’t assume all fire-resistant products meet your local building codes. Check requirements before purchasing, as some areas mandate specific fire ratings or installation methods.
Finally, rushing the acclimation process can cause buckling or warping. Let materials adjust to room temperature and humidity for at least 48 hours before installation. Taking these precautions ensures your fire-resistant underlayment performs as intended when it matters most.
When to Hire a Professional
While many homeowners can tackle fire-resistant underlayment installation themselves, certain situations call for professional expertise. Consider hiring a pro when working with complex roof designs that include multiple valleys, dormers, or unusual angles where proper overlap and sealing are critical for fire protection. If your local building codes require specific installation certifications or inspections, a licensed contractor ensures compliance and helps you avoid potential insurance complications down the road.
Professional installation makes sense for large-scale projects where time is a factor, or when you’re uncomfortable working at heights. Experienced installers have the right tools and knowledge to handle tricky details like proper ventilation integration and fastener spacing that directly impact fire resistance. If you’re coordinating multiple tradespeople or dealing with insurance claims after fire damage, a professional contractor can streamline the process and provide documentation that validates your fire-safety upgrades for insurance purposes.
Cost Considerations and Budget Planning
When budgeting for fire-resistant underlayment, expect to pay between $0.75 and $3.50 per square foot for materials alone, depending on the type and fire rating you choose. Standard gypsum-based products sit at the lower end, while premium cement board or specialized composite underlayments command higher prices. For a typical 300-square-foot room, you’re looking at $225 to $1,050 just for materials.
Installation costs vary widely based on your approach. Professional installation typically adds $2 to $4 per square foot, bringing your total project cost to $825 to $2,250 for that same room. If you’re comfortable with DIY work, you can save significantly on labor while still achieving excellent fire protection.
Here’s how to maximize value without compromising safety. First, always prioritize areas where fire risk is highest—kitchens, utility rooms, and spaces with fireplaces or wood stoves deserve top-tier products. For lower-risk areas, mid-range options meeting local code requirements work perfectly well.
Consider buying in bulk if you’re tackling multiple rooms. Many suppliers offer discounts on larger orders, and you’ll eliminate multiple delivery fees. Additionally, timing your purchase during off-season sales (typically late fall or winter) can yield savings of 10 to 20 percent.
Don’t skimp on proper tools and fasteners. Spending an extra $50 on the right screws and cutting tools prevents costly mistakes and ensures your underlayment performs as designed. Remember, fire-resistant underlayment is an investment in safety and property value—cheaper isn’t always better when lives and assets are at stake.
Finally, check if your insurance provider offers premium reductions for fire-resistant improvements. Some homeowners recoup installation costs through lower annual premiums within just a few years.
Building Codes and Insurance Benefits
Before you invest in fire-resistant underlayment, it’s worth checking what your local building department requires. In many areas, especially those prone to wildfires or classified as high-risk fire zones, building codes now mandate fire-resistant underlayment for new construction and major roof replacements. These requirements vary widely by region, so start by contacting your local building inspector or visiting your municipality’s website. California, for instance, has strict fire-resistant roofing standards in designated wildfire hazard zones, while coastal and urban areas may have different regulations altogether.
Understanding these requirements upfront can save you from costly do-overs and failed inspections. If you’re planning a DIY installation, make sure any product you choose meets your local fire rating standards, typically Class A being the highest rating for fire resistance.
Beyond compliance, fire-resistant underlayment can put money back in your pocket through insurance savings. Many homeowners don’t realize that upgrading to fire-resistant roofing materials, including underlayment, often qualifies for insurance premium discounts. These savings vary by provider and location but typically range from 5% to 20% off your annual premium.
Contact your insurance agent before starting your project and ask specifically about fire-resistant material discounts. Some insurers require documentation or inspection photos, so keep receipts and take pictures during installation. In high-risk fire areas, these upgrades might even be necessary to maintain coverage at all. The upfront investment in fire-resistant underlayment often pays for itself over time through these premium reductions, while simultaneously protecting your most valuable asset.
Fire-resistant underlayment may be hidden beneath your floors and behind your walls, but its protective power is anything but invisible. This affordable layer of defense can slow the spread of flames, provide precious evacuation time, and potentially save your home from catastrophic damage. While it’s easy to focus on the aesthetic elements of your renovation projects, investing in fire safety measures like quality underlayment gives you something far more valuable than beautiful finishes—it gives you peace of mind.
If you’re planning a renovation or building project, now is the perfect time to assess your current fire protection. Take a moment to review your local building codes and check whether your existing underlayment meets modern fire safety standards. Even if you’re not planning major construction, understanding what’s beneath your surfaces helps you make informed decisions about future upgrades.
Ready to take action? Start by requesting quotes from reputable suppliers and discussing your project with a qualified contractor. If you’re comfortable with DIY installation, gather your materials, review manufacturer guidelines, and don’t hesitate to consult a professional for guidance. Your family’s safety is worth the investment, and that investment starts with the layers you never see.
