Why Your Radiant Floors Need a Structural Thermal Break (Before It Costs You)
Structural thermal breaks are specialized insulation layers that prevent heat from escaping through your concrete floors and ceilings in radiant heating and cooling systems. Without them, your expensive heated or chilled water literally warms or cools the earth beneath your home instead of your living space, wasting up to 30% of your system’s energy and dramatically increasing utility bills.
Think of a thermal break as a protective barrier between your thermally active slab and the structural elements below it. In a typical Thermally Activated Building System (TABS), heated or cooled water flows through pipes embedded in concrete. That concrete naturally wants to conduct temperature in all directions, including downward into your foundation or upward through your ceiling. The thermal break stops this energy loss by creating an insulation barrier, typically made from rigid foam boards or specialized materials with low thermal conductivity.
For homeowners planning a radiant system installation, understanding thermal breaks means making informed decisions about material thickness, R-value requirements, and placement locations. These choices directly impact your system’s efficiency, comfort levels, and return on investment. The difference between a properly designed thermal break and a missing or inadequate one can mean hundreds of dollars in annual energy costs and significantly reduced heating or cooling performance throughout your home’s lifetime.
What Is a Thermally Activated Building Structure (TABS)?
How TABS Differs from Traditional Radiant Floors
If you’ve ever considered radiant floor heating, you might picture thin electric wires or water tubes installed just beneath your tile or hardwood. That’s the traditional approach, and it works well for warming surfaces. But TABS takes a completely different route.
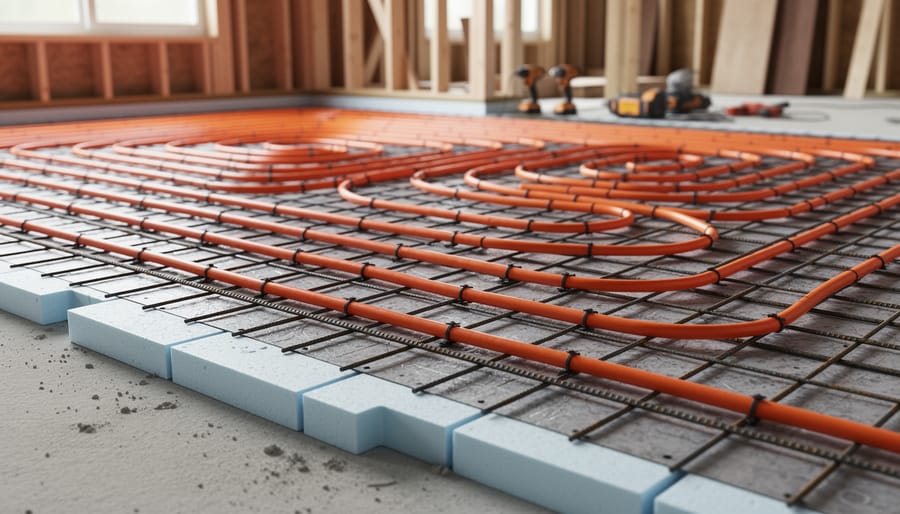
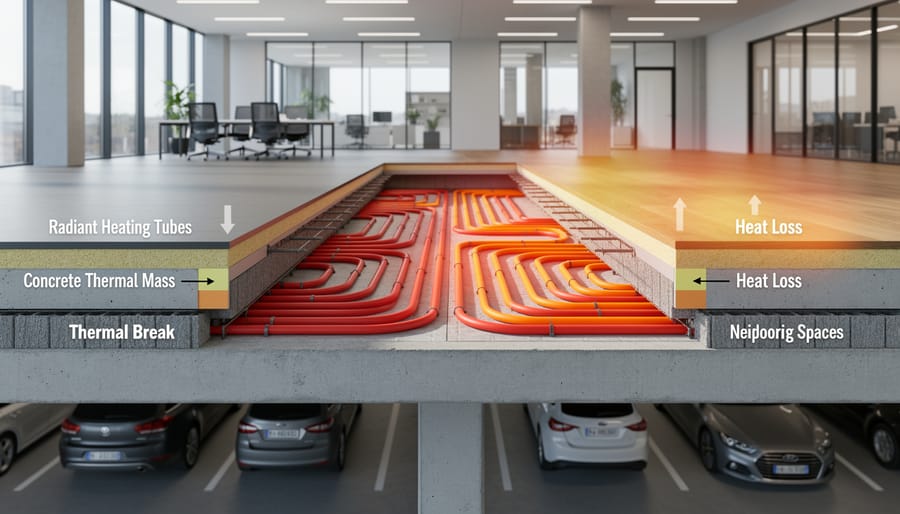
Instead of adding heating elements as an afterthought, TABS integrates hydronic tubing directly into your building’s concrete floor slabs during construction. Think of it as turning your entire structural floor into a gentle, slow-release thermal battery. The concrete itself becomes the heating and cooling system, storing thermal energy and radiating it gradually throughout the day.
Traditional radiant floors heat up quickly and provide that cozy warmth underfoot we all love. TABS, on the other hand, operates at lower temperatures and focuses on conditioning the entire room rather than just the floor surface. You won’t necessarily feel that immediate warmth when you step on a TABS floor, but you’ll notice the consistent, draft-free comfort throughout your space.
This fundamental difference is why thermal breaks matter so much in TABS installations. Since you’re relying on the concrete slab’s thermal mass for climate control, you need to prevent that stored energy from escaping downward into the ground or adjacent structures.
The Problem: Heat Escaping Through Your Structure
Picture this: you’ve invested in a beautiful radiant heating or cooling system embedded in your concrete floor. The idea is simple—warmth (or coolness) radiates up into your living space, creating comfortable temperatures exactly where you need them. But here’s the catch: heat doesn’t just move in one direction. It travels wherever there’s a path of least resistance.
Without proper insulation, a significant portion of that energy takes a detour. Instead of warming your toes on a chilly morning, your carefully generated heat seeps downward through the concrete slab into the ground below. Or worse, it migrates horizontally into adjacent spaces like garages, crawl spaces, or even your neighbor’s unit in a multi-family building. Think of it like heating your entire neighborhood when you only meant to warm your living room.
This isn’t just uncomfortable—it’s expensive. Your heating or cooling system works overtime trying to compensate for the lost energy, driving up utility bills month after month. In fact, studies show that uninsulated radiant systems can lose 30-50% of their energy to unwanted areas.
The same principle applies in reverse during summer months. If you’re using radiant cooling, that precious cool temperature escapes downward instead of keeping your floors comfortably cool. The result? Higher energy costs, reduced system efficiency, and rooms that never quite reach your desired temperature no matter how much you crank the thermostat.
What a Structural Thermal Break Actually Does
Common Materials Used in Thermal Breaks
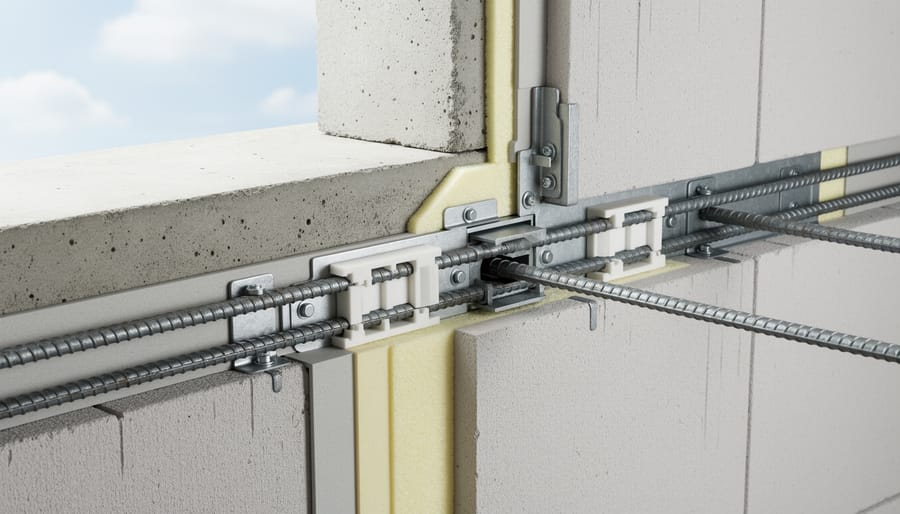
When you’re installing a structural thermal break system, you’ll encounter a few key materials designed to stop heat transfer while maintaining structural integrity. The most common option is rigid foam insulation, typically made from extruded polystyrene (XPS) or expanded polystyrene (EPS). These materials offer excellent insulating properties and come in various thicknesses to match your project’s needs.
You might also see specialized thermal break products that combine insulation with engineered connectors. These products are specifically designed for radiant heating and cooling applications, featuring built-in channels or clips that help secure your tubing while preventing thermal bridging. Some systems incorporate natural insulation materials for eco-conscious homeowners seeking sustainable options.
During installation, your contractor will likely recommend materials based on your building’s structural requirements and local building codes. The thickness typically ranges from one to three inches, with denser materials providing better support for concrete slabs above. Understanding these material choices helps you make informed decisions about performance, cost, and long-term energy savings for your radiant system.
Where Thermal Breaks Matter Most in Your Home
Understanding where your home loses the most heat helps you prioritize thermal break installations for maximum impact. Let’s look at the spots where thermal bridges cause the biggest problems.
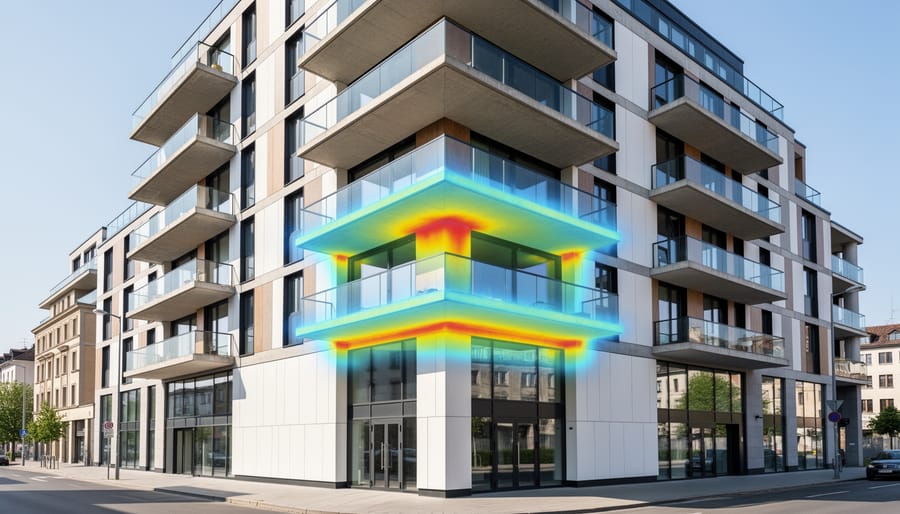
Balconies and cantilevered decks are notorious heat thieves. When a concrete balcony extends directly from your interior floor slab without interruption, it acts like a highway for heat to escape. Think of it as leaving a metal spoon in hot coffee—the entire spoon gets hot because metal conducts heat so efficiently. That same concrete extending outdoors creates a cold zone on your interior floor near the balcony door, leading to uncomfortable cold spots and increased heating bills. This is where structural thermal breaks become essential, creating a barrier that stops heat from traveling outside.
Garage-to-living space transitions present another major challenge. Your heated living areas sit right next to an unheated garage, separated only by a concrete slab or structural connection. Without a thermal break, cold transfers directly from the garage into your home’s floor structure, making rooms above the garage noticeably colder and harder to heat. Many homeowners struggle with this exact problem, constantly adjusting thermostats to compensate.
Perimeter edges where your floor slab meets exterior walls create a continuous thermal bridge around your entire home. Heat naturally flows toward these colder edges, cooling down the perimeter of your rooms and creating that chilly feeling near windows and exterior walls. This edge condition affects every room with an exterior wall.
Cantilevered slabs extending beyond your home’s footprint, like bay windows or architectural overhangs, expose concrete directly to outdoor temperatures on three sides. This creates an even more efficient path for heat loss than standard connections.
Each of these locations shares a common vulnerability: structural concrete or steel connecting your warm interior to the cold exterior without any insulating interruption. Installing thermal breaks at these critical junctions dramatically reduces heat loss and improves comfort throughout your home.
The Real-World Benefits You’ll Actually Notice
Let’s talk about what structural thermal breaks actually do for your daily life, because that’s what really matters when you’re investing in your home.
First up: your energy bills. While results vary based on your climate and system design, most homeowners see a 15-30% reduction in heating and cooling costs compared to similar homes without thermal breaks. That’s real money staying in your pocket month after month. The thermal break prevents your expensive heated or cooled water from losing energy through your home’s structure, so your system doesn’t have to work overtime to maintain comfort.
Temperature consistency is where you’ll notice the biggest quality-of-life improvement. No more hot and cold spots throughout your home. That bedroom that’s always too cold in winter? The living room that gets uncomfortably warm in summer? Structural thermal breaks help your radiant system deliver even, comfortable temperatures in every room. Your floors stay consistently comfortable underfoot without any surprise cold zones.
Here’s a benefit many people don’t consider until it becomes a problem: condensation and mold prevention. When warm, moist air meets cold surfaces, you get condensation. Structural thermal breaks minimize those cold spots where moisture can accumulate, significantly reducing mold and mildew risk. This means healthier indoor air quality and less maintenance headache down the road.
Want to maximize these benefits? Consider pairing your thermally broken system with smart home technology that learns your schedule and preferences. Smart thermostats can optimize your system’s performance, helping you squeeze every bit of efficiency from your investment while keeping your home perfectly comfortable.
What to Expect During Installation
Thermal breaks are typically installed during new construction or major renovation projects, not as a standalone retrofit. The timing matters because these components need to be integrated into your floor system before the concrete slab is poured—making this decidedly not a DIY weekend project.
Here’s what the installation process generally involves: your contractor will first prepare the subfloor, ensuring it’s level and properly insulated. Next, they’ll install the thermal break material according to manufacturer specifications, paying careful attention to seams and edges where heat could escape. The radiant tubing gets laid on top of the thermal break, secured in place with clips or guides. Finally, the concrete or lightweight gypsum overlay is poured, completely encasing the tubing and creating your finished floor structure.
This is professional-level work for several important reasons. First, proper installation directly impacts your system’s energy efficiency—mistakes here mean higher heating bills for years to come. Second, working with concrete and radiant systems requires specialized knowledge and equipment. Third, most thermal break products come with warranties that require certified installer involvement.
The typical installation timeline ranges from a few days to a week, depending on your project size. While you can’t install thermal breaks yourself, understanding the process helps you make informed decisions when working with contractors. Including structural thermal breaks alongside other eco-friendly home features during construction maximizes your investment in comfort and efficiency.
Questions to Ask Your Contractor
Before your contractor starts work, have a candid conversation about thermal breaks to ensure you’re getting the performance you’re paying for. Here are the essential questions to ask:
Are structural thermal breaks included in your bid? Don’t assume they’re standard—some contractors skip them to cut costs. Get clarity upfront about what’s included in your quote.
Where exactly will thermal breaks be placed? Ask for a detailed layout showing placement at all critical junctions—walls, columns, balconies, and anywhere your heated slab meets the building structure.
What specific materials are you using for the thermal breaks? Request product specifications and R-values. Quality matters here, so ask about the thermal resistance rating and whether the materials meet local building codes.
What performance improvements can I realistically expect? Have your contractor quantify energy savings, temperature consistency improvements, and projected payback period. Get these estimates in writing.
How will installation affect my timeline and budget? Understanding the added cost and construction time helps you plan accordingly.
Can you provide references from previous TABS installations? Speaking with past clients gives you real-world insight into the contractor’s expertise and the system’s actual performance.
When planning your radiant heating or cooling system, think of structural thermal breaks as essential insurance for your investment. While skipping this component might save a few dollars initially, it’s a decision that can haunt you with higher energy bills and reduced comfort for decades to come. Thermal breaks aren’t an optional upgrade or a nice-to-have feature—they’re fundamental to making your TABS system work as efficiently as possible.
As you interview contractors and review project proposals, make thermal breaks a non-negotiable part of your specifications. Ask directly about the type of insulation material, its R-value, and how it will be installed. A quality contractor will appreciate your attention to detail and readily provide this information. Remember, the upfront cost difference is minimal compared to the long-term energy savings and comfort improvements you’ll enjoy. Your radiant system is a multi-decade investment in your home’s comfort and efficiency—protect that investment by insisting on proper thermal separation from day one.
