Make Your 7×10 Office Work Harder Than You Do
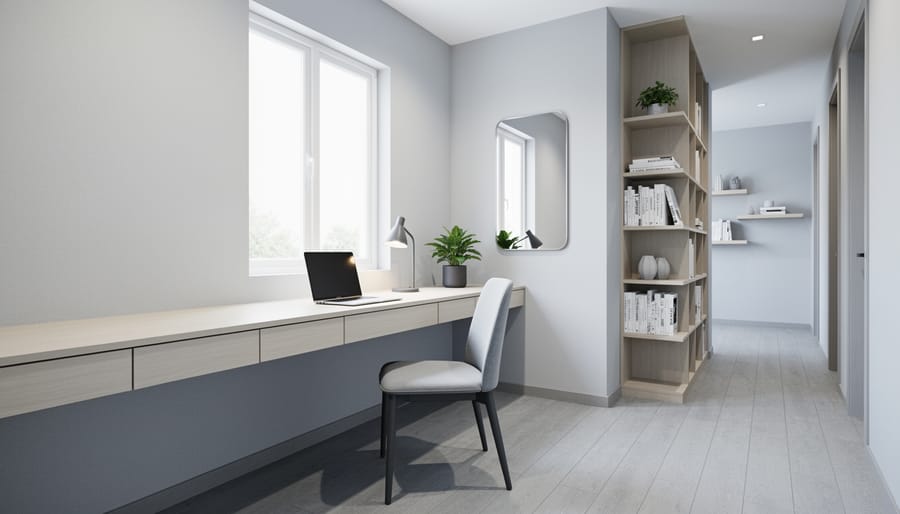
Position your desk against the longest wall to maximize floor space and create clear pathways in your 7×10 office. This 70-square-foot workspace requires strategic furniture placement where every inch counts. Mount a compact 48-inch desk flush against the 10-foot wall, leaving 24-30 inches of clearance behind your chair for comfortable movement. Place a vertical storage unit or bookshelf in the corner to capitalize on height rather than consuming precious floor area.
Choose furniture pieces specifically sized for small office spaces – a desk no deeper than 24 inches, a chair with a compact footprint under 26 inches wide, and slim storage solutions measuring 12-15 inches deep. Wall-mounted shelves, floating desks, and multi-functional furniture like an ottoman with internal storage help you avoid the cramped feeling that overtakes tight quarters when standard-sized furniture dominates.
Install adequate lighting through a combination of overhead fixtures and task lighting to eliminate shadows that make small rooms feel smaller. Position your desk perpendicular to windows when possible to reduce screen glare while maintaining natural light benefits. Consider a light color palette for walls and furniture to visually expand the space, and add a mirror on one wall to create depth perception that makes your compact office feel substantially larger than its actual dimensions.
Understanding Your 7×10 Space: The Reality Check
Let’s talk real numbers here. A 7×10 office gives you exactly 70 square feet to work with. To put that in perspective, it’s roughly the size of a walk-in closet or a small guest bedroom. Picture a space that’s about two average arm-spans wide and just under three arm-spans deep. Not tiny, but definitely cozy.
Here’s your reality check: you’re working with limited floor space, which means every piece of furniture needs to earn its place. The good news? Seventy square feet is absolutely enough for a functional, comfortable home office when you plan it right.
The biggest mistake people make is trying to cram in too much furniture. I’ve seen folks attempt to fit an oversized executive desk, a filing cabinet, bookshelves, and a lounge chair into this space. The result? A cramped, claustrophobic room that feels more like a storage closet than a workspace.
Another common pitfall is ignoring traffic flow. You need at least 24 to 30 inches of clearance to move comfortably around your desk and pull out your chair. If you’re bumping into furniture every time you stand up, your layout needs rethinking.
Think strategically about scale. A standard 60-inch desk might look perfect online but can overwhelm a 7×10 room. Instead, consider compact options around 48 inches wide. Wall-mounted shelves beat bulky bookcases every time, and a slim filing cabinet (or better yet, digital storage) keeps floor space open.
The key is accepting what this space is: a dedicated, focused work zone, not a sprawling corporate office. Once you embrace these dimensions and plan accordingly, you’ll be amazed at how functional and inviting your 7×10 office can become.
The Three Best Layout Configurations for 7×10 Offices
The Corner Command Center
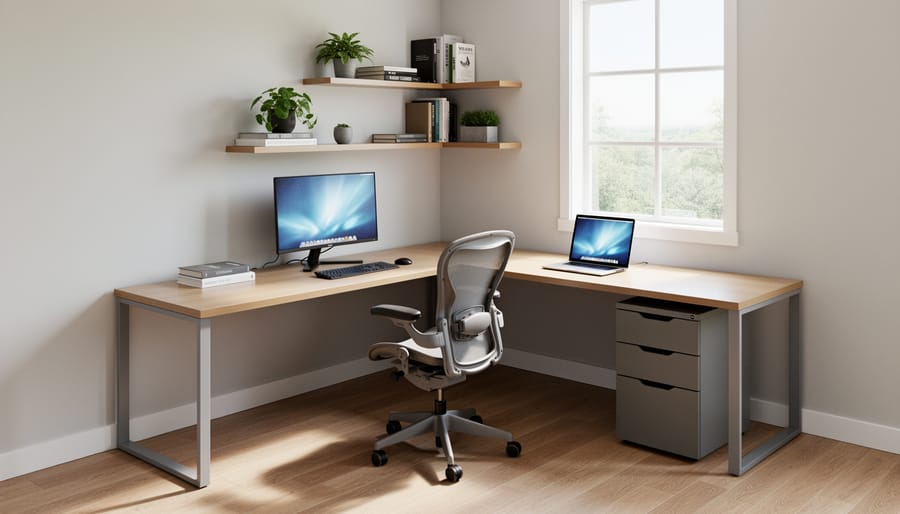
When you’re working with a 7×10 space, the corner becomes your best friend. L-shaped desk layouts are perfect for small offices because they give you two full work surfaces without eating up valuable floor space in the center of the room.
Here’s how to make it work: Position your L-shaped desk in one corner, ideally the corner opposite the door so you can see who’s entering. A desk with dimensions around 60 inches on one side and 48 inches on the other fits comfortably without overwhelming the room. This setup creates distinct work zones—use one side for your computer and primary tasks, and the other for paperwork, projects, or even a small printer.
The beauty of this configuration is the natural workflow it creates. Keep your most-used items within arm’s reach on your dominant side, and use the perpendicular surface for secondary tasks. Mount a monitor arm to free up desk space, and add a small filing cabinet that doubles as a side table beneath the shorter desk section.
For technology integration, install a power strip with USB ports directly under your desk to avoid cord chaos. Consider a cable management tray along the underside to keep everything tidy. Wall-mounted shelves above the desk corner provide storage without taking up precious floor space, keeping your command center organized and efficient.
The Wall-Hugger Setup
If you’re working with a 7×10 space and feeling a bit boxed in, the wall-hugger setup might be your best friend. This layout keeps everything pressed against one long wall, leaving the center of your room completely open. The result? A space that feels less cramped and gives you room to actually breathe and move around.
Start with a desk that runs along your 10-foot wall. A simple 60-inch desk works perfectly here, leaving space on either end for additional storage pieces. Position your desk chair directly in front, and you’ll have plenty of clearance behind you to roll back without hitting anything. Mount floating shelves above your desk at eye level when standing—this keeps frequently used items within reach without sacrificing precious floor space.
On one side of your desk, add a slim filing cabinet or a narrow bookshelf that’s no wider than 15 inches. On the other side, consider a small credenza or storage cabinet. This creates a continuous workstation along the wall while maintaining that open center space.
The beauty of this setup is psychological as much as practical. When you walk into the room, you see open floor space rather than a maze of furniture. It makes the 70 square feet feel surprisingly spacious. Plus, you can easily add a small area rug in the center to define your workspace without cluttering it.
For tech integration, use a monitor arm to free up desk surface and keep your screen at the perfect height. Cable management boxes mounted under your desk keep cords from becoming visual clutter along your wall.
The Floating Desk Layout
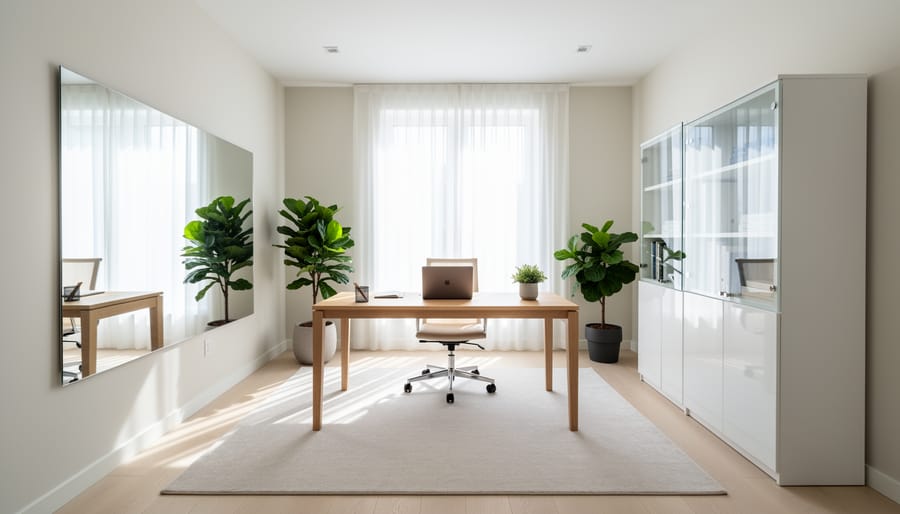
If you’re looking to create a more polished, professional atmosphere in your 7×10 office, consider floating your desk away from the walls. This layout might seem counterintuitive in a smaller space, but it can actually make the room feel more spacious and sophisticated while giving you better access to natural light.
Position your desk about 2-3 feet from the window wall, facing into the room. This creates an executive-style setup that reduces glare on your computer screen while still bathing your workspace in natural light. A compact desk around 48 inches wide works perfectly here, leaving enough room to walk comfortably around all sides.
Behind the desk, use the wall space for a credenza or low bookshelf, about 60-72 inches long. This creates a functional backdrop for video calls and provides additional storage without blocking light flow. The credenza can house your printer, files, and office supplies while keeping them within easy reach.
For technology integration, this layout is ideal for managing cables. Install a floor outlet or use a cable management box under your desk to keep cords organized and out of sight. Consider a wireless charging pad built into your desk surface to minimize visible tech clutter.
Add a stylish area rug under your desk zone to define the workspace and add warmth. This floating arrangement creates clear pathways around your office, making the 70 square feet feel more open and intentional. The key is keeping furniture proportional and leaving at least 24-30 inches of clearance on all walkable sides.
Storage Solutions That Don’t Steal Your Floor Space
Going Vertical: Wall-Mounted Options
When floor space is at a premium in your 7×10 office, the answer is simple: look up! Your walls offer roughly 70 square feet of untapped storage potential that won’t eat into your already limited walking space.
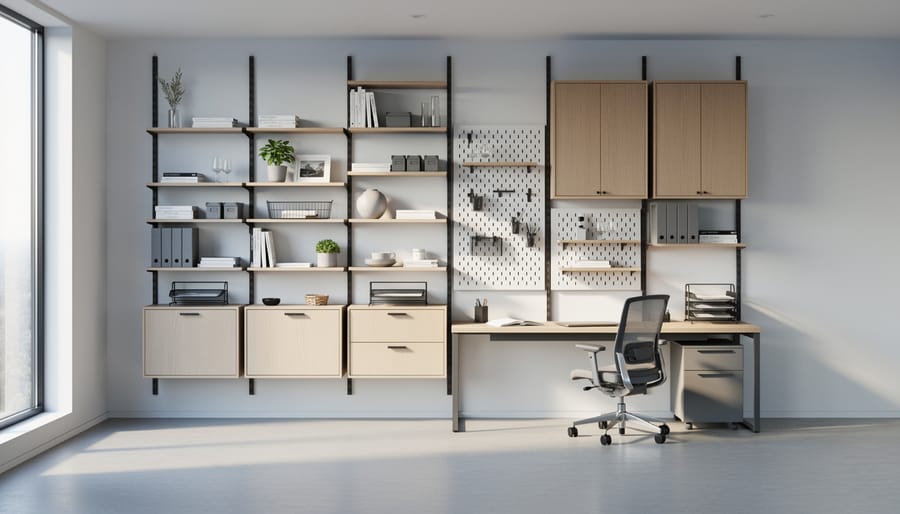
Start with floating shelves above your desk. Install them 18-24 inches above your workspace to keep frequently used items within arm’s reach without feeling cramped. A set of three 24-inch shelves can hold books, binders, and decorative storage boxes that keep clutter contained.
Pegboards are your best friend for customizable organization. Mount one behind your desk to hang everything from headphones and cables to small office supplies. The beauty? You can rearrange the hooks and baskets anytime your needs change. Paint it to match your walls for a cohesive look, or choose a bold color to add personality.
Wall-mounted organizers with pockets work brilliantly for mail, notepads, and ongoing projects. Install a magnetic board or corkboard on the wall beside your desk for quick-reference documents and inspiration.
Consider a wall-mounted fold-down desk if you need occasional extra workspace. When not in use, it disappears completely, giving you valuable floor space back. Just make sure to mount everything into studs for proper support—nobody wants their storage solution coming down mid-workday!
Dual-Purpose Furniture Picks
In a 7×10 office, every piece of furniture should pull double duty to maximize your limited square footage. Start with a Murphy desk that folds flat against the wall when not in use, instantly giving you back several feet of floor space for yoga breaks or simply moving around comfortably. Many models include built-in shelving and cork boards, eliminating the need for separate storage units.
Consider a storage ottoman that serves as extra seating for video calls while hiding office supplies, printer paper, or seasonal items inside. Place it under your desk when not needed, and it practically disappears. File cabinet alternatives like rolling carts with drawers can slide beneath your desk and double as a printer stand when pulled out.
Wall-mounted desks with integrated filing drawers are game-changers for tight spaces. Look for models with cable management holes and built-in power strips to keep your tech organized without adding bulky surge protectors. A bookshelf with a fold-down desk attachment transforms vertical wall space into functional workspace while keeping supplies within arm’s reach. The key is choosing pieces where storage, seating, and work surface combine seamlessly, giving you maximum function without the furniture overload.
Hidden Storage Hacks
When space is tight, you need to get creative with where you tuck away office supplies, files, and equipment. The good news? Your 7×10 office has more hidden storage potential than you might think.
Start by maximizing the often-wasted space under your desk. Rolling drawer units that slide beneath your work surface keep files and supplies within arm’s reach while maintaining a clean look. You can also install shallow shelving or hanging organizers on the underside of your desk for pens, charging cables, and small items.
Don’t overlook the back of your office door. Over-the-door organizers with clear pockets work brilliantly for storing notebooks, folders, and daily essentials without eating up precious floor space. Mount a slim coat rack on the door’s back to hang bags or a sweater.
Consider furniture that does double duty. An ottoman with internal storage provides extra seating for video calls while hiding away seasonal items or backup supplies. Look for filing cabinets that can support a cushion on top to serve as additional seating.
Wall-mounted magnetic strips keep scissors, staplers, and metal tools visible yet out of the way. Install small floating shelves in corners or above doorways for items you need but don’t access daily. These vertical solutions free up your desktop while keeping everything accessible in your compact workspace.
Furniture Dimensions That Actually Fit
Getting the right furniture dimensions is crucial when you’re working with a 7×10 space. The difference between a functional office and a cramped disaster often comes down to choosing pieces that fit the scale of your room.
For your desk, think compact but practical. A writing desk measuring 42-48 inches wide and 20-24 inches deep gives you adequate workspace without overwhelming the room. If you need more surface area, an L-shaped desk with a maximum footprint of 60 inches on the long side and 48 inches on the return works well in corner configurations. Wall-mounted desks are game-changers for tight spaces, offering 36-40 inches of work surface while keeping the floor clear underneath.
Your office chair matters more than you might think in a small space. Look for chairs with a compact base measuring 24-26 inches wide. Skip the oversized executive chairs and opt for ergonomic task chairs that provide comfort without eating up precious square footage. When pushed under your desk, the entire setup should occupy no more than 30 inches of depth.
Storage units need careful consideration too. A vertical bookshelf measuring 24-30 inches wide, 12 inches deep, and 60-72 inches tall maximizes vertical space without crowding the floor. File cabinets should stick to standard dimensions of 15 inches wide and 18 inches deep. These slip nicely under most desks or beside them.
Here’s a quick reference chart for your 7×10 office:
Desk: 42-48 inches W x 20-24 inches D
L-Shaped Desk: 60 inches W x 48 inches D (maximum)
Wall-Mounted Desk: 36-40 inches W x 16-18 inches D
Office Chair: 24-26 inches W
Bookshelf: 24-30 inches W x 12 inches D x 60-72 inches H
File Cabinet: 15 inches W x 18 inches D x 28 inches H
Side Table: 16-20 inches W x 16-20 inches D
Remember to leave at least 36 inches of clearance for walkways and chair movement. This ensures you can navigate comfortably and your chair has room to roll back from the desk.
Making It Feel Bigger: Visual Space Tricks
When you’re working with 70 square feet, the right design choices can make your office feel surprisingly spacious. Let’s explore some proven visual tricks that’ll transform your compact workspace.
Start with your color palette. Light, neutral walls are your best friend in a 7×10 office. Whites, soft grays, and pale blues reflect light and push walls back visually. If you crave personality, add color through accessories rather than painting all four walls a dark shade. Consider an accent wall behind your desk in a slightly deeper tone to create depth without closing in the space.
Lighting strategies make an enormous difference. Natural light is ideal, so keep window treatments minimal or opt for sheer curtains. Add layered lighting with a desk lamp, overhead fixture, and perhaps a floor lamp in the corner. Well-lit rooms always feel larger than dim ones.
Mirrors work magic in small offices. Place a large mirror opposite a window to double the natural light, or position one behind your desk to visually extend the wall. Even a smaller decorative mirror adds dimension.
Your furniture choices matter tremendously. Select pieces with exposed legs rather than solid bases, this creates sight lines along the floor that make the room feel more open. Glass or acrylic desk accessories maintain functionality without visual weight. A glass-top desk or clear chair practically disappears while serving its purpose.
Finally, embrace vertical storage. Tall, narrow bookcases draw the eye upward and emphasize ceiling height. Wall-mounted shelves eliminate bulky furniture footprints while providing essential storage. Keep surfaces relatively clear, as clutter makes any space feel cramped and chaotic.
Technology Setup Without the Cable Chaos
In a 7×10 space, technology cables can quickly turn your compact office into a tangled mess. The good news? Modern technology setup solutions make it easier than ever to go wireless and keep surfaces clean.
Start by choosing wireless peripherals wherever possible. A wireless keyboard, mouse, and printer eliminate at least three cables right away. Modern wireless printers can tuck neatly on a shelf or wall-mounted bracket, freeing up valuable desk space while staying connected to your devices.
For monitor setup, consider a monitor arm instead of a traditional stand. These clamp to your desk edge and allow you to adjust height and position while keeping the base of your desk clear. The arm conceals cables along its length, maintaining that clean aesthetic.
Cable management doesn’t have to be complicated. Simple adhesive cable clips attached to the back edge of your desk keep charging cables accessible but hidden. For power strips and excess cable length, mount them underneath your desk using mounting tape or small brackets. A basic cable sleeve bundled cords together along the desk leg, creating one clean line instead of multiple dangling wires.
Position your desk near outlets to minimize extension cord needs. If outlets are limited, choose a compact surge protector with USB ports built in, reducing the number of wall adapters competing for space. These small changes transform your workspace from cluttered to streamlined without any major renovations.
Creating a functional and comfortable workspace in a 7×10 office is absolutely achievable with the right approach. The key is starting with your layout first rather than rushing to buy furniture. Measure your space carefully, map out traffic flow, and think about where natural light falls throughout the day. Once you have your desk and chair positioned optimally, you can build your storage solutions around how you actually work. Remember that vertical space is your best friend in a compact office, and choosing furniture with dual purposes keeps the room from feeling cramped. Whether you opt for an L-shaped configuration, a linear setup, or a floating desk arrangement, the goal is creating a space that supports your productivity without sacrificing comfort. Take it one step at a time, prioritize what matters most for your daily workflow, and don’t be afraid to adjust as you discover what works best for you.
