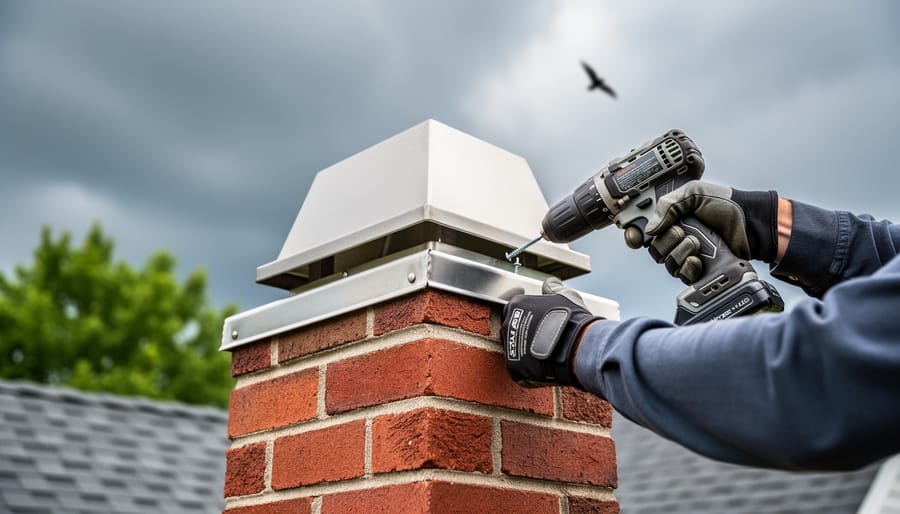
Stop Rain and Animals from Destroying Your Chimney
Your chimney needs protection from water damage, animal intrusions, and debris—and installing a chimney cap yourself can save you hundreds of dollars compared to professional services like Mason Chimney Repair. A quality chimney cap prevents costly repairs by blocking rain that causes flue deterioration, keeps birds and squirrels from nesting inside, and stops downdrafts that fill your home with smoke. This guide walks you through selecting the right cap for your chimney’s specific dimensions and material, then provides clear instructions for measuring accurately and completing a secure installation in just a few hours. Whether you have a masonry chimney, metal flue pipe, or chase top system, you’ll learn which cap style offers the best protection and how to mount it properly using basic tools you likely already own. The installation process requires only a ladder, drill, and measuring tape—no specialized skills needed. By the end of this article, you’ll understand exactly which features matter most when comparing caps and feel confident tackling this straightforward home improvement project that protects one of your home’s most vulnerable areas.
Why Your Chimney Needs a Cap (And What Happens Without One)
Protection from Water Damage
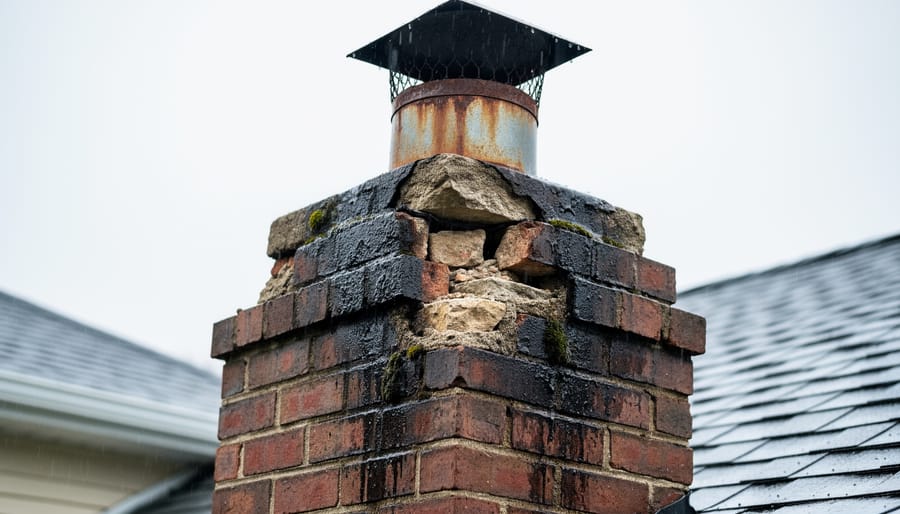
Water is your chimney’s worst enemy. Without proper protection, rain, snow, and ice can seep into your chimney system, causing extensive damage that’s both costly and dangerous. When water penetrates the masonry, it leads to cracking, spalling, and structural deterioration through repeated freeze-thaw cycles. The flue liner can crack or separate, allowing dangerous gases to escape into your home rather than venting safely outside.
Interior damage is equally concerning. Water infiltration often results in stained ceilings, peeling wallpaper, and musty odors throughout your living space. It can also damage your damper mechanism, making it difficult to control airflow effectively—similar to issues with preventing heat loss throughout your home. If you’ve invested time in a fireplace renovation guide, protecting that investment with a quality chimney cap is essential. A properly installed cap acts as your first line of defense, keeping moisture out while maintaining proper ventilation.
Keeping Animals and Debris Out
Without a chimney cap, your flue becomes an inviting home for unwanted guests. Raccoons, squirrels, birds, and bats commonly nest in chimneys, attracted by the shelter and darkness. These animals create blockages with nesting materials, potentially causing dangerous carbon monoxide buildup inside your home. Birds are particularly problematic since they return to the same nesting sites year after year.
Beyond wildlife, uncapped chimneys collect leaves, twigs, and other debris that can restrict airflow or create fire hazards. Rain and snow enter freely, causing water damage to your fireplace and potentially rusting metal components. In severe cases, accumulated debris can completely block your flue, preventing smoke and gases from properly venting during use. A quality chimney cap acts as your first line of defense, keeping both animals and debris out while maintaining proper ventilation for safe fireplace operation.
Improved Draft and Spark Protection
A properly designed chimney cap does more than just keep rain out—it actually enhances your chimney’s performance. The raised design and strategic venting slots create better draft by protecting the flue opening from downdrafts caused by wind. When wind hits your chimney, a quality cap redirects airflow upward, helping smoke exit more efficiently instead of pushing it back down into your home.
Spark protection is equally important, especially if you have a wood-burning fireplace. As you enjoy a cozy fire, tiny embers can travel up through your chimney at surprising speeds. Without a cap, these sparks can land on your roof, nearby trees, or dry leaves in your gutters—creating a serious fire hazard. The mesh screening on chimney caps (typically 5/8-inch or 3/4-inch openings) catches these embers before they escape while still allowing smoke to pass through freely. This simple feature provides peace of mind and helps you meet local fire codes in many areas.
Types of Chimney Caps: Finding Your Perfect Match
Single-Flue vs. Multi-Flue Caps
Understanding the difference between single-flue and multi-flue caps is essential for choosing the right protection for your chimney. Single-flue caps fit directly over individual flue tiles and are ideal if your chimney has just one flue or if you want to cap each flue separately. They’re typically more affordable and easier to install, making them perfect for DIY projects. Simply measure your flue opening and choose a cap that matches those dimensions.
Multi-flue caps, sometimes called chase covers or full-coverage caps, span your entire chimney crown and protect multiple flues at once. These are great if you have several flues close together or want a cleaner, more unified appearance. While they cost more upfront, multi-flue caps offer comprehensive protection against weather, debris, and animals across your entire chimney structure. They require more precise measurements of your chimney crown and may need professional installation for larger or more complex setups.
Material Options: Stainless Steel, Copper, and Aluminum
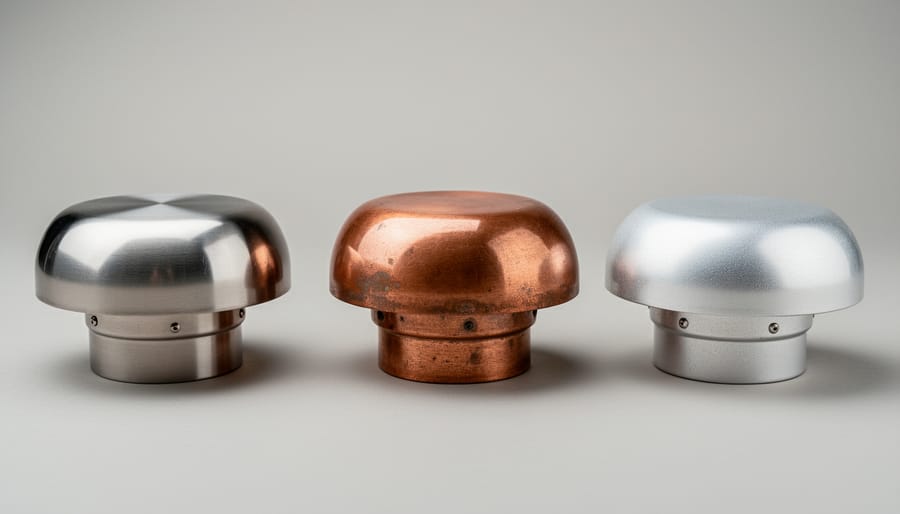
Choosing the right material for your chimney cap affects both performance and your wallet. Let’s break down the three most popular options to help you decide what works best for your home.
Stainless steel is the gold standard for chimney caps and for good reason. It resists rust exceptionally well, even in coastal areas with salty air, and typically lasts 20-30 years with minimal maintenance. While it’s the priciest option (usually $100-$400), you’re investing in longevity. The sleek, modern appearance complements most architectural styles, and it won’t stain your chimney with rust streaks. If you’re planning to stay in your home long-term, stainless steel delivers the best value.
Copper caps offer timeless elegance and develop a beautiful green patina over time that many homeowners love. This material is incredibly durable, often outlasting stainless steel, but comes with a premium price tag ($200-$600). Copper works wonderfully on historic homes or upscale properties where curb appeal matters. Keep in mind that the patina process takes several years, so your cap will start bright and shiny.
Aluminum represents the budget-friendly choice ($50-$150) and works well in dry climates. It’s lightweight, making DIY installation easier, and won’t rust. However, aluminum is less durable than other options and may dent or deteriorate faster in harsh weather conditions. It’s ideal if you’re working with a tight budget or need a temporary solution while planning renovations.
Special Features Worth Considering
Beyond the basic design, several specialized features can significantly enhance your chimney cap’s performance and functionality. Let’s explore options that might be worth the extra investment for your specific situation.
Draft-increasing designs feature specially engineered tops that create a wind-directional effect, essentially using air currents to pull smoke up and out more efficiently. These are particularly valuable if you’ve struggled with smoky rooms or downdrafts. The wind-catching design amplifies your chimney’s natural draft, especially helpful on windy days or in homes with challenging chimney configurations.
Built-in dampers offer year-round energy savings by sealing your chimney when not in use. Instead of installing a separate damper system, you get a top-mounted damper controlled by a cable that runs down your chimney. Simply pull the cable to open before lighting a fire, then close it afterward. This feature prevents conditioned air from escaping up your chimney and blocks drafts from coming down, potentially saving hundreds on heating and cooling costs annually.
Spark arrestors are essential if you burn wood regularly. These mesh screens trap sparks and embers before they can land on your roof or nearby vegetation. Many municipalities actually require spark arrestors, so check local fire codes before purchasing.
Finally, decorative caps can complement your home’s architectural style. From sleek copper designs that develop beautiful patinas to ornate Victorian-style tops, these options prove that function and aesthetics can work together beautifully. Just ensure decorative elements don’t compromise the cap’s primary protective duties.
Measuring Your Chimney: Getting the Right Size
Tools You’ll Need for Measuring
Before you head up to your roof, gather these essential items to ensure accurate measurements and safe working conditions. You’ll need a sturdy tape measure (at least 25 feet long) to measure your flue’s dimensions from multiple angles. A flashlight helps you see clearly down into your chimney, especially if you’re measuring from above. Don’t forget safety gear: a stable ladder rated for your weight, work gloves with good grip, and safety glasses to protect against falling debris. If your roof has a steep pitch, consider investing in a safety harness. Having a notepad and pen handy lets you record all measurements immediately, preventing potentially costly errors when ordering your chimney cap.
How to Measure Single-Flue Chimneys
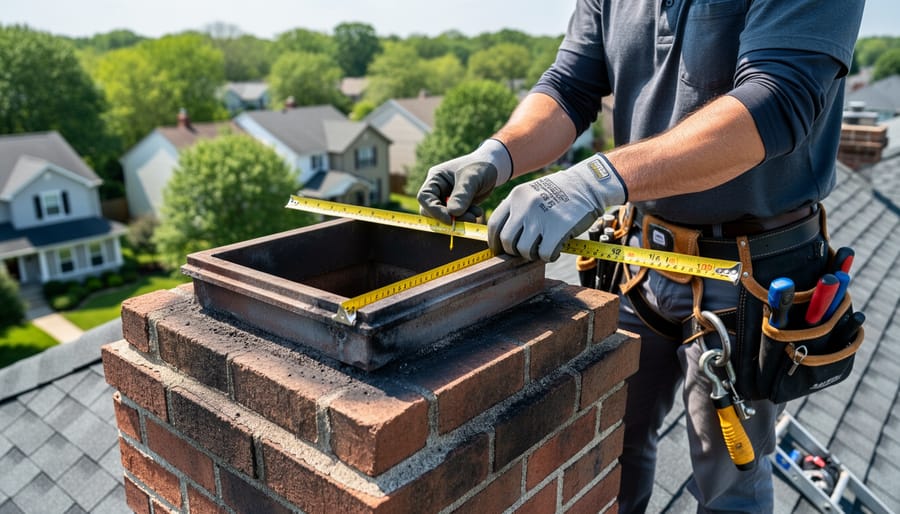
Measuring your single-flue chimney accurately is crucial for getting a cap that fits properly and protects your home. Start by grabbing a tape measure and heading up to your roof (with proper safety gear, of course).
For round flues, measure the inside diameter by placing your tape measure across the center of the opening from one inner edge to the opposite inner edge. Then measure the outside diameter across the outer edges of the flue pipe. Most round flues come in standard sizes like 6, 8, or 10 inches.
For square or rectangular flues, measure the inside dimensions from wall to wall in both directions (length and width). Next, measure the outside dimensions of the entire flue structure. These measurements typically range from 8×8 inches to 13×13 inches for square flues.
Pro tip: Take photos of your measurements with your smartphone so you have a visual reference when shopping. If your measurements fall between standard sizes, always round up to ensure proper coverage and protection.
How to Measure for Multi-Flue or Crown-Mount Caps
For chimney crowns with multiple flues or when you’re installing a crown-mount cap that covers the entire top, you’ll need a different measuring approach. Instead of measuring individual flues, measure the outside dimensions of your chimney crown—that’s the concrete or masonry surface at the top.
Grab your tape measure and determine the length and width of the crown from edge to edge. If your crown isn’t perfectly rectangular, measure at the widest points. Also note the locations and sizes of all flue openings, as your crown-mount cap needs to accommodate each one.
Consider using your smartphone to snap photos from different angles—these visual references are incredibly helpful when shopping online or consulting with suppliers. Many crown-mount caps are custom-fabricated, so precise measurements matter. Write down everything: crown dimensions, number of flues, their individual sizes, and the distance between them. Pro tip: Add an extra half-inch to your measurements to account for any irregularities in the masonry. Crown-mount caps typically attach with mounting brackets or weighted systems, so you’ll also want to check if there’s adequate overhang space around the perimeter.
What to Look for When Shopping: Quality Indicators
Construction Quality and Mesh Size
Quality construction determines how long your chimney cap will protect your home. Start by inspecting the welds and seams—look for smooth, continuous welds without gaps or rough spots that could eventually rust or separate. Corners should be reinforced, not simply bent or crimped together.
The mesh sizing is crucial for keeping animals out while allowing proper ventilation. Choose mesh with openings no larger than 3/4 inch to block birds, squirrels, and raccoons. Smaller mesh (5/8 inch) offers even better protection but may require more frequent cleaning if you burn wood regularly. The mesh itself should be welded or securely fastened to the frame—avoid caps where the mesh simply wraps around or uses flimsy attachment methods.
Check that all materials are appropriately gauged for your climate. Heavier gauge stainless steel or copper resists denting from falling branches and handles severe weather better than thin aluminum alternatives.
Mounting Hardware and Stability Features
A properly secured chimney cap protects your investment and ensures long-term performance. Look for caps with robust mounting brackets designed specifically for your chimney type. Stainless steel clamps or screws should attach firmly to the flue without wobbling. Quality caps feature wind-resistant designs with aerodynamic profiles that prevent uplift during storms.
Check that mounting hardware includes corrosion-resistant fasteners and weatherproof gaskets. Some models offer additional stability through base plate designs that distribute weight evenly across the chimney crown. For areas with high winds, consider caps rated for specific wind speeds or those with additional anchor points.
During installation, ensure all mounting screws penetrate securely and evenly around the perimeter. A stable cap shouldn’t shift when you gently push against it from different angles. This secure foundation prevents rattling, reduces wear on your chimney, and keeps animals and weather elements out where they belong.
Price Ranges and When to Spend More
Chimney caps typically range from $50 to $500, depending on size, material, and features. Basic galvanized steel models start around $50-$100 and work well for budget-conscious homeowners. Mid-range stainless steel caps ($150-$300) offer better durability and rust resistance, making them worthwhile investments for long-term protection.
It’s worth spending more when your chimney faces harsh weather conditions or you live in areas with heavy wildlife activity. Premium copper caps ($300-$500) provide superior longevity and aesthetic appeal, often lasting 50+ years. Multi-flue caps and those with spark arrestors or animal guards justify higher prices through added functionality.
Consider spending extra for stainless steel or copper if you’re tackling other money-saving home improvements yourself, since quality caps reduce future maintenance costs. Professional installation adds $100-$300, but DIY installation keeps costs down while ensuring proper protection for your home.
DIY Installation: Step-by-Step Instructions
Safety First: What You Need Before You Start
Before you climb that ladder, let’s talk safety because no chimney cap is worth a trip to the emergency room. Start by checking the weather forecast—you’ll need dry conditions with minimal wind. Rain makes surfaces slippery, and wind creates dangerous conditions on rooftops.
Your ladder should extend at least three feet above the roofline and be positioned on stable, level ground. Use a ladder stabilizer for extra security, and never work alone. Having someone nearby to spot you and call for help if needed is essential.
When you’re on the roof, wear rubber-soled shoes with good traction and consider using a safety harness, especially on steep pitches. Avoid stepping on damaged or weak areas, and stay aware of your positioning relative to the roof edge.
Here’s the thing though—some situations absolutely require a professional. If your roof pitch is steeper than 6/12, your chimney needs repairs, you’re uncomfortable with heights, or your home is more than two stories, call a certified chimney sweep or roofer. They have specialized equipment and insurance for high-risk work. There’s no shame in hiring help; it’s the smart choice when conditions exceed your comfort level or experience.
Tools and Materials Checklist
Before you start your chimney cap installation, gather everything you’ll need to avoid multiple trips up and down the ladder. For tools, you’ll need a measuring tape, adjustable wrench or socket set, screwdriver (likely Phillips head), drill with masonry bits if installing into brick or stone, and safety equipment including work gloves and safety glasses. A sturdy extension ladder tall enough to safely reach your chimney is essential.
Materials include your new chimney cap, stainless steel screws or bolts (often included with the cap), and silicone sealant rated for high temperatures. For masonry chimneys, grab concrete anchors appropriate for your chimney material.
Optional items that make the job easier include a second ladder for a helper, drop cloth to protect your roof, bucket with rope for hauling tools, and a wire brush for cleaning the flue before installation. Consider a headlamp or work light if you’re working in low-light conditions, and keep your smartphone handy for photos during disassembly if replacing an existing cap.
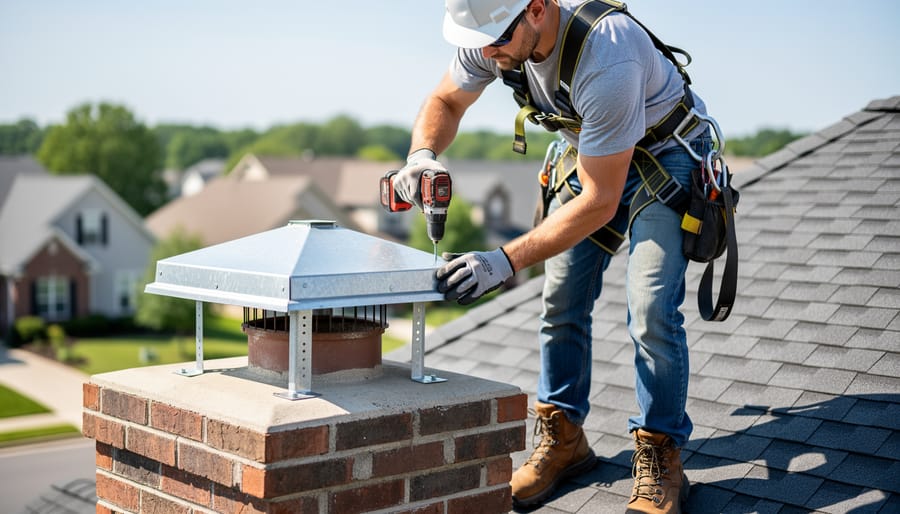
Installing a Single-Flue Cap
Installing a single-flue cap is one of the most straightforward chimney upgrades you can tackle yourself. These caps mount directly onto individual flue pipes, making them perfect for chimneys with exposed flues extending above the crown.
Start by cleaning the outside of your flue pipe thoroughly. Use a wire brush to remove any creosote, rust, or debris from the top few inches where the cap will sit. A clean surface ensures proper adhesion and a secure fit.
Next, position your cap over the flue opening. Most single-flue caps use a band clamp system that tightens around the flue pipe. Slide the cap down until it rests about one inch above the top of the flue. This spacing prevents moisture from pooling while allowing proper ventilation.
Before tightening, make sure the cap sits level on all sides. An uneven cap can allow water infiltration and reduce effectiveness. Use a small level if needed to verify proper positioning.
Now tighten the band clamp using a screwdriver or wrench, depending on your cap’s design. Work gradually, alternating between attachment points to ensure even pressure. The cap should feel firmly secure but avoid overtightening, which can damage the flue pipe or deform the cap.
For added security in high-wind areas, apply a bead of high-temperature silicone sealant around the base where the cap meets the flue. This creates an extra weather barrier while remaining removable for future maintenance.
Finally, give the cap a gentle tug test to confirm it’s solidly attached and won’t shift during storms.
Installing a Multi-Flue or Crown-Mount Cap
Multi-flue and crown-mount caps cover the entire chimney crown rather than individual flues, making them ideal for chimneys with multiple openings. These larger caps require a different installation approach than single-flue models.
Start by positioning the cap on the crown to ensure proper coverage of all flues with adequate clearance. Mark the mounting hole locations with a pencil or chalk, then set the cap aside. Using a masonry drill bit (typically 3/8-inch), drill holes at each marked spot to the depth specified in your cap’s instructions, usually 2-3 inches deep.
Clear debris from the holes using compressed air or a brush. Insert concrete anchors into each hole, tapping them flush with the crown surface using a hammer. These anchors create a secure base for the mounting screws.
Position the cap over the anchors and insert the provided lag screws through the mounting brackets. Tighten the screws gradually in a diagonal pattern to ensure even pressure distribution. Don’t overtighten, as this can crack the crown or strip the anchors.
Apply a bead of high-temperature silicone sealant around the base where the cap meets the crown. This prevents water infiltration and adds stability. Check that the cap sits level and firmly secured before finishing.
Final Checks and Testing
Once your chimney cap is installed, give it a gentle shake test to confirm it’s firmly secured and won’t budge in strong winds. Check that all screws or clamps are tight and the cap sits level. Light a small fire and observe the smoke flow—it should exit normally without backing up into your home. Step outside to verify smoke rises freely through the cap’s mesh openings. If you notice any draft issues or unusual smoke patterns, double-check that the cap size matches your flue and nothing is blocking the openings. Take a photo for your home maintenance records and inspect the cap seasonally to ensure it stays secure.
Troubleshooting Common Installation Problems
Cap Doesn’t Fit Properly
If your new chimney cap wobbles or sits unevenly, don’t worry—this is usually an easy fix! First, double-check your measurements against the cap specifications. Many caps come with adjustable mounting brackets that can accommodate slight size variations. Simply loosen the screws, reposition the brackets, and tighten them securely.
For outside-mount caps that feel loose, consider adding foam gasket strips around the flue opening for a snugger fit. These weatherproof strips create a tight seal while preventing rattling in windy conditions. If your cap is slightly too large, metal shims can help stabilize it between the cap and chimney crown.
On the flip side, if the cap is too tight to slide on, check for debris or creosote buildup on your flue. A quick cleaning often solves the problem. Still having issues? Adjustable clamps provide extra grip and can compensate for minor sizing discrepancies. Remember, a properly fitted cap shouldn’t require forcing—if it’s genuinely too small or large, exchanging it for the correct size will save you headaches down the road.
Dealing with Damaged or Uneven Chimney Crowns
Before installing your chimney cap, inspect the chimney crown for damage. Small cracks (less than 1/4 inch) can be sealed with crown repair caulk or sealant designed for high-heat applications. Simply clean the area thoroughly, apply the sealant, and let it cure for 24 hours before cap installation.
For larger cracks, crumbling concrete, or significant uneven surfaces, professional crown repair is necessary. Installing a cap on a damaged crown won’t provide proper protection and could lead to water infiltration that damages your chimney structure and home interior.
If your crown has minor surface irregularities but is structurally sound, you can often compensate during installation by using adjustable mounting brackets or shimming the cap level. However, the mounting surface must be stable enough to securely hold the cap’s weight and withstand wind forces. When in doubt, consult a chimney professional before proceeding with installation.
Wind Noise or Draft Issues After Installation
If you notice whistling sounds or cold drafts after installing your chimney cap, don’t worry—these issues are usually easy to fix. First, check that the cap is sitting flush against the flue and all mounting screws are properly tightened. Gaps between the cap and chimney can cause both noise and drafts. If wind noise persists, the mesh screening might be vibrating—try applying a bead of high-temperature silicone sealant around the base where the cap meets the flue. For persistent drafts, inspect the seal and consider adding a storm collar if your cap design allows it, which helps create a tighter barrier against the elements.
Maintenance Tips to Make Your Cap Last
Annual Inspection Checklist
Mark your calendar for an annual chimney cap inspection each spring or fall. Start by checking for visible rust, cracks, or bent sections in the metal screening and crown. Look closely at the mesh openings to ensure they’re free from debris, bird nests, or creosote buildup that could block airflow. Inspect the mounting brackets and screws for looseness or corrosion, tightening any wobbly components immediately. Check the cap’s seal against the flue to confirm it’s still weathertight with no gaps where water could seep through. If you notice missing mortar around the crown or significant damage to any part, schedule repairs promptly to prevent costlier problems down the road. A quick annual check takes just fifteen minutes but adds years to your chimney cap’s lifespan.
Cleaning and Debris Removal
Regular maintenance keeps your chimney cap functioning properly and extends its lifespan. Before starting any cleaning, ensure your fireplace is cold and hasn’t been used for at least 24 hours. For most homeowners, spring or fall cleaning works best.
Start by wearing safety gloves and safety glasses to protect against sharp edges and debris. If your cap is removable, carefully detach it and bring it down from the roof for easier cleaning. Use a stiff wire brush to scrub away creosote buildup, leaves, and bird nesting materials. For stubborn deposits, a mixture of warm water and mild dish soap works wonders.
Check the mesh screening thoroughly for holes or damage while cleaning. Small openings can let animals inside, so replace damaged screens promptly. Rinse everything with a garden hose and let it dry completely before reinstalling to prevent rust.
If you spot heavy creosote buildup during cleaning, this signals it’s time for a professional chimney sweep, as excessive buildup indicates incomplete combustion and potential safety hazards. Consider setting a phone reminder every six months to inspect your cap and remove any accumulated debris before it becomes problematic.
Installing a chimney cap is one of those weekend projects that delivers serious long-term value for your home. You’re protecting your chimney from water damage, keeping animals out, preventing downdrafts, and potentially saving hundreds or even thousands in future repair costs. With the right measurements, the proper cap for your chimney type, and a commitment to safety, this is absolutely a project most DIY enthusiasts can tackle successfully.
If you’ve followed the steps in this guide, you now have everything you need to choose the right chimney cap and install it confidently. Remember to work on calm, dry days, use proper safety equipment, and never compromise on securing your ladder or working at heights alone.
That said, there’s no shame in calling a professional. If your roof is exceptionally steep, your chimney needs repairs before capping, or you’re simply not comfortable working at heights, a certified chimney sweep or roofing contractor is worth every penny. They bring experience, proper insurance, and peace of mind.
Ready to get started? Measure your chimney, choose your cap, and give your home the protection it deserves.
