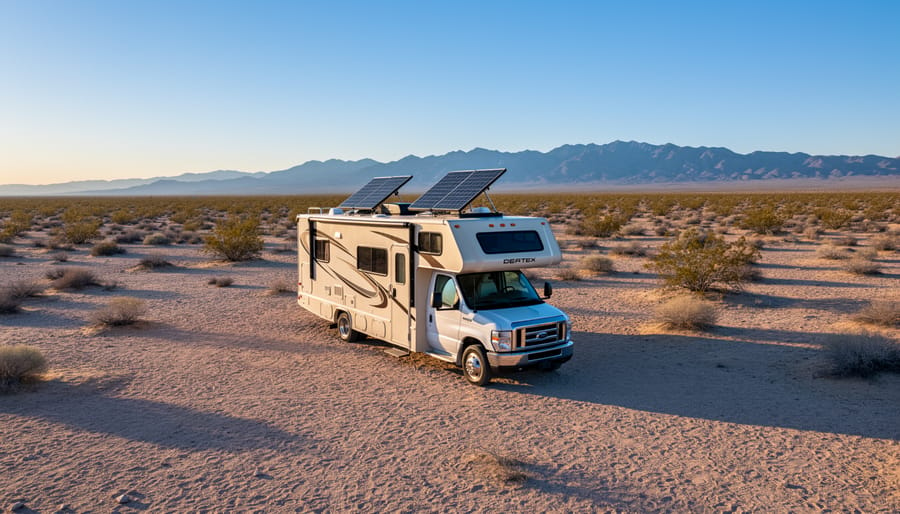
Stop Paying Campground Fees: Install Solar Panels on Your RV This Weekend
Calculate your daily power consumption by listing every device you’ll run, its wattage, and hours of use—this determines whether you need a 200-watt, 400-watt, or larger solar array. Multiply your total watt-hours by 1.5 to account for inefficiencies and cloudy days, then divide by your average sun hours (typically 4-6 hours depending on location) to find your minimum solar panel wattage requirement.
Mount your panels on the RV roof using adjustable brackets rather than flat-mounting them—even a 10-degree tilt increases energy production by up to 20 percent and allows rain to wash away debris naturally. Choose a location that avoids shadows from roof vents, air conditioners, and antennas throughout the day, as even partial shading can reduce your entire system’s output by 50 percent or more.
Wire your panels in series to reach your charge controller’s input voltage (typically 12, 24, or 48 volts), which reduces current and allows you to use smaller, less expensive gauge wire for the roof-to-controller run. Install an MPPT charge controller instead of a basic PWM model—while it costs $100-200 more, it extracts 20-30 percent more power from your panels, especially during morning and evening hours.
Installing solar on your RV ranks among the most rewarding beginner DIY projects because it delivers immediate benefits: quiet power without running your generator, the freedom to boondock indefinitely, and significant long-term savings. The entire installation typically takes one weekend and requires only basic tools you probably already own.
Why RV Solar Makes Sense (And When It Doesn’t)
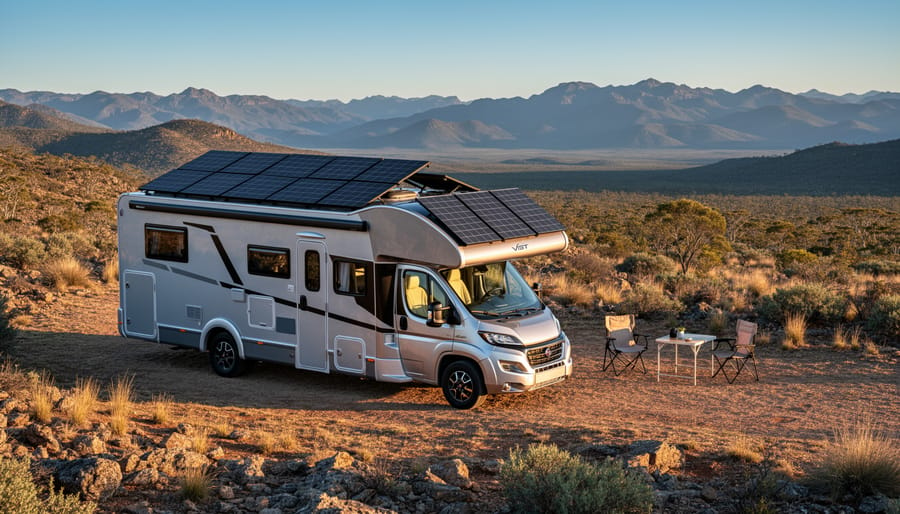
RV solar makes tremendous sense if you frequently boondock, camp off-grid, or spend extended periods away from shore power. The sweet spot? RVers who dry camp more than 30 days per year typically see payback within 3-5 years. If you love remote camping spots, dispersed camping on public lands, or simply want the freedom to park anywhere without seeking electrical hookups, solar transforms your RV experience.
The financial math works best for full-timers and frequent travelers. A typical 400-800 watt system costs $1,500-$3,000 for DIY installation versus $4,000-$8,000 professionally installed. Compare this to campground fees of $30-$50 per night with hookups, and the savings add up quickly. Plus, many of the same principles apply whether you’re tackling home solar panel installation or an RV system, making this one of the most valuable energy-saving upgrades you can make.
However, solar might not be your best option if you primarily stay at campgrounds with full hookups, rarely camp more than a few days at a time, or have minimal power needs that a generator handles adequately. Weekend warriors who consistently plug into shore power may find the investment hard to justify.
Solar also faces limitations in heavily shaded environments or if you park under trees regularly. Northern climates during winter months see reduced production, though systems still generate power on sunny days. If you run energy-intensive appliances like residential refrigerators or multiple air conditioners, you’ll need substantial battery banks and panels, potentially making generators more practical.
Consider your actual camping style and power consumption before committing. Track your usage for several trips to make an informed decision.
Understanding Your RV’s Power Needs
Calculate Your Daily Energy Usage
Before you can size your solar system properly, you’ll need to figure out how much power you actually use. Don’t worry – this is easier than it sounds, and getting it right means you won’t over-buy or under-buy your components.
Start by making a list of every device and appliance you’ll run in your RV. Walk through your space and write them all down – refrigerator, lights, phone chargers, laptop, water pump, fans, everything. Next to each item, note how many watts it uses. You can usually find this on a label or in the owner’s manual.
Here are some typical RV appliance wattages to get you started: LED lights use about 10-15 watts each, while your 12V refrigerator typically draws 50-100 watts. A water pump runs at 40-60 watts, ceiling fans around 20-50 watts, and a laptop charger needs roughly 50-75 watts. Phone chargers are light users at just 5-10 watts.
Now estimate how many hours per day you’ll run each item. Multiply the watts by the hours to get watt-hours. For example, if you run four LED lights at 12 watts each for 5 hours daily, that’s 48 watts × 5 hours = 240 watt-hours.
Add up all your watt-hours to get your daily total. This number is your baseline for sizing your solar panels and battery bank. Most RVers find they use between 1,000 to 3,000 watt-hours per day, depending on their setup and lifestyle.
Choosing the Right System Size
Getting your solar system size right makes all the difference between having enough power and wishing you’d planned better. Think of it this way: your power needs drive everything else in your system design.
Start by calculating your daily energy consumption. List all your devices, their wattage, and how many hours you use them daily. A typical weekend RVer running LED lights, charging phones, and powering a small fridge might need 500-1000 watt-hours per day. Full-time RV living with laptops, a microwave, and air conditioning? You’re looking at 2000-4000 watt-hours or more.
For weekend warriors, a 200-400 watt solar panel setup paired with 200-400 amp-hours of battery capacity usually does the trick. You’ll recharge between trips and use moderate power on weekends.
Full-timers need more robust systems. Consider 600-1200 watts of solar panels with 400-800 amp-hours of battery storage. This ensures you can run appliances comfortably and recharge batteries even on partly cloudy days.
Here’s a practical rule: your solar panels should generate at least 1.5 times your daily consumption to account for weather variations and charging efficiency losses. Battery capacity should cover at least two days of usage without sun exposure, giving you a comfortable safety buffer.
Don’t forget seasonal considerations. Winter sun is weaker, so if you plan year-round travel, add 20-30 percent extra capacity to your calculations. Starting with expandable components lets you add panels or batteries later as your needs grow.
Essential Components You’ll Need
Solar Panels: Rigid vs. Flexible
Choosing between rigid and flexible solar panels is one of your first big decisions. Rigid panels are the traditional choice, offering excellent durability and efficiency. They’re mounted on brackets that elevate them slightly above your roof, allowing airflow underneath that keeps them cooler and performing better. These panels typically last 25-30 years and come in higher wattage options, usually 100-400 watts per panel. The downside? They’re heavier and require roof penetrations for mounting.
Flexible panels lie flat against your RV roof, making them perfect for curved surfaces or low-clearance situations. They’re lightweight, easy to install with adhesive backing, and won’t catch wind resistance like rigid panels. However, they run hotter without that airflow gap, which reduces efficiency by 10-15%. They also have shorter lifespans of 10-15 years and typically max out around 100-200 watts per panel.
For most DIY installations, rigid panels offer better long-term value despite the trickier installation. Plan on 400-800 watts total for weekend camping, or 800-1,200 watts if you’re planning extended off-grid adventures. Consider your roof space, weight capacity, and how much drilling you’re comfortable with before making your final choice.
Charge Controllers: MPPT vs. PWM
Your charge controller manages the flow of power from your solar panels to your batteries, and choosing between MPPT and PWM models can significantly impact your system’s performance and budget.
PWM (Pulse Width Modulation) controllers are the simpler, more affordable option, typically costing $50-150. They work like an on-off switch, connecting panels directly to batteries when charging is needed. PWM controllers work best with smaller systems (under 400 watts) where your panel voltage closely matches your battery voltage. They’re ideal if you’re on a tight budget and have limited roof space that doesn’t require maximum efficiency.
MPPT (Maximum Power Point Tracking) controllers are the premium choice, ranging from $150-600. These smart devices convert excess panel voltage into additional charging current, delivering 15-30% more power than PWM controllers, especially in cold weather or less-than-ideal conditions. Choose MPPT for larger systems (over 400 watts), when using high-voltage panels with 12V batteries, or if you plan to expand your system later.
For sizing, select a controller rated for at least 125% of your maximum panel current. Most RV systems use 20-40 amp controllers, though this varies based on your specific setup.
Batteries, Inverters, and Wiring
Now that you’ve got your panels picked out, let’s talk about the heart of your system: batteries, inverters, and all the connecting hardware that makes everything work together.
Your battery bank stores the energy your panels collect. You’ve got two main choices here. Lithium batteries cost more upfront, typically $800-$1,200 per 100Ah, but they last 10+ years, charge faster, and you can use nearly all their capacity. Lead-acid batteries run $200-$400 per 100Ah and work fine if you’re on a tighter budget, though they’re heavier and you can only use about 50% of their capacity. For most weekend warriors, a 200-400Ah lithium setup hits the sweet spot.
Your inverter converts DC power from batteries to AC power for regular appliances. Size it based on your biggest simultaneous load plus 20% buffer. Running a microwave and coffee maker together? You’ll want at least a 2,000-watt inverter. Pure sine wave models cost a bit more but protect sensitive electronics.
Wire gauge matters more than you’d think. Undersized wiring causes power loss and heat buildup. For runs under 10 feet, 10 AWG handles most 30-amp applications, but always verify with a wire sizing calculator based on your specific amperage and distance.
Don’t skimp on safety hardware. Install inline fuses or circuit breakers between every major component. You’ll also need quality MC4 connectors, mounting brackets rated for RV vibration, and proper battery terminals. These small investments prevent big problems down the road.
Planning Your RV Roof Layout
Before you climb onto your RV roof with panels in hand, spend some quality time with graph paper and a measuring tape. A well-planned layout makes installation day significantly smoother and helps you generate maximum power from your available space.
Start by measuring your roof’s usable area and sketching it to scale. Note every obstruction, including air conditioners, vents, antennas, skylights, and any raised areas. Don’t forget about the ladder access point. Measure the dimensions of each obstacle and mark them on your diagram with accurate spacing.
When positioning your panels, aim for areas that receive unobstructed sunlight throughout the day. The front portion of your RV roof often offers the cleanest real estate, though you’ll need to work around that AC unit. Try to maintain at least 3-4 inches of clearance around vents and other fixtures for airflow and future maintenance access.
Consider cable routing early in your planning. You’ll need to run wiring from your panels down into the RV, so position panels with a clear path to an entry point. Many RVers utilize existing cable entry ports or refrigerator vents to bring wires inside, minimizing the need for drilling new holes.
Think about expansion too. If you’re starting with two panels but might add more later, arrange your initial layout to accommodate future additions. Keeping panels in neat rows makes wiring cleaner and leaves defined spaces for expansion.
Take photos of your roof from different angles and print them out. Sketch potential layouts directly on these photos to visualize how everything will look. This hands-on approach often reveals spacing issues that aren’t obvious on paper.
Finally, check your roof’s weight capacity in your RV manual. While solar panels are relatively lightweight (typically 40-50 pounds each), you need to account for mounting hardware and ensure even weight distribution across the roof structure. This planning phase might feel tedious, but it’s the foundation of a successful installation.
Step-by-Step Installation Process
Step 1: Prepare Your Roof Surface
Before mounting anything, you’ll want to start with a spotless canvas. Give your RV roof a thorough cleaning using a mild detergent and soft brush, paying special attention to areas where you’ll place the panels. This removes dirt, oxidation, and debris that could interfere with adhesive mounting or create uneven surfaces.
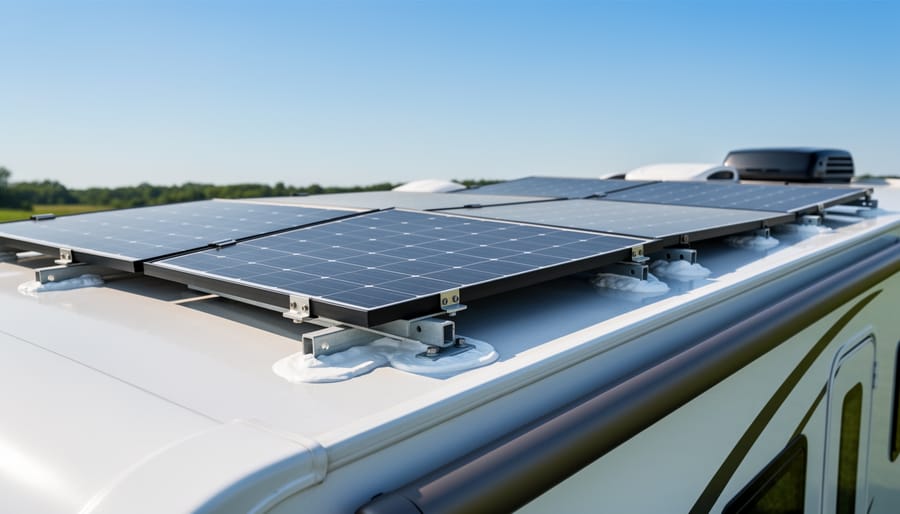
Once dry, take careful measurements of your roof space, noting obstacles like vents, air conditioning units, and antenna mounts. Sketch a simple diagram showing where each panel will go, ensuring adequate spacing for airflow underneath (about 1-2 inches helps prevent overheating and boosts efficiency).
Mark your panel locations using painter’s tape or a chalk line. This lets you visualize the layout and make adjustments before committing. Position panels to avoid low spots where water pools and stay clear of roof seams when possible, as these are common leak points.
Here’s a key tip: minimize roof penetrations. Modern RV installations increasingly use adhesive mounting systems that eliminate the need for drilling holes through your roof membrane. If you must drill for mounting brackets or cable entry points, choose structurally sound areas and seal everything meticulously with appropriate sealants designed for RV roofing materials.
Step 2: Mount the Solar Panels
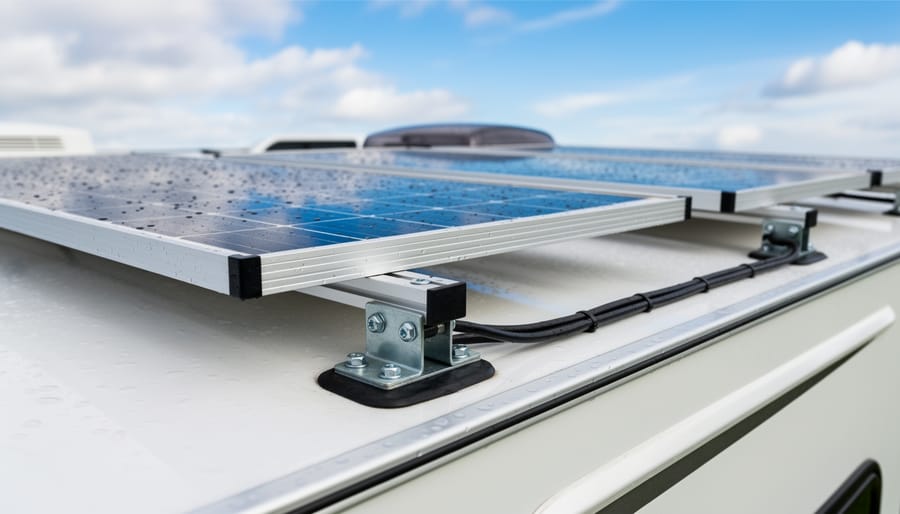
Now comes the exciting part—actually mounting those panels to your RV roof! Before you climb up there, gather your mounting brackets or adhesive mounts, stainless steel hardware, drill with appropriate bits, and a high-quality marine-grade sealant like Dicor or Sikaflex.
Start by planning your panel placement. Position them to avoid vents, AC units, and areas where shadows might fall. Lay the panels out temporarily to visualize spacing and ensure cables can reach your entry point into the RV. Once you’re happy with the layout, mark the mounting points with a pencil.
If you’re using mounting brackets, this is where precision matters. Drill pilot holes carefully—going through your RV roof can feel intimidating, but take your time. Apply a generous amount of sealant to the bracket bases before securing them with self-tapping screws. Don’t skimp on sealant here; water damage is your biggest enemy.
For adhesive mounts, thoroughly clean the mounting surface with isopropyl alcohol. Apply the adhesive according to manufacturer instructions, press firmly, and allow proper curing time before attaching panels.
Once brackets are secure and sealed, attach your solar panels using the provided hardware. Double-check that everything is tight but not over-torqued. Finally, apply an additional bead of sealant around all penetration points and bracket edges. Think of it as giving your roof a waterproof insurance policy. Let everything cure completely before moving to the wiring stage.
Step 3: Run Wiring Through the Roof
Getting power from your roof into your RV requires creating a clean, weatherproof entry point. The goal is to prevent leaks while safely routing cables to your charge controller inside.
Start by choosing your entry location, ideally close to where your charge controller will mount. Most RVers prefer a spot near existing roof penetrations to minimize potential leak points. Cable entry plates (also called cable glands or roof penetrations) are your best friend here. These specialized components create watertight seals around your wiring.
Drill a hole sized appropriately for your entry plate, following the manufacturer’s specifications. Apply a generous bead of lap sealant or dicor around the base of the entry plate before securing it to the roof. Don’t skimp on sealant – this is your primary defense against water damage.
Thread your MC4 cables through the entry plate, ensuring you maintain the positive and negative wire identification. Inside the RV, leave enough slack for comfortable connections but avoid excessive loops that could create interference or safety hazards.
Secure cables along their route using cable clips every 12-18 inches. This prevents rattling during travel and protects wires from abrasion. Consider running cables through protective conduit in high-traffic areas or where they might contact sharp edges. Take your time with this step – proper weatherproofing now prevents expensive repairs later.
Step 4: Install the Charge Controller
Your charge controller is the brain of your solar system, so choosing the right spot matters. Mount it in a cool, dry location inside your RV—ideally close to your battery bank to minimize voltage drop. A utility compartment or interior wall works great. Just make sure there’s at least two inches of clearance around the unit for proper ventilation and heat dissipation.
Start by securing the controller to the wall using appropriate screws. Next, connect your solar panels to the controller’s solar input terminals, following the polarity marked on the unit (positive to positive, negative to negative). Double-check your connections before proceeding.
Now connect the battery terminals. Always connect the battery first before connecting solar panels—this allows the controller to properly detect your system voltage. Use the wire gauge recommended by your controller’s manual, typically 8 or 10 AWG for most RV setups.
Finally, verify that nothing is blocking the controller’s ventilation slots. Some models have cooling fans that need unobstructed airflow to function properly. Heat is the enemy of electronics, so adequate ventilation extends your controller’s lifespan and ensures reliable performance during those sunny days on the road.
Step 5: Connect Your Battery Bank
Before connecting your battery bank, safety is paramount. First, ensure your charge controller is completely powered down and disconnected from the solar panels. Always install a properly rated fuse or circuit breaker between your charge controller and battery bank—this protects against dangerous electrical faults. Position the fuse within 7 inches of the battery’s positive terminal for maximum protection.
Connect the negative cable from your charge controller to the battery bank’s negative terminal first, then attach the positive cable through the fuse holder to the positive terminal. Use appropriately sized cables based on your system’s amperage—undersized wires create fire hazards. Double-check all connections are tight and corrosion-free.
Once connected, power on your charge controller and verify it recognizes your battery voltage. Most modern controllers display battery status on their screen. If your panels are receiving sunlight, you should see charging begin immediately. Monitor the system for the first few hours, checking that batteries reach appropriate voltage levels and that no connections feel warm to the touch, which would indicate resistance issues requiring immediate attention.
Safety Tips and Common Mistakes to Avoid
Working with electricity and climbing on your RV roof requires serious attention to safety. Before you start any electrical work, always disconnect your RV’s battery using the main disconnect switch. Think of this as your safety insurance policy – it prevents accidental shocks and short circuits that could damage your system or cause injury.
When working on your roof, choose a calm, dry day. Wet surfaces are slippery and dangerous, and you definitely don’t want to be up there during windy conditions. Use a sturdy ladder that extends well above the roofline, and consider wearing a safety harness if you’re uncomfortable with heights. Walk carefully on designated support areas of your roof to avoid damage, and have a helper on the ground to hand up tools and materials.
Never work alone when dealing with electrical connections. Having someone nearby means help is immediately available if something goes wrong. Wear insulated gloves when making connections, and use a multimeter to verify there’s no voltage present before touching any wires.
Common mistakes can derail your project quickly. One of the biggest errors is undersizing your charge controller. Your controller must handle the total amperage from all your panels, so calculate carefully and add a 25% safety margin. Another frequent problem is using inadequate wire gauge for long cable runs. Thin wires create resistance, generate heat, and waste precious power. Always consult a wire sizing chart based on your amperage and distance.
Poor mounting is another culprit. Skimping on sealant around mounting feet creates leak pathways that can cause expensive interior damage. Use high-quality lap sealant specifically designed for RV roofs, and reapply it annually during inspections.
Finally, don’t forget to properly fuse your system between the battery and charge controller. This critical safety component protects against electrical fires if a short circuit occurs. Place the fuse as close to the battery as possible, ideally within 18 inches.
Testing Your System and What to Expect
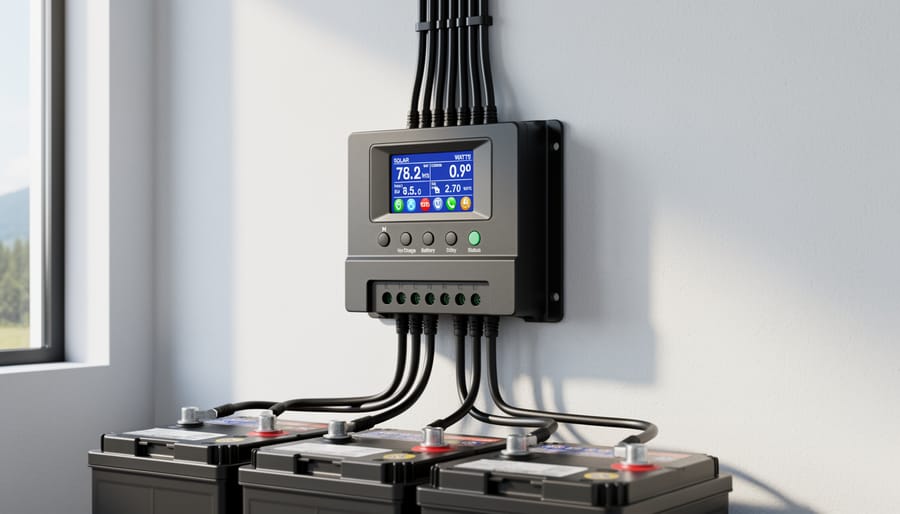
Once your system is fully connected, it’s time for the exciting part—making sure everything works! Start by covering your panels with a blanket or tarp so they aren’t generating power during initial testing. Double-check all connections, then turn on your charge controller. Most controllers will display a welcome screen before showing battery voltage. If you see your current battery voltage displayed, you’re off to a great start.
Remove the covering from your panels and watch your charge controller spring to life. You should see incoming wattage displayed, along with battery voltage and charging current. Many controllers use simple icons showing solar panels, batteries, and loads, making them easy to read at a glance. The display will cycle through different screens showing various metrics—just give it a few minutes to stabilize.
Expect your panels to produce their maximum rated wattage only under perfect conditions: bright midday sun, cool temperatures, and panels positioned directly perpendicular to the sun. In reality, you’ll typically see 70-85% of rated capacity during peak hours. A 400-watt system might realistically generate 280-340 watts on a good afternoon.
Charging times vary dramatically based on battery size, sunlight availability, and power consumption. A typical 200-amp-hour battery bank drawing from 400 watts of panels might take 6-8 hours of good sun to fully recharge from 50%. Overcast days can reduce output by 50-80%, while partial shade on even one panel significantly impacts the entire system.
Test your system over several days in different conditions. Run your typical appliances and monitor battery levels to understand your real-world capacity. Most charge controllers store historical data showing daily energy production, helping you identify patterns and adjust expectations. Remember, solar power is about managing energy use strategically, not replicating unlimited shore power.
Installing solar panels on your RV is genuinely more achievable than you might think. Thousands of RV owners have successfully completed this project with basic tools and a weekend of focused work. The combination of energy independence, reduced campground costs, and the freedom to boondock wherever adventure calls makes this one of the most rewarding sustainable energy improvements you can make to your rig.
Your journey starts with that critical first step: calculating your daily power needs. Once you understand your consumption patterns, selecting the right components becomes straightforward, and the physical installation follows logically from there. Don’t let concerns about complexity hold you back. Modern solar equipment is designed with DIY installation in mind, featuring plug-and-play connectors and clearly labeled terminals.
The ongoing maintenance is refreshingly simple too. An occasional wipe-down of your panels to remove dust and debris, plus periodic checks of your connections, keeps everything running smoothly for years. Your monitoring system will alert you to any issues before they become problems.
Whether you’re planning extended off-grid adventures or simply want to reduce generator runtime at your favorite campsite, solar power transforms your RVing experience. Start calculating your power needs today, and you’ll be harvesting free energy from the sun before your next big trip.
