Build a Powerful 3-Stage Water Filter Without Charcoal (DIY Solution)
Transform your home’s water quality with a powerful three-stage filtration system that removes sediment, chemical contaminants, and microscopic particles. Unlike traditional safe water filtration options, this DIY setup combines mechanical, biological, and chemical filtration layers for comprehensive purification. The system’s modular design allows for easy maintenance and customization, while its space-efficient configuration fits neatly under most sinks or in utility rooms. By implementing this triple-filter approach, you’ll achieve better-tasting water, extended appliance life, and significant cost savings compared to bottled water or commercial filtering systems. Whether you’re concerned about municipal water quality or want to upgrade your home’s filtration capabilities, this three-stage solution delivers professional-grade water purification without complex installation requirements or expensive maintenance contracts.
Alternative Materials for Your Filter System

Sand and Gravel Foundation
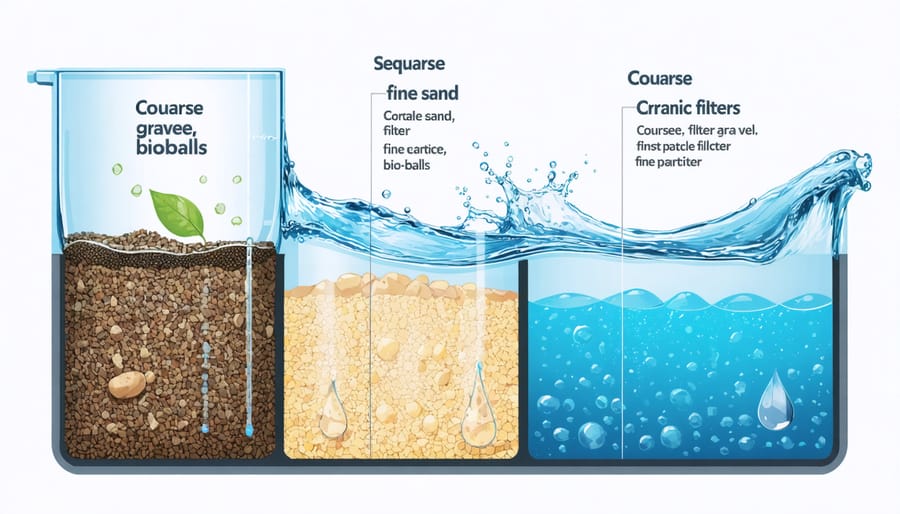
The foundation of your three-filter water system starts with carefully layered sand and gravel, creating an effective natural filtration base. Begin with coarse gravel (about 1-2 inches in diameter) at the bottom, which provides structural support and prevents clogging. Add a middle layer of medium-grade gravel (roughly 1/2 inch pieces) to create a transition zone. Top it off with fine sand, which acts as the primary filtration medium, trapping smaller particles and sediment.
For best results, use clean, washed materials and layer them in descending size order. The gravel layers should each be about 4-6 inches thick, while the sand layer needs to be 8-10 inches for optimal filtration. Make sure each layer is level before adding the next to ensure even water flow through the system. Regular maintenance includes occasional backwashing to prevent sand compaction and maintain filtration efficiency.
Ceramic and Bio-Balls
Ceramic filters and bio-balls work together to create a powerful filtration duo in your three-stage system. The ceramic component acts as a physical barrier, trapping particles as small as 0.3 microns while also removing harmful bacteria and protozoa. Look for ceramic filters with silver-impregnated surfaces for extra antimicrobial protection.
Bio-balls, those small plastic spheres with intricate surface patterns, provide the perfect home for beneficial bacteria to grow. These good bacteria break down harmful compounds and create a natural biological filtration process. For best results, place bio-balls after the ceramic filter and maintain water temperature between 65-85°F to encourage optimal bacterial growth.
Remember to clean your ceramic filter monthly and never use soap – just rinse with filtered water. Bio-balls rarely need replacement unless physically damaged, making them a cost-effective choice for long-term filtration.
Natural Filter Materials
Natural filter materials offer effective alternative filtration methods that are both eco-friendly and efficient. Coconut fiber, with its dense structure, excels at trapping larger particles and sediment while naturally inhibiting bacterial growth. Cotton layers work as an excellent medium filter, capturing smaller particles while allowing good water flow. Zeolite, a mineral known for its unique molecular structure, acts as a powerful final filter, removing heavy metals and unwanted odors. These materials are readily available, cost-effective, and can be easily replaced when needed. For optimal results, layer these materials from coarsest to finest, ensuring thorough filtration while maintaining steady water flow through your system.
Building Your Three-Stage Filter

Stage 1: Sediment Removal
The first stage of filtration focuses on removing larger particles and sediment from your water. Start by selecting a clean, food-grade container that’s at least 2 gallons in capacity. Like many DIY water filter systems, this stage uses readily available materials to create an effective filtration barrier.
Begin by drilling or cutting a 1-inch hole at the bottom of your container. Next, layer your filtering materials from bottom to top: start with a layer of small pebbles (about 2 inches), followed by coarse sand (3 inches), and finally, fine sand (2 inches). Place a fine mesh screen between each layer to prevent mixing.
Before adding water, rinse all materials thoroughly to remove dust and debris. This initial washing prevents contamination of your filtered water. When assembling, ensure each layer is level and well-packed to prevent channeling, where water finds an easy path through the filter instead of being properly filtered.
Install a spigot or valve at the bottom hole using food-grade silicone sealant to prevent leaks. Allow the sealant to cure completely (usually 24 hours) before use. This stage will effectively remove suspended particles, silt, and visible debris from your water, preparing it for the next filtration phase.
Stage 2: Bacterial Filtration
The bacterial filtration layer is where the magic of biological water purification happens. This layer uses beneficial bacteria to break down harmful contaminants and organic matter in your water. Start by creating a mix of fine sand and gravel, layering them carefully to create optimal surface area for bacterial growth.
For best results, use river sand that’s been thoroughly washed and sterilized. Layer approximately 6 inches of sand, followed by 2 inches of fine gravel. The key is maintaining consistent grain sizes throughout each layer to prevent mixing and ensure proper water flow.
To jumpstart the bacterial colony, you can add a cup of water from an established aquarium or pond. These contain naturally occurring beneficial bacteria that will populate your filter. It takes about 2-3 weeks for the bacterial colony to establish fully.
Regular maintenance is crucial for this layer. Every few months, gently stir the top inch of sand to prevent clogging and ensure proper water flow. Avoid using any chemical cleaners, as these will kill the beneficial bacteria. If you notice slower filtration rates, it’s time for a gentle cleaning.
Remember that temperature affects bacterial activity, so try to maintain your filter system in a location with stable temperatures between 65-80°F (18-27°C) for optimal performance.
Stage 3: Fine Particle Removal
The final stage of your three-filter system is where the magic happens – removing those tiny particles that managed to slip through the first two stages. This layer typically uses a fine filter material with pores ranging from 1 to 5 microns, effectively catching microscopic contaminants while maintaining good water flow.
For optimal results, consider using a high-quality polypropylene filter cartridge or a fine mesh stainless steel screen. These materials are particularly effective at trapping sediment, rust particles, and other microscopic debris without affecting water taste or introducing chemicals into your water.
Installation is straightforward: ensure the filter material is securely fastened within its housing to prevent any water from bypassing the filtration media. The filter should fit snugly but not so tight that it restricts water flow. Regular maintenance is crucial at this stage – plan to check and clean or replace your fine particle filter every 3-6 months, depending on your water quality and usage.
Keep an eye on water pressure – if you notice a significant drop, it’s usually a sign that the filter needs attention. A pressure gauge installed before and after this filter can help you monitor its performance and know exactly when maintenance is needed. Remember, maintaining consistent water flow while ensuring thorough filtration is the key to success at this final stage.
Maintenance and Optimization
Regular Cleaning Schedule
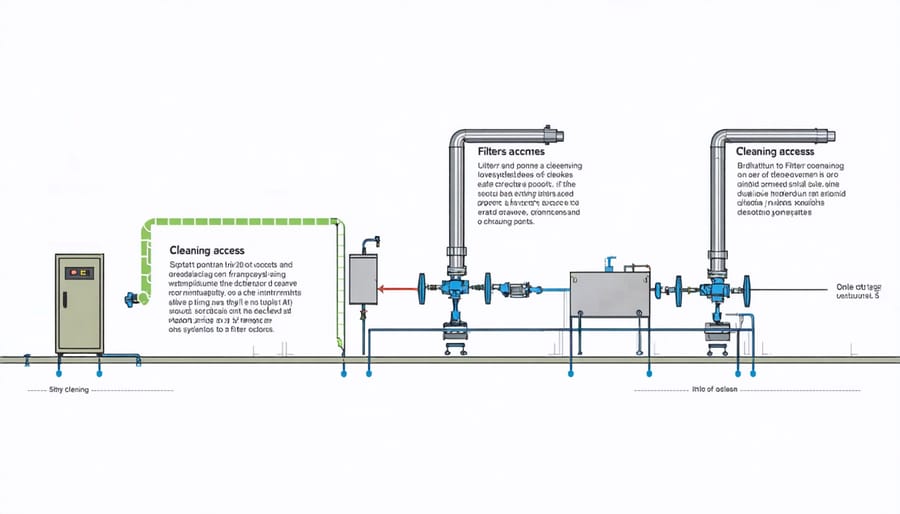
To keep your three-filter water system operating at peak efficiency, follow this straightforward maintenance schedule. Clean the first filter (sediment) every 2-3 months, or more frequently if you notice reduced water flow. The second filter typically needs attention every 4-6 months, while the third filter can last up to 8 months before requiring maintenance.
When cleaning, start by turning off the water supply and releasing pressure from the system. Remove each filter housing carefully and wash the removable filter elements with clean water. Avoid using harsh chemicals or scrubbing too vigorously, as this can damage the filter material. For stubborn debris, soak the filters in warm water for 15-20 minutes before rinsing.
Check the O-rings during each cleaning session and replace them if you notice any wear or damage. This prevents leaks and ensures proper seal. Make a habit of recording your maintenance dates – a simple calendar reminder works great. Replace filters entirely when you notice they’re not bouncing back after cleaning, typically every 12-18 months depending on your water quality and usage.
Performance Monitoring
Monitoring your three-filter water system’s performance is crucial for maintaining clean, safe water. Check the water pressure gauge readings weekly – a significant drop indicates it’s time for maintenance. Test your water quality monthly using a home testing kit, paying attention to TDS (Total Dissolved Solids) levels before and after filtration.
Keep a maintenance log to track filter changes and pressure readings. This helps identify patterns and anticipate when filters need replacement. Look for visual cues like water clarity, unusual tastes, or odors that might signal declining performance.
For optimal performance, clean pre-filter screens monthly and backwash when pressure drops by 10-15%. Monitor flow rates by timing how long it takes to fill a one-gallon container – slower fills usually mean it’s time for filter replacement.
Install a filter life indicator if your system doesn’t have one. These smart devices measure water usage and alert you when it’s time for maintenance. Remember that performance can vary based on your water source and usage patterns, so adjust monitoring frequency accordingly.
A three-filter water system is a smart investment that brings multiple benefits to your home and family. By implementing this filtration setup, you’ll enjoy cleaner, better-tasting water while protecting your plumbing and appliances from sediment buildup. The system’s modular design makes maintenance straightforward, and replacement parts are readily available at most home improvement stores.
Taking on this DIY project not only saves money in the long run but also gives you complete control over your water quality. With proper installation and regular maintenance, your three-filter system can provide years of reliable service, making it a worthwhile addition to any home.
Don’t wait to start enjoying cleaner, safer water. Gather your materials, follow the installation steps we’ve outlined, and you’ll have your system up and running in no time. Remember to keep track of filter replacement dates and perform regular maintenance checks to ensure optimal performance. Your family deserves the best water quality possible, and this three-filter system is an excellent way to achieve that goal.
