
Sound-Smart Spaces: How Acoustic Design Transforms Physical Therapy Clinics
Transform your physical therapy space into a healing sanctuary by integrating smart sound design principles with strategic layout planning. Position treatment areas along sound-dampening walls using acoustic panels concealed within calming artwork, creating private zones that maintain an open feel. Install adjustable LED lighting systems with color temperature controls to mirror natural daylight patterns, enhancing patient comfort and practitioner efficiency. Configure equipment stations in ergonomic clusters that maximize space efficiency while ensuring clear sightlines between therapist and patient. Select antimicrobial, easy-clean materials in nature-inspired tones that withstand heavy use without compromising the space’s therapeutic atmosphere. Incorporate biophilic elements like living walls and water features strategically placed to mask ambient noise while promoting a sense of serenity. This thoughtful fusion of function and comfort creates an environment where healing thrives and practitioners can deliver optimal care.
The Science of Healing Sounds
Understanding Sound Dynamics in Therapy Spaces
Sound management in therapy spaces requires careful consideration, as it directly impacts both patient comfort and treatment effectiveness. In these clinical environments, sound tends to bounce off hard surfaces like treatment tables and exercise equipment, creating unwanted echoes that can disturb therapeutic sessions and private conversations.
The key to managing sound dynamics lies in understanding how different materials affect acoustic performance. Soft surfaces absorb sound waves, while hard surfaces reflect them. This is why many modern therapy spaces incorporate a mix of sound-absorbing materials like carpeted areas, acoustic ceiling tiles, and fabric-wrapped panels alongside necessary hard surfaces.
Strategic placement of sound barriers and absorption materials can create distinct zones within an open space. For example, placing acoustic panels between treatment areas helps maintain privacy without the need for solid walls. White noise machines or sound masking systems can further enhance speech privacy while creating a more comfortable environment.
Consider the layout’s impact on sound travel patterns. Positioning noisy equipment away from quiet treatment areas and using mobile screens or partitions can help control sound distribution throughout the space.

The Impact of Noise on Recovery
Research has shown that noise levels significantly impact patient recovery in physical therapy settings. Studies indicate that excessive noise can increase stress hormones, elevate blood pressure, and slow healing processes – factors that directly affect the various dimensions of wellness essential for recovery.
Patients exposed to constant background noise above 65 decibels often report difficulty concentrating during exercises and reduced satisfaction with their therapy sessions. Common noise sources include equipment sounds, conversations from adjacent treatment areas, and HVAC systems. However, not all sound is detrimental – gentle, natural sounds like flowing water or soft music can actually promote relaxation and healing.
To optimize recovery, experts recommend maintaining ambient noise levels between 35-45 decibels in treatment areas. This range allows for clear communication between therapists and patients while creating a calm, therapeutic environment. Strategic acoustic design can help achieve these optimal sound levels while maintaining an open, welcoming atmosphere that supports both physical and emotional healing.
Smart Acoustic Solutions for Treatment Areas
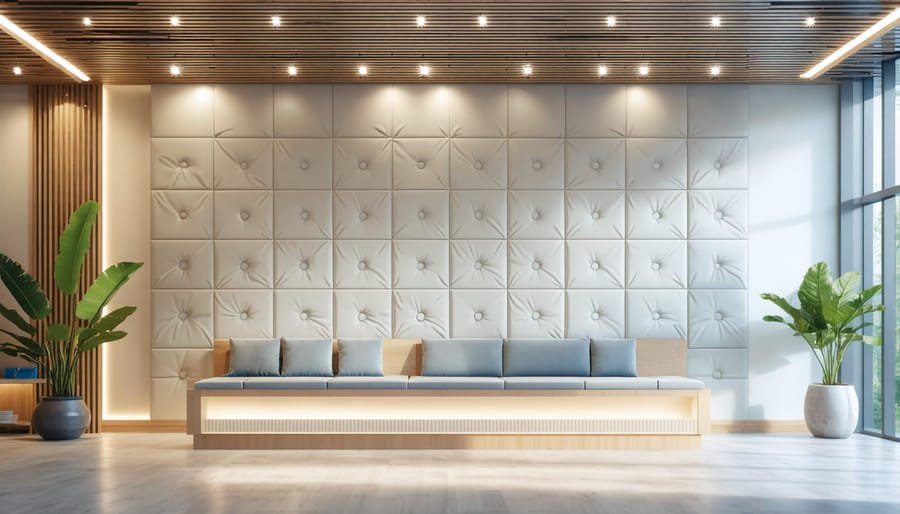
Exercise Areas and Open Spaces
Exercise areas and open spaces in physical therapy facilities present unique acoustic challenges that require thoughtful planning and implementation of acoustic design solutions. These larger areas often generate more noise from equipment, multiple conversations, and movement-based activities, which can create an overwhelming environment for both patients and therapists.
To effectively manage sound in these spaces, consider installing suspended acoustic ceiling panels that not only absorb excess noise but also add visual interest to the room. Wall-mounted acoustic panels can be strategically placed at different heights to capture sound at various levels, while also serving as decorative elements that complement your facility’s color scheme.
Flooring plays a crucial role in sound management for exercise areas. Consider using rubber flooring or specialized acoustic vinyl that absorbs impact noise from equipment and footsteps. These materials are also practical for therapy activities, providing necessary cushioning and slip resistance.
Room dividers and mobile screens with sound-absorbing properties can help create flexible spaces while managing noise levels. These portable solutions allow you to adjust the acoustic environment based on daily needs and different therapy sessions.
Don’t forget about the placement of noisy equipment. Creating designated zones for machines and high-activity exercises can help contain sound to specific areas. Adding sound-absorbing materials around these zones further helps minimize noise transfer to quieter treatment spaces nearby.
Private Treatment Rooms
Private treatment rooms are the heart of any physical therapy practice, where the real healing happens. These spaces need to strike the perfect balance between privacy and comfort while maintaining professional functionality. To create an optimal healing environment, sound management should be your top priority.
Start by incorporating sound-absorbing materials into your wall treatments. Acoustic panels don’t have to be boring – choose fabric-wrapped options in soothing colors that complement your overall design scheme. Installing these panels at various heights helps break up sound waves effectively while adding visual interest to the space.
For flooring, consider using rubber-based materials or commercial-grade carpet tiles with sound-dampening properties. These options not only reduce noise but also provide comfort underfoot for both therapists and patients. Wall-to-wall carpeting can be particularly effective, though make sure to select solutions that are easy to clean and maintain.
Don’t forget about the ceiling space. Suspended acoustic tiles can significantly reduce sound transmission between rooms while concealing necessary mechanical systems. For a more modern look, floating ceiling panels can achieve the same acoustic benefits while adding architectural interest.
Doors should be solid core and properly sealed around the frames to prevent sound leakage. Consider adding door sweeps and weatherstripping to further enhance sound isolation. Some practices also benefit from installing white noise machines or small water features to create ambient sound that helps mask conversations and treatment sounds.
Remember to plan your electrical and equipment layout thoughtfully. Position outlets and mounting points where they won’t interfere with sound-dampening materials while ensuring easy access for treatment equipment.
Material Selection and Implementation
Sound-Absorbing Materials
Creating a peaceful healing environment starts with choosing the right sound-absorbing materials. Acoustic panels are a popular choice, offering both functionality and aesthetic appeal. These panels typically consist of compressed mineral wool or foam covered in fabric, effectively reducing echo and ambient noise while adding a decorative element to your space.
Wall-mounted acoustical treatments come in various styles, from traditional flat panels to modern 3D designs. Consider installing these at ear level where they’ll be most effective at absorbing sound waves. For a more subtle approach, acoustic ceiling tiles can significantly reduce noise without drawing attention to themselves.
Soft furnishings play a crucial role in sound absorption too. Plush upholstered seating, thick curtains, and area rugs help minimize sound reflection while creating a cozy atmosphere. Look for materials with high NRC (Noise Reduction Coefficient) ratings, such as heavy velvet or wool fabrics.
Natural materials like cork and bamboo offer excellent acoustic properties while bringing an organic element to your design. Cork flooring, in particular, reduces impact noise and footfall sound while providing comfort underfoot – perfect for therapy spaces where practitioners are standing for long periods.
For treatment rooms, consider installing sound-dampening insulation within the walls during construction or renovation. This creates a more private environment for client consultations while preventing noise transfer between rooms.

Installation Best Practices
When implementing acoustic solutions in your physical therapy space, start with a thorough assessment of your room’s current sound profile. Begin installation work from the ceiling down, as overhead panels typically provide the most significant impact on sound control. Install acoustic ceiling tiles in a grid pattern, ensuring they’re properly secured and level.
For wall treatments, mark your installation points at eye level first, typically between 3-6 feet from the floor. When mounting acoustic panels, use appropriate wall anchors and maintain consistent spacing between panels for both functional and aesthetic purposes. Leave a small gap (about 1-2 inches) between panels to maximize sound absorption while maintaining a clean look.
Consider using a combination of both hard and soft surfaces strategically. Place sound-absorbing materials in areas where echo is most problematic, such as near treatment tables or exercise areas. For flooring installations, start from the corner farthest from the door and work your way toward the exit to avoid walking on newly installed materials.
Remember to install sound-blocking solutions around doors and windows, using acoustic seals and weatherstripping to prevent sound leakage. When mounting equipment or fixtures, use rubber gaskets or isolators to minimize vibration transfer through walls and floors. Finally, test the acoustics throughout the installation process to ensure you’re achieving the desired sound quality in your therapy space.
Design That Complements Function
Aesthetic Considerations
Creating a healing environment in a physical therapy space requires careful consideration of both visual appeal and acoustic performance. The key is striking the perfect balance between aesthetics and functionality, ensuring that accessibility-focused design elements don’t compromise the overall look and feel of the space.
Consider using sound-absorbing materials that also serve as decorative elements, such as textured wall panels, artistic acoustic tiles, or sculptural ceiling baffles. These elements can become focal points while effectively managing noise levels. Color psychology plays a crucial role too – opt for calming blues and greens that promote healing while incorporating sound-dampening fabrics in complementary hues.
Modern acoustic solutions come in various design-forward options, allowing you to maintain a contemporary, professional appearance without sacrificing sound quality. For instance, fabric-wrapped panels can be customized with prints or patterns that match your brand identity, while decorative perforated panels can create interesting visual effects while absorbing unwanted noise.
Window treatments serve dual purposes – they control natural light and help with acoustics. Choose thick, flowing curtains or cellular shades that add softness to the space while reducing sound reflection. Remember that plants not only add life to the environment but also help diffuse sound waves naturally.
Practical Design Tips
Start with an open floor plan that allows for easy movement and equipment placement. Position treatment tables with enough space around them for therapists to work comfortably from all angles – typically 3-4 feet on each side. Create dedicated zones for different therapy activities: a reception area, private treatment rooms, an exercise space, and a rehabilitation equipment area.
Choose slip-resistant flooring materials that are both durable and easy to clean. Consider using rubber flooring in exercise areas for comfort and safety, while maintaining a professional look with luxury vinyl or hardwood in reception areas. Install handrails along corridors and in treatment rooms for patient safety and independence.
Maximize natural light wherever possible, but ensure window treatments can control glare during treatment sessions. Install adjustable LED lighting systems that can be dimmed as needed. Paint walls in calming, neutral colors like soft blues, greens, or warm beiges to create a healing atmosphere.
Storage is crucial – incorporate built-in cabinets and mobile storage units for equipment and supplies. Include mirrors strategically placed for exercise monitoring and patient feedback. Consider installing a sound system for music therapy and white noise options in treatment areas.
Remember to maintain clear pathways throughout the facility and ensure all doorways and treatment areas are wheelchair accessible. Position electrical outlets at convenient heights and locations for easy equipment access.
Creating a healing environment through thoughtful physical therapy interior design involves careful consideration of multiple elements, from color schemes to acoustic treatments. By implementing the design principles we’ve discussed, you can transform your space into an inviting, functional facility that promotes recovery and well-being.
Remember to prioritize patient comfort while maintaining professional efficiency. Start with a well-planned layout that supports smooth traffic flow and accommodates both equipment and people comfortably. Choose calming colors, incorporate natural elements, and ensure adequate lighting throughout the space. Don’t forget the importance of acoustic solutions to create a peaceful environment conducive to healing and communication.
To get started with your physical therapy interior design project:
1. Assess your current space and identify priority areas for improvement
2. Create a realistic budget that includes both essential and aesthetic elements
3. Develop a phased implementation plan if needed
4. Consult with design professionals who understand healthcare requirements
5. Consider future growth and flexibility in your design decisions
Remember that successful interior design in a physical therapy setting is an ongoing process. Regular evaluation and updates ensure your space continues to meet the evolving needs of both patients and practitioners. By focusing on these key elements while maintaining a balance between functionality and aesthetics, you’ll create an environment that supports optimal healing outcomes and professional success.
