
Z-Wave Outdoor Lights Transform Your Backyard Into a Smart Paradise
Transform your outdoor spaces with smart outdoor lighting using Z-Wave technology, the ultimate solution for modern home automation enthusiasts. These wireless-enabled fixtures revolutionize exterior illumination by seamlessly integrating with your existing smart home ecosystem, offering precise control through smartphone apps or voice commands.
Z-Wave outdoor lights eliminate the complexity of traditional landscape lighting while delivering enhanced security and energy efficiency. Install motion-activated floodlights near entry points, program pathway lights to adjust brightness based on sunset times, and orchestrate stunning ambient scenes for outdoor entertaining—all from a single, intuitive interface.
Unlike standard Bluetooth or Wi-Fi solutions, Z-Wave’s mesh network technology ensures reliable connectivity across your entire property, even in challenging weather conditions. The system’s military-grade encryption keeps your outdoor lighting network secure, while its compatibility with major smart home hubs makes integration straightforward for both DIY installers and professional contractors.
Whether illuminating a cozy patio or securing a sprawling estate, Z-Wave outdoor lighting combines cutting-edge automation with practical functionality, creating an intelligent exterior lighting solution that enhances both the beauty and safety of your home.
What Makes Z-Wave Outdoor Lights Special?
Smart Features That Matter Outdoors
Z-wave outdoor lights come packed with essential features that make them perfect for exterior applications. Weather resistance is a top priority, with most models offering IP65 or higher ratings to protect against rain, snow, and dust. This means your smart lighting system keeps working reliably through all seasons and weather conditions.
Range capabilities are particularly impressive, with Z-wave Plus devices offering up to 300 feet of direct communication distance. The mesh network technology allows each light to act as a signal repeater, extending coverage throughout your property and ensuring consistent performance even in larger outdoor spaces.
Reliability is built into the core of Z-wave technology. These lights operate on a different frequency than Wi-Fi, reducing interference and ensuring stable connections. Many models include backup memory, so they maintain their programming even during power outages. Advanced features like motion detection, scheduling, and dimming capabilities work seamlessly with your home automation system.
Most outdoor Z-wave lights also feature energy-efficient LED technology, combining smart functionality with cost-effective operation. The robust build quality and dedicated wireless protocol make these lights a dependable choice for smart outdoor lighting.
Seamless Integration with Home Automation
Z-wave outdoor lights excel at smart home technology integration, making them a perfect choice for homeowners already using smart systems. These lights seamlessly connect to popular home automation hubs like SmartThings, Hubitat, and Home Assistant, allowing you to control your outdoor lighting through the same interface you use for indoor devices.
Once connected, you can create synchronized lighting scenes that coordinate your outdoor and indoor spaces. Imagine having your pathway lights automatically illuminate as your indoor lights dim for movie night, or setting up automated schedules that adjust based on sunset times. You can even integrate your outdoor lights with motion sensors, security cameras, or door locks for enhanced home security.
The real beauty of Z-wave outdoor lights lies in their ability to work alongside other smart devices. Whether you’re using voice commands through Alexa or Google Assistant, or controlling everything from your smartphone, these lights respond instantly and reliably. Plus, they can be part of larger automation routines, such as “Good Morning” or “Goodnight” sequences that manage all your connected devices at once.

Creating Perfect Outdoor Scenes
Entertainment Areas
Transform your outdoor entertainment areas into welcoming spaces with Z-Wave outdoor lighting solutions that combine functionality with ambiance. Whether you’re hosting evening barbecues, pool parties, or simply enjoying quiet nights on the patio, smart lighting can enhance these experiences. Check out these inspiring outdoor lighting design ideas to maximize your space’s potential.
Start by installing Z-Wave motion-activated flood lights around gathering spaces for security and convenience. Add ambient lighting with smart string lights or LED strips along pergolas and deck railings, which can be programmed to create different moods for various occasions. For dining areas, consider dimmable pendant lights or adjustable spotlights that can be controlled via your smartphone or voice commands.
Pool areas benefit from color-changing Z-Wave lights that can sync with music or create themed atmospheres for parties. Install pathway lights leading to entertainment zones, which can be scheduled to activate at sunset and adjust brightness based on outdoor conditions. Garden accent lights can highlight landscaping features while providing subtle illumination for evening conversations.
Remember to create lighting zones that can be controlled independently, allowing you to activate only the areas currently in use. This smart approach not only enhances the functionality of your outdoor spaces but also helps conserve energy and reduce light pollution.

Security and Safety Zones
Strategic placement of Z-Wave outdoor lights is crucial for creating effective security zones around your property. By implementing professional lighting design techniques, you can significantly enhance your home’s safety while maintaining its aesthetic appeal.
Start by identifying vulnerable areas like entry points, walkways, and dark corners. Position motion-activated Z-Wave lights near all exterior doors, focusing on both front and back entrances. These smart fixtures can automatically illuminate when movement is detected and send instant notifications to your phone.
Create overlapping zones of lighting coverage to eliminate blind spots. Place lights at different heights and angles to ensure comprehensive surveillance. Key areas to focus on include:
– Garage doors and driveways
– Side yards and fence lines
– Window perimeters
– Utility access points
– Landscaping that could provide cover
The beauty of Z-Wave outdoor lights lies in their programmability. Set up automated schedules that mimic occupancy when you’re away, or create dynamic lighting scenes that respond to specific triggers. You can even integrate these lights with other security devices, such as cameras and sensors, for a complete home protection system that’s both smart and effective.
Remember to position lights facing downward to minimize light pollution while maximizing visibility in critical areas. This approach not only respects your neighbors but also provides more effective security coverage.
Installation and Setup Made Simple
Tools and Planning
Before diving into your Z-Wave outdoor lighting project, gather these essential tools and materials. You’ll need a basic toolkit including wire strippers, a voltage tester, screwdrivers, and weatherproof wire connectors. For mounting, have a drill, appropriate screws, and anchors ready. Don’t forget a sturdy ladder for reaching higher installation points.
Your Z-Wave setup requires a compatible hub or controller, which serves as the brain of your smart home system. Make sure you have a strong Wi-Fi connection that extends to your outdoor areas, as this affects your hub’s performance.
Create a detailed lighting plan by sketching your outdoor space and marking desired light locations. Consider power sources – you’ll need weather-resistant electrical boxes and possibly an electrician if new wiring is required. For battery-operated options, stock up on recommended batteries.
Safety equipment is crucial: wear work gloves, safety glasses, and ensure you have proper outdoor-rated extension cords if needed. Having a helper during installation is recommended for both safety and efficiency.
Step-by-Step Installation
Installing Z-Wave outdoor lights is a straightforward process that most homeowners can handle with basic DIY skills. Start by choosing an appropriate location near a power source, ensuring the lights are protected from direct water exposure while maintaining good signal connectivity to your Z-Wave hub.
First, turn off power at the circuit breaker. If you’re replacing an existing fixture, remove it carefully and disconnect the old wiring. For new installations, you’ll need to install an electrical box rated for outdoor use.
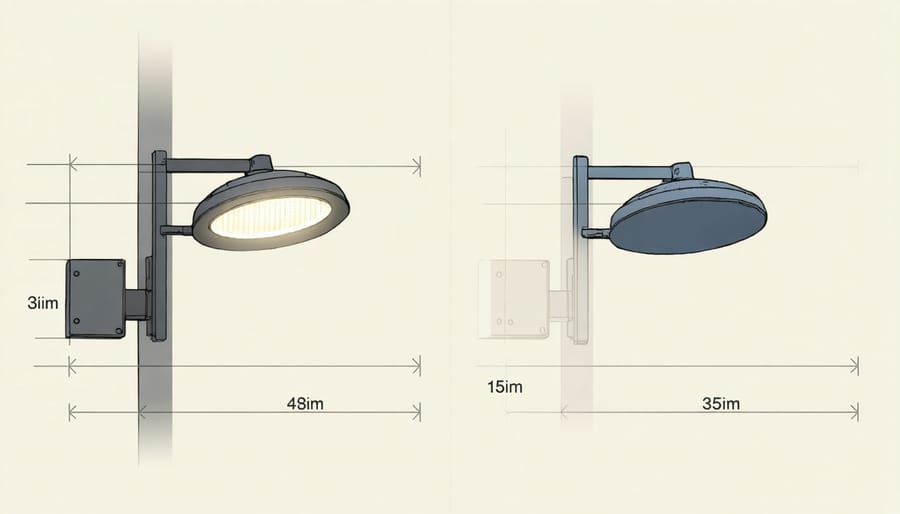
Mount the mounting bracket securely to your electrical box. Connect the wires following the manufacturer’s instructions: typically black to black (hot), white to white (neutral), and green or bare copper to ground. Some models may have additional wires for specific features.
Attach the light fixture to the mounting bracket, ensuring all connections are properly sealed with weatherproof gaskets. Apply silicone caulk around the edges where the fixture meets the wall to prevent water infiltration.
Power up the circuit and add the device to your Z-Wave network by following your hub’s inclusion process. This usually involves pressing a button sequence on the light or using your hub’s app.
Test the connection by controlling the light through your smart home system. Check all functions, including motion detection and scheduling if available. Finally, adjust any sensors and fine-tune the settings through your Z-Wave controller for optimal performance.
Remember to perform periodic maintenance checks to ensure weather seals remain intact and connections stay secure.
Maintenance and Troubleshooting
Like any smart home device, Z-Wave outdoor lights may occasionally experience issues that require troubleshooting. Here are some common problems and their solutions to keep your outdoor lighting system running smoothly.
If your lights aren’t responding to commands, first check the battery levels in your Z-Wave controller or hub. Low batteries can cause communication issues. Next, verify that the lights are within range of your Z-Wave network. Outdoor fixtures sometimes sit at the edge of your network’s reach, so you might need a Z-Wave repeater to extend the signal.
Connection drops are another frequent concern. Reset the problematic light by turning off the power at the circuit breaker for 30 seconds, then restoring power. If issues persist, try removing the device from your network and re-adding it. This often resolves stubborn connectivity problems.
For optimal performance, clean your outdoor fixtures regularly. Remove debris, cobwebs, and dirt that can accumulate around sensors and affect functionality. During cleaning, inspect wire connections and weather sealing to prevent water damage.
Seasonal maintenance is crucial for longevity. Before winter, ensure all weatherproof gaskets and seals are intact. Check that mounting hardware is tight and secure, as wind and temperature changes can loosen fixtures over time.
If lights show delayed response or irregular behavior, check for interference from nearby metal objects or electrical equipment. Sometimes, repositioning the fixture slightly can improve communication with your Z-Wave network.
For LED-based systems, flickering might indicate incompatibility with your dimmer settings. Adjust the minimum and maximum brightness levels in your Z-Wave controller’s settings to resolve this issue.
Keep a log of when you experience problems and under what conditions. This information can be invaluable for troubleshooting patterns and can help support teams assist you more effectively if needed.
Remember to update your Z-Wave hub’s firmware regularly, as manufacturers often release fixes for common issues through software updates.
Z-Wave outdoor lights represent a fantastic investment in both home security and convenience, offering a perfect blend of smart technology and practical lighting solutions. By implementing these innovative fixtures in your outdoor spaces, you’re not just illuminating your property – you’re creating a sophisticated, automated environment that enhances both safety and ambiance.
The benefits are truly compelling: scheduled lighting that mimics occupancy while you’re away, instant smartphone control from anywhere in the world, and seamless integration with other smart home devices. Plus, the energy savings from automated scheduling and motion-sensing capabilities can help offset the initial investment over time.
Whether you’re starting small with a few pathway lights or planning a comprehensive outdoor lighting system, Z-Wave technology provides the flexibility to expand your setup gradually. The wireless nature of Z-Wave makes installation relatively straightforward for DIY enthusiasts, while professional installation remains an option for those seeking expert guidance.
Remember that proper planning is key to success. Consider your specific needs, from security lighting near entrances to ambient lighting for entertainment areas. Take advantage of Z-Wave’s mesh network capabilities to ensure reliable coverage throughout your property, and don’t forget to verify weather ratings for your chosen fixtures.
As smart home technology continues to evolve, Z-Wave outdoor lighting stands out as a practical, future-proof solution for modern homes. By taking the step to implement these smart lighting solutions, you’re not just upgrading your outdoor spaces – you’re investing in a more secure, efficient, and enjoyable home environment that will serve you well for years to come.
