The Nursery Furniture Dangers No One Warns You About (And How to Keep Your Baby Safe)
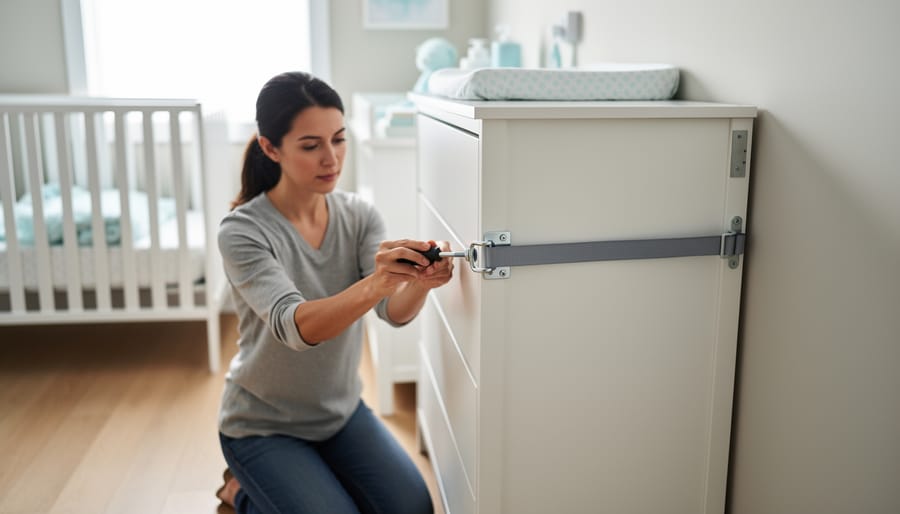
Anchor every piece of tall furniture in your nursery to the wall using furniture straps or L-brackets, because tip-over accidents send a child to the emergency room every 24 minutes in the United States. Choose cribs with slats spaced no more than 2-3/8 inches apart to prevent your baby’s head from getting trapped, and verify that any crib manufactured after June 2011 meets current CPSC standards that banned dangerous drop-side designs. Position changing tables against walls rather than freestanding in room centers, and always use safety straps while keeping one hand on your baby during diaper changes.
Creating a safe nursery goes beyond simply buying furniture with safety certifications. You need to understand which specific hazards threaten your child at different developmental stages, from stationary newborns to climbing toddlers. Dressers that seem perfectly stable when empty become top-heavy death traps when curious toddlers use open drawers as ladder rungs. Rocking chairs without proper weight distribution can pinch tiny fingers in mechanisms. Even seemingly harmless items like toy chests can slam shut on little hands or create suffocation risks.
This guide walks you through evidence-based safety standards, room-by-room furniture assessments, DIY anchoring techniques that actually work, and maintenance schedules to keep your nursery safe as your child grows. Whether you’re setting up your first nursery or updating a space for another child, you’ll learn exactly which safety measures deserve your attention and your budget.
Why Nursery Furniture Safety Matters More Than Ever
Every year, thousands of children are injured in preventable accidents involving nursery furniture, making safety awareness more critical than ever for new and expectant parents. According to recent data from the Consumer Product Safety Commission, emergency rooms treat approximately 15,000 children annually for injuries related to furniture tip-overs alone, with cribs, dressers, and changing tables being the most common culprits.
The numbers tell a sobering story. Between 2019 and 2023, major furniture manufacturers issued over 200 recalls affecting nursery products, ranging from cribs with faulty hardware to changing tables with structural defects. These recalls impacted millions of units already in homes across the country, highlighting how even reputable brands can have safety oversights that put your little one at risk.
The most common accidents involve furniture tip-overs when curious toddlers climb on dressers or use drawer handles as makeshift ladders. Drop-side cribs, once considered standard, were banned in 2011 after causing numerous fatalities, yet many still circulate through secondhand markets. Entrapment hazards remain a concern too, with gaps in crib slats or headboards posing serious dangers to infants.
What makes these statistics particularly alarming is that many accidents occur with furniture that looks perfectly safe at first glance. A sturdy-looking dresser might become unstable when drawers are opened, or a crib that seems solid could have hidden defects in its construction. This is why staying informed about current safety standards and recall notices isn’t just helpful, it’s essential for protecting your child.
The good news? Most nursery furniture accidents are entirely preventable with proper knowledge, careful selection, and simple safety measures you can implement yourself. Understanding what to look for and how to properly secure furniture can make all the difference in creating a truly safe nursery environment.
The Critical Safety Standards You Need to Know
How to Verify Safety Certifications
Finding and verifying safety certifications is easier than you might think. Start by checking the product labels, tags, or stamps directly on the furniture. Look for recognizable certification marks like JPMA (Juvenile Products Manufacturers Association), ASTM International, or GREENGUARD Gold. These are typically located on the back, bottom, or inside drawers of cribs, changing tables, and dressers.
To verify authenticity, visit the certifying organization’s website and use their product registry or database search feature. Simply enter the product model number or manufacturer name to confirm certification status. For JPMA-certified items, you can check their online directory at jpma.org. If a product claims certification but doesn’t appear in the official database, that’s a major red flag.
Watch out for warning signs of non-compliant furniture. Be suspicious of products lacking any certification labels, items sold without proper documentation or assembly instructions, or furniture with vague safety claims like “meets standards” without specifying which ones. Unusually low prices compared to similar products often indicate corners were cut, potentially including safety testing. If labels appear worn, peeling, or tampered with, proceed with caution. When purchasing secondhand items, always research the specific model online to ensure it hasn’t been recalled and originally met safety standards. Remember, investing a few extra minutes in verification protects your little one for years to come.
Crib Safety: The Non-Negotiables
Slat Spacing and Structural Integrity
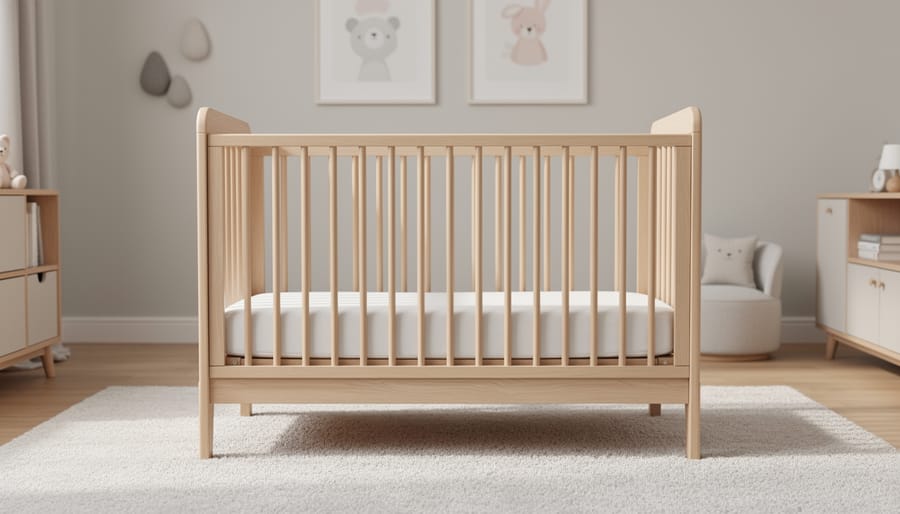
When shopping for cribs and toddler beds, pay close attention to slat spacing, which should never exceed 2 3/8 inches apart. This specific measurement prevents your baby’s head from becoming trapped between slats. You can easily test this at home using a standard soda can—if it fits through the slats, the spacing is too wide and unsafe.
Corner posts should sit flush with the headboard and footboard or be extremely tall, like decorative bedposts. Posts that extend 1/16 inch or more above the end panels create snagging hazards for clothing and pose a strangulation risk. Check all four corners before purchasing any crib.
Mattress support stability is crucial for preventing collapse. The support system should attach firmly to the crib frame with quality wood construction or metal hangers. Test it by pushing down firmly—there should be no wobbling or loose connections. The mattress itself should fit snugly with no more than two fingers of space between the mattress edge and crib sides.
For a quick DIY safety check, regularly inspect all screws, bolts, and support brackets. Tighten any loose hardware immediately and replace damaged components with manufacturer-approved parts only.
Drop-Side Cribs and What to Avoid
Drop-side cribs were once popular for their convenience, but they’re now banned in the United States and Canada for good reason. These cribs featured a movable side rail that could be lowered for easier access to your baby. Unfortunately, this design created serious safety hazards. The hardware often malfunctioned or detached over time, creating dangerous gaps where infants could become trapped or even suffocate. Since 2011, manufacturing and selling drop-side cribs has been illegal, and they’ve been linked to numerous infant deaths.
If you’ve inherited a hand-me-down crib or found one at a yard sale, check carefully for this feature and avoid using it entirely. Beyond drop-side models, steer clear of cribs with decorative cutouts in the headboard or footboard where a baby’s head could get stuck. Cribs with corner posts higher than 1/16 inch above the end panels also pose strangulation risks from clothing catching on them. Antique cribs, while charming, rarely meet current safety standards and often have lead-based paint or slat spacing that’s too wide. When shopping for nursery furniture, always choose new cribs certified to current safety standards rather than risking your child’s safety with outdated designs.
Mattress Fit and Firmness
A proper mattress fit is one of the most important safety considerations for your baby’s crib. To check if your mattress fits correctly, use the simple two-finger rule: you should not be able to fit more than two fingers between the mattress edge and the crib frame. Any gap larger than this creates a dangerous entrapment hazard where your baby’s head or body could become wedged, leading to potential suffocation.
Firmness matters just as much as fit. Soft mattresses might seem more comfortable, but they actually pose a significant risk for infants. A firm sleep surface helps prevent suffocation by ensuring your baby’s face won’t sink into the mattress if they roll over during sleep. Press firmly on the mattress center with your hand—it should quickly bounce back to shape and not conform to your hand’s impression.
When shopping for a crib mattress, look for products that meet Consumer Product Safety Commission standards and are specifically labeled for infant use. Avoid adding extra padding, pillow-top covers, or soft bedding that can compromise the mattress’s firmness. Remember, what feels comfortable to you isn’t what’s safe for your baby’s developing body.
Changing Tables and Dressers: Hidden Tip-Over Dangers
Anchoring Systems That Actually Work
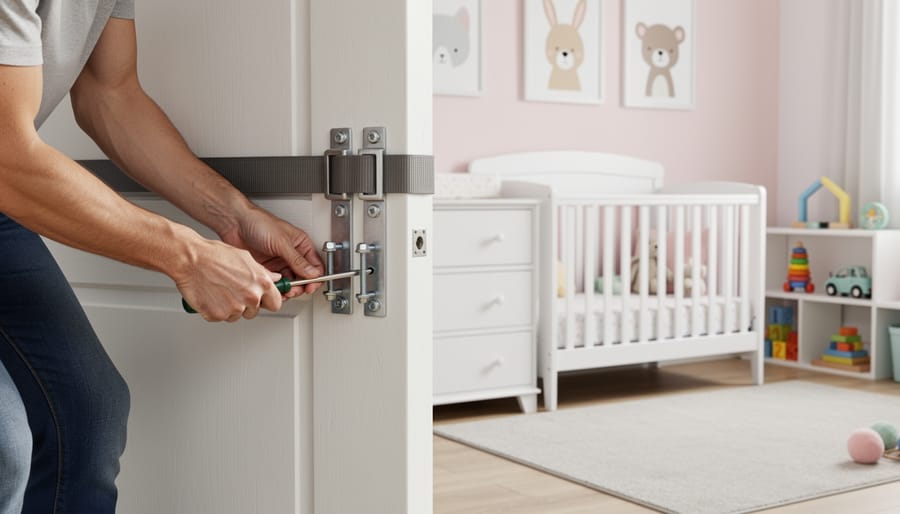
Anchoring your nursery furniture doesn’t require professional help—you can absolutely do this yourself with the right approach. Let’s walk through exactly how to secure those dressers, bookcases, and changing tables so they stay put.
First, gather your supplies: furniture anchoring straps or brackets (often included with new furniture), a drill with appropriate bits, wall anchors suitable for your wall type, a stud finder, pencil, and level. Most hardware stores sell universal anti-tip kits for around ten dollars if your furniture didn’t come with anchors.
Here’s your step-by-step process: Start by using your stud finder to locate wall studs—anchoring directly into studs provides the strongest hold. Mark the stud locations with a pencil. Position your furniture in its final spot, making sure it’s level. Attach the bracket or strap to the back of the furniture piece according to the manufacturer’s instructions. Hold the other end of the strap against the wall at the stud location, mark your drilling point, then drill your pilot hole. If you can’t hit a stud, use heavy-duty wall anchors rated for at least 50 pounds. Secure the strap to the wall and test the connection by gently pulling on the furniture.
Common mistakes to avoid: Don’t skip the stud finder and just guess where studs are located. Never use anchors that aren’t rated for your wall type—drywall anchors won’t work in plaster walls. Avoid placing straps where curious toddlers can reach and tamper with them. Finally, don’t anchor just the top of tall furniture; secure it at multiple points for maximum stability.
Storage Solutions Without the Safety Compromise
Toy Chest Lids and Ventilation
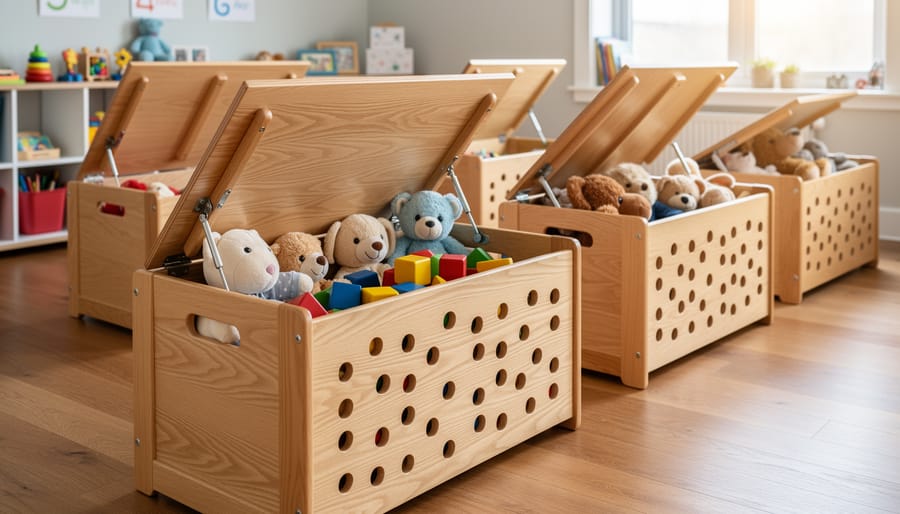
Toy chests might seem harmless, but they pose serious safety risks if not properly designed. The biggest danger? Heavy lids that can slam shut on little heads and fingers. Always choose toy chests with slow-closing hinges or lid support mechanisms that prevent sudden closure. These safety hinges are designed to catch the lid and lower it gently, giving your child time to pull back if their hands are in the way.
Ventilation is equally critical. If a child climbs inside and the lid closes, adequate airflow can be lifesaving. Look for toy chests with ventilation holes or gaps that won’t close completely. Many modern designs include decorative cutouts that serve this dual purpose beautifully.
If you’re building or retrofitting a toy chest, installing soft-close hinges is a straightforward DIY project. You’ll need a drill, screwdriver, and the appropriate hinge kit for your chest size. For ventilation, drill several holes along the back or sides, spacing them at least four inches apart for optimal airflow. Sand the edges smooth to prevent splinters, and you’ve created a much safer storage solution for your nursery.
Rocking Chairs and Gliders: What to Check Before You Buy
That cozy rocking chair might be calling your name, but before you commit, let’s make sure it’s truly safe for late-night feeding sessions. Start by testing stability on a flat surface. Give it a good rock and check for wobbling or tipping. The base should be wide enough to prevent accidental tip-overs, especially when you’re settling in with your baby at 2 a.m.
Pinch points are your next concern. Run your hands along all moving parts where the rocker or glider mechanism operates. These gaps can trap tiny fingers, so look for models with enclosed mechanisms or protective coverings. Check armrests too—they should be smooth without sharp edges or hardware that could snag clothing or scratch skin.
Weight capacity matters more than you’d think. Verify that the chair can safely support your weight plus your growing child. Quality construction includes proper cushion support that won’t compress unevenly or create uncomfortable gaps over time.
Placement is crucial for preventing accidents. Position your rocking chair away from windows, cords, and other furniture to avoid collision risks during those drowsy moments. Ensure there’s enough clearance behind the chair so it won’t bump the wall or knock over nearby items. If you’re placing it on hardwood floors, consider adding a non-slip rug pad underneath to prevent the chair from gradually shifting across the room during use.
Ongoing Maintenance and Safety Checks
Monthly Safety Checklist
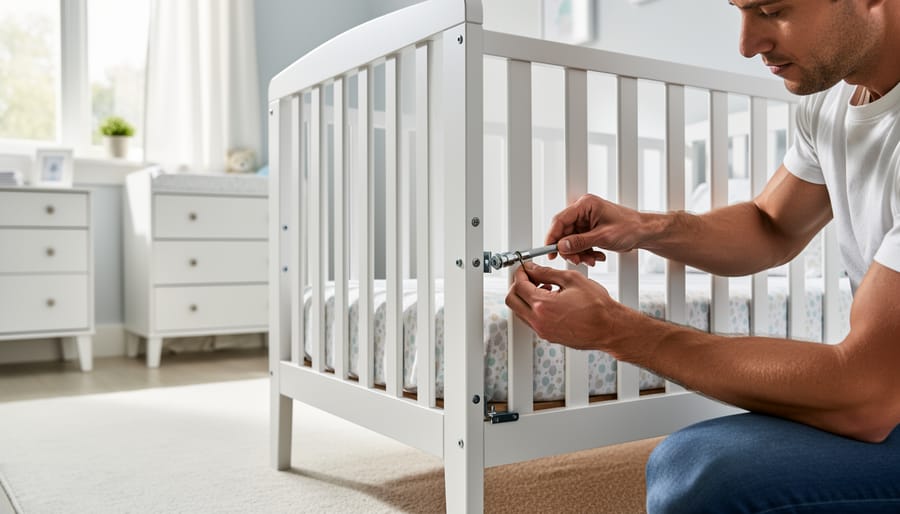
Set aside time each month to give your nursery furniture a thorough safety inspection. Start by checking all hardware connections on cribs, changing tables, and dressers. Tighten any loose screws or bolts, paying special attention to areas that see frequent use. Quality sturdy metal hardware typically holds up better than plastic components, but everything needs regular attention.
Test furniture stability by gently pushing from different angles. Wobbly pieces need immediate attention or repositioning. Inspect anti-tip straps and wall anchors to ensure they’re still secure and haven’t loosened over time. Check for any new cracks, splinters, or sharp edges that could pose injury risks.
Don’t forget to visit the Consumer Product Safety Commission website monthly to check for any recent furniture recalls. Sign up for email alerts to stay informed automatically. Look for signs of wear like peeling paint, worn fabric, or deteriorating foam padding. Replace or repair items showing significant wear before they become safety hazards. Keep a simple log of your inspection dates and findings to track patterns and stay consistent with this important routine.
When to Say No to Hand-Me-Downs and Vintage Finds
Hand-me-downs can be wonderful budget savers, but when it comes to nursery furniture, safety must come first. The general rule? Never accept used cribs, car seats, or any item with a history of recalls. Cribs manufactured before 2011 don’t meet current safety standards that banned dangerous drop-side designs, and older models may have lead paint, toxic finishes, or slat spacing that poses entrapment risks.
Before accepting any used nursery furniture, check the Consumer Product Safety Commission’s recall database at cpsc.gov. Simply enter the brand name and model number to see if the item has been flagged. Missing or faded labels make this impossible, which is reason enough to pass.
When evaluating secondhand furniture, inspect carefully for structural integrity. Wobbly joints, stripped screws, or cracked wood cannot be safely repaired for items supporting a child’s weight. Changing tables and dressers made from durable wood types like maple or oak fare better over time than particleboard, which deteriorates and weakens.
Vintage finds might look charming, but antique cribs almost never meet modern standards. Decorative spindles, ornate cutouts, and corner posts can trap clothing or limbs. Save vintage pieces for non-sleep purposes, like displaying blankets or toys.
Some items are safer secondhand choices: solid wood bookshelves, gliders without recalls, and storage solutions that don’t support your baby’s weight. Always request assembly instructions and verify all hardware is included. When in doubt, remember that your child’s safety outweighs any savings or sentimental value.
Creating a safe nursery doesn’t mean compromising on style or personality. You’ve learned the essentials, from understanding CPSC and ASTM standards to anchoring furniture properly and choosing non-toxic finishes. Now you’re equipped to design a space that’s both beautiful and secure for your little one.
Remember, safety is an ongoing commitment. Make it a habit to check the CPSC website regularly for recalls, and sign up for email alerts about nursery products you own. Technology can help too—set calendar reminders every few months to inspect anchor straps, tighten hardware, and check for wear and tear.
Trust your instincts as a parent. If something feels unstable or questionable, address it immediately. That wobbly changing table or loosening crib bolt deserves your attention now, not later. Your diligence in these early stages creates lasting habits that will serve your family well as your child grows.
You’ve got this. With the knowledge you’ve gained and your commitment to staying informed, you’re creating more than just a nursery—you’re building a safe haven where your baby can thrive, and you can rest easy knowing you’ve done everything right.
