
Build Your Perfect L-Shaped Desk With These Smart Divider Plans
Transform your workspace with a custom L-shaped desk that maximizes corner space and boosts productivity. Building your own L-shaped desk lets you improve your home office while saving money and creating exactly what you need. This comprehensive guide walks you through constructing a professional-grade corner desk, complete with integrated storage solutions and cable management systems.
Start with precise measurements of your space, accounting for both desk surface dimensions and ergonomic height requirements. Select high-quality plywood or solid wood boards for durability, focusing on 3/4-inch thickness for the desktop and supporting structures. Consider incorporating built-in features like keyboard trays, monitor stands, and hidden wire channels during the planning phase to create a truly functional workspace.
Our step-by-step plans include detailed cutting lists, assembly diagrams, and finishing techniques that ensure professional results, even for beginners. Whether you’re crafting a compact home office solution or an expansive workspace, these DIY plans adapt to your specific needs while maintaining structural integrity and professional aesthetics.
Materials and Tools You’ll Need

Wood and Hardware Selection
For this L-shaped desk, you’ll want to focus on durable materials that can withstand daily use while keeping your budget in check. Like many successful woodworking projects, material selection is crucial. Start with 3/4-inch plywood or MDF for the desktop surfaces – you’ll need two 4×8 sheets. For added durability, consider solid wood edging using 1×2 pine boards.
Essential hardware includes:
– 8-12 heavy-duty L-brackets (at least 6 inches)
– #8 wood screws (1-1/4 inch and 2-1/2 inch lengths)
– Corner braces for reinforcement
– Adjustable desk legs or filing cabinet for support
– Wood glue
– Cable grommets (optional)
For a premium look, consider hardwoods like oak or maple for the edging, though pine works well for a budget-friendly option. If using plywood, select cabinet-grade material for a smoother finish and fewer voids. Remember to choose wood that matches your room’s existing decor and factor in about 10% extra material for mistakes or adjustments.
Essential Tools List
To build your L-shaped desk successfully, you’ll need a solid set of basic tools and some optional equipment that can make the job easier. Must-have tools include a power drill with various drill bits, a circular saw or table saw for precise cuts, a measuring tape, pencil, level, and speed square. You’ll also need a quality screwdriver set, wood glue, clamps (at least 4-6), and a sander with medium and fine-grit sandpaper.
For more professional results, consider adding these optional but helpful tools: a pocket hole jig for strong joints, an impact driver for faster assembly, a router for edge finishing, and a miter saw for perfect angle cuts. A workbench or stable work surface is essential, and sawhorses can be incredibly useful for supporting long pieces during cuts.
Safety equipment is non-negotiable – always have protective eyewear, work gloves, and a dust mask on hand. If you’re planning to apply finish indoors, grab some drop cloths and ensure proper ventilation. A shop vacuum will make cleanup much easier and help maintain a safe work environment throughout your project.
Building the L-Shaped Desktop
Frame Construction
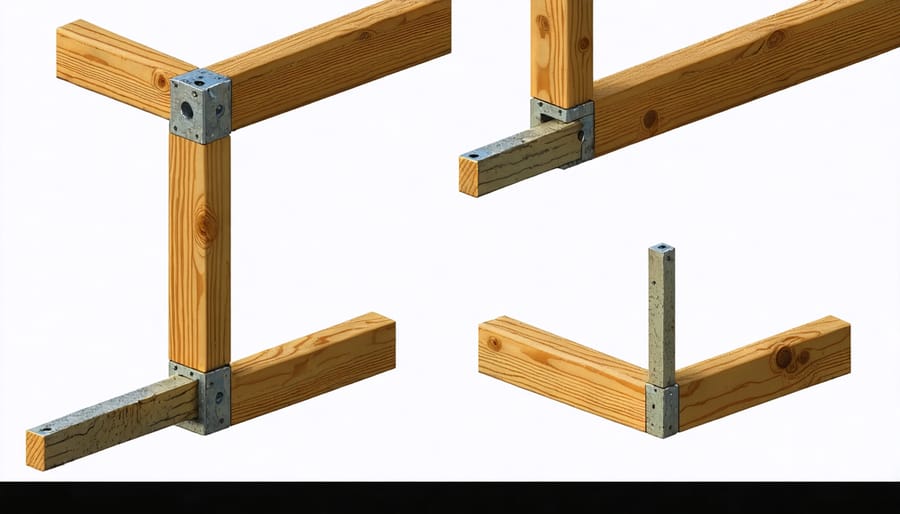
Start by constructing a solid base frame using 2×4 lumber for maximum stability. Cut two long pieces for the L-shape’s main runs, typically 60 inches and 48 inches, though you can adjust these measurements to fit your space. Create supporting legs by cutting four pieces at 28 inches each, which will give you a standard desk height of 30 inches once you add the top.
For the frame’s perimeter, connect your pieces using wood screws and corner brackets. Position the legs at each corner and one at the L-junction for crucial support. Add a fifth leg at the back corner where the two sections meet to prevent sagging. Pre-drill your holes to avoid splitting the wood and use a level throughout the process.
Install support braces running between the legs at regular intervals – about every 20 inches is ideal. These prevent wobbling and provide mounting points for your desktop. Add diagonal braces at each corner, cutting them at 45-degree angles for a clean fit. These triangular supports are essential for eliminating side-to-side movement.
For extra stability, incorporate a back rail that runs the full length of both sides. This not only strengthens the entire structure but also provides support for mounting storage solutions later. Use a combination of wood glue and screws for all joints to ensure maximum durability.
Before moving forward, check that all corners are square and each leg sits firmly on the ground. Adjust the legs with levelers if needed, especially if your floor isn’t perfectly even. This attention to detail during frame construction will ensure your desk remains stable for years to come.
Desktop Assembly
Now comes the exciting part – bringing your L-shaped desk to life by assembling the desktop surface. Start by laying out your desktop pieces on a flat surface, ensuring they’re perfectly aligned. If you’re using multiple boards, apply wood glue along the edges and clamp them together firmly, allowing the glue to dry completely according to the manufacturer’s instructions.
Once your desktop pieces are secure, sand the entire surface thoroughly, starting with medium-grit sandpaper and progressively moving to finer grits for a smooth finish. Pay special attention to the edges and any joints between boards. Wipe away all dust with a tack cloth before proceeding.
Position your desktop pieces on top of the base frame, making sure they’re centered and the L-shape corners meet precisely. Secure the desktop to the frame using 1¼-inch wood screws from underneath, spacing them every 8-10 inches along the support structure. Be careful not to over-tighten, which could split the wood or create dimples in your desktop surface.
For a professional finish, fill any screw holes or small gaps with wood putty that matches your wood tone. Once dry, sand these spots smooth. Apply your chosen finish – whether stain, paint, or clear coat – following the product instructions. For maximum durability, apply at least two coats, sanding lightly between each layer.
Don’t forget to add protective feet or pads underneath the desk legs to prevent floor scratches and ensure stability. Once everything’s dry, flip your desk right-side up, and you’re ready to organize your new workspace!
Integrated Divider System
Divider Design Options
When planning your L-shaped desk, incorporating desk divider options can significantly enhance your workspace organization. Consider a vertical pegboard divider that doubles as a tool holder and note display. For a more minimalist approach, install clear acrylic panels that maintain an open feel while creating distinct work zones. Wooden slat dividers offer a warm, natural aesthetic and can be customized with different stains to match your desk finish.
Another popular choice is the modular cube system, where you can create both division and storage by stacking wooden boxes in various configurations. For flexibility, consider mounting adjustable sliding panels that can be moved as your needs change. Wire mesh dividers provide an industrial look while allowing air and light flow, perfect for displaying photos or holding lightweight items.
If you’re tech-savvy, incorporate a cable management channel into your divider design to keep wires organized and hidden. Built-in shelving dividers can maximize vertical space while separating work areas. For a unique touch, try using repurposed wooden pallets cut to size, creating an eco-friendly division system with rustic charm. Remember to match the divider height to your intended use – lower dividers work well for collaboration, while taller ones offer more privacy.
Installation Methods
When it comes to mounting dividers on your L-shaped desk, there are several secure methods you can use depending on your design preferences and materials. For wooden dividers, wood screws combined with wood glue provide excellent stability. Pre-drill your holes to prevent splitting, and use screws that are slightly shorter than the combined thickness of your pieces.
For a more modern look, consider using metal brackets or L-brackets. These can be particularly useful at corner joints and provide additional support while maintaining a clean appearance. Install these every 12-16 inches along the divider length for optimal stability.
If you’re working with acrylic or glass dividers, specialized clamps or channels are your best bet. These can be mounted directly to the desk surface and will hold your divider panels securely without damaging them. Make sure to use rubber gaskets between the clamps and panels to prevent scratching.
For adjustable dividers, consider installing track systems. These allow you to slide dividers along predetermined paths and reposition them as needed. Mount the tracks using countersunk screws and ensure they’re perfectly level for smooth operation.
Remember to always measure twice and mark your mounting points clearly before drilling. Use a level to ensure your dividers are perfectly straight, and consider adding rubber feet or felt pads underneath to prevent scratching and movement.
Storage Solutions and Organization

Built-in Storage Ideas
One of the biggest advantages of building your own L-shaped desk is the ability to customize storage solutions that perfectly fit your needs. Consider adding a series of drawers along one side for office supplies and documents – shallow drawers work well for stationery while deeper ones can handle hanging files. Built-in shelving above the desk surface maximizes vertical space and keeps frequently used items within arm’s reach.
Create cubbies underneath the desk surface for housing a computer tower, printer, or storage bins. Adding adjustable shelves allows you to modify the space as your needs change. A pencil drawer that slides out from underneath the desktop provides quick access to small items while keeping them out of sight.
Don’t forget about cable management – incorporate holes or channels in the back panel to neatly route power cords and computer cables. Consider building a raised platform along the back edge to hide wires while creating a subtle lip that prevents items from rolling off. Adding a few strategically placed hooks on the sides gives you spots to hang headphones, bags, or other accessories.
Cable Management
A well-organized cable management system is essential for keeping your L-shaped desk tidy and functional. Start by drilling 2-inch holes at strategic points where cables need to pass through – typically behind monitors and near power outlets. Install rubber grommets in these holes to protect your cables and create a polished look.
Consider mounting a cable raceway or J-channel under the desk surface to bundle and route cables neatly. Position it about 2-3 inches from the desk’s edge, allowing easy access while keeping wires hidden from view. For extra organization, use velcro cable ties every 12 inches to prevent cables from sagging.
Create a power station by attaching a surge protector under one corner of the desk using mounting brackets. This keeps outlets easily accessible while maintaining a clean workspace. For frequently used devices, consider installing a USB hub or wireless charging pad directly into the desktop surface.
Add adhesive cable clips along the desk legs to guide wires vertically and prevent them from tangling. Remember to leave some slack in the cables to accommodate desk movement and make future changes easier.
Finishing Touches
Surface Finishing
The final touches on your L-shaped desk can make all the difference in achieving a professional look. Start by thoroughly sanding all surfaces with 120-grit sandpaper, then progress to 220-grit for a silky-smooth finish. Pay special attention to edges and corners where splinters might form. For optimal results, consider these proven furniture restoration techniques to ensure lasting beauty.
Choose a wood stain that complements your room’s décor, applying it evenly with a foam brush or lint-free cloth. Allow each coat to dry completely before adding another, typically 4-6 hours between applications. After staining, protect your desk with at least two coats of polyurethane finish, sanding lightly with 320-grit paper between coats. For high-use areas like the desktop surface, consider applying a third coat for extra durability.
Don’t forget to properly ventilate your workspace during finishing and allow at least 24 hours of curing time before placing any items on your newly finished desk.
Personalization Options
One of the best aspects of building your own L-shaped desk is the ability to customize it to your exact needs. Consider adding a raised monitor platform to achieve optimal screen height and improve posture. For heavy computer users, built-in cable management channels and pre-drilled holes can keep wires tidy and organized.
Storage options are highly customizable – you might incorporate floating drawers, pull-out keyboard trays, or built-in file cabinet spaces. If you frequently use a printer, designate a specific platform or shelf at a convenient height. For creative professionals, consider adding an adjustable-angle surface section for drawing or drafting.
The desk height can be tailored to your preference, typically ranging from 28 to 30 inches, but you can adjust this based on your height and chair. You might also consider making one section standing-height for versatility. The corner junction can feature a curved or angular design, and you can add modular shelving units above the desk for additional storage.
Remember to plan for specific equipment or tools you use regularly, ensuring adequate space and support for monitors, speakers, or other peripherals.
Building your own L-shaped desk is an achievable and rewarding DIY project that can transform your workspace. With the plans and guidance we’ve shared, you’re well-equipped to create a custom desk that perfectly fits your space and needs. Remember to carefully measure your space, select quality materials, and take your time with each step of the construction process. Whether you’re a beginner or experienced DIYer, this project offers the perfect opportunity to develop your woodworking skills while creating a functional piece of furniture. Don’t forget to add personal touches like cable management solutions or integrated storage to make your desk truly your own. Now it’s time to gather your materials and start building the perfect L-shaped desk for your home office or workspace!
